Note: The payee record is needed for petty cash management.
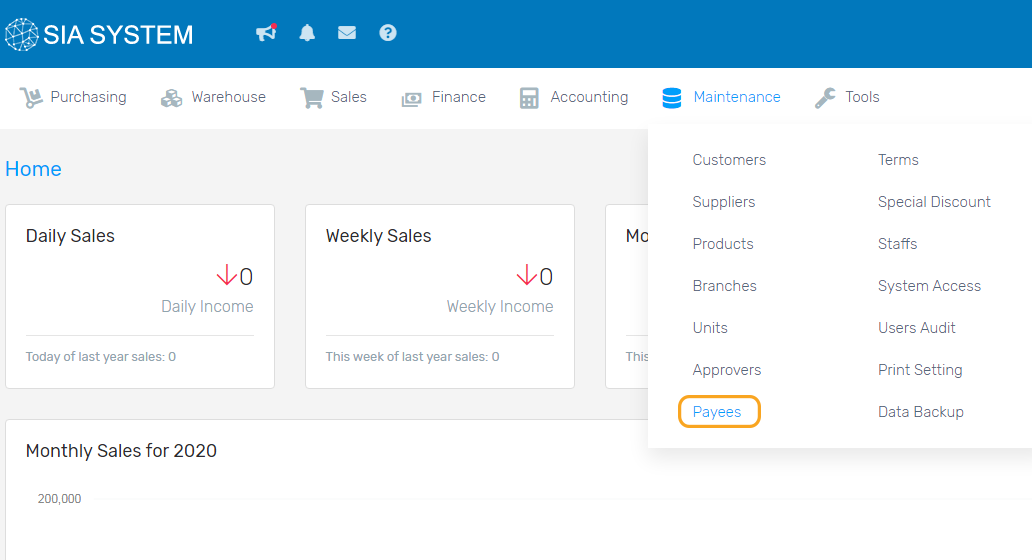
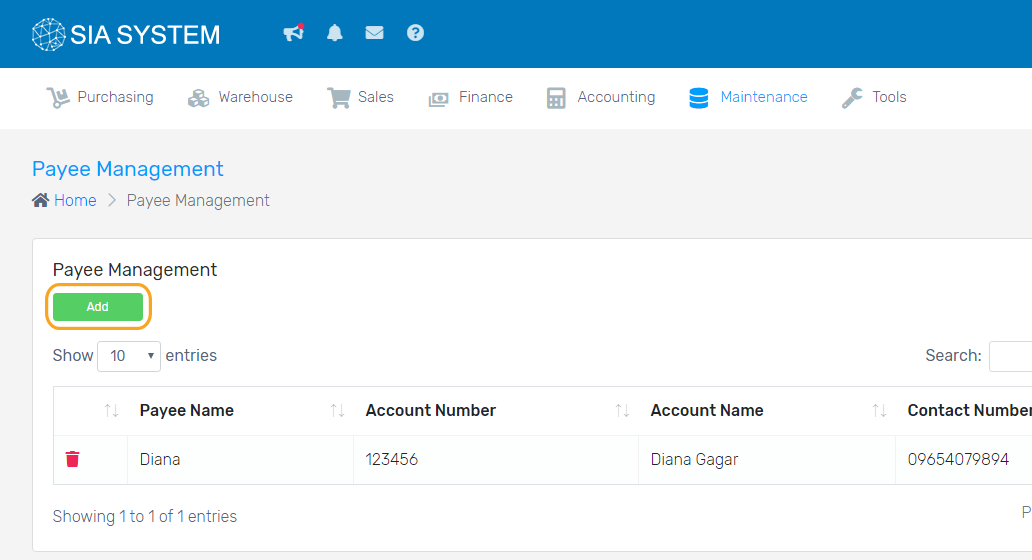
1. On the Maintenance menu, click Payee then click Add button.
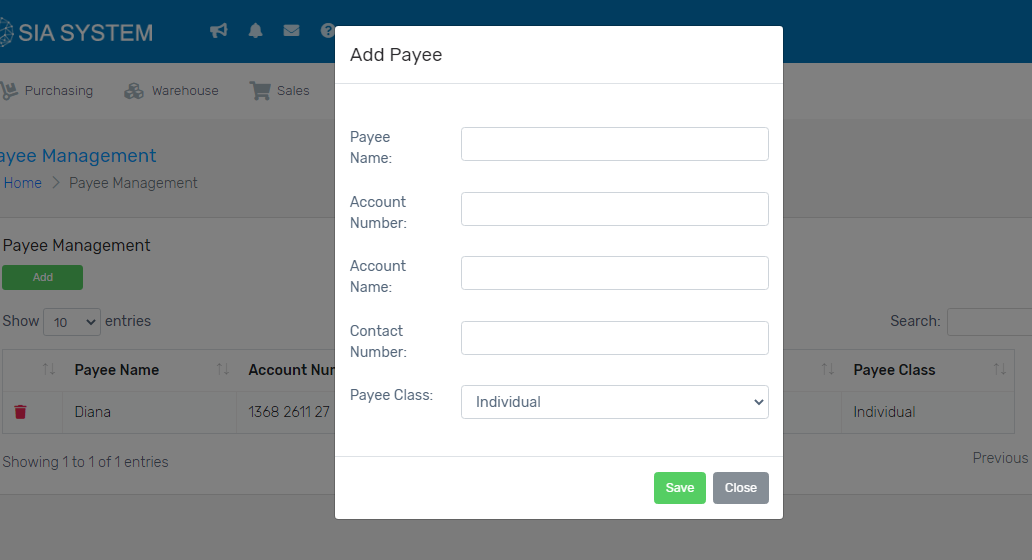
2. Fill in the details with data needed and click Save.
Was this article helpful ?
Have more questions ? Submit a request
Note: The payee record is needed for petty cash management.
1. On the Maintenance menu, click Payee then click Add button.
2. Fill in the details with data needed and click Save.
Have more questions ? Submit a request
For the security and correctness of every order, approvers can be assigned to users of the system.
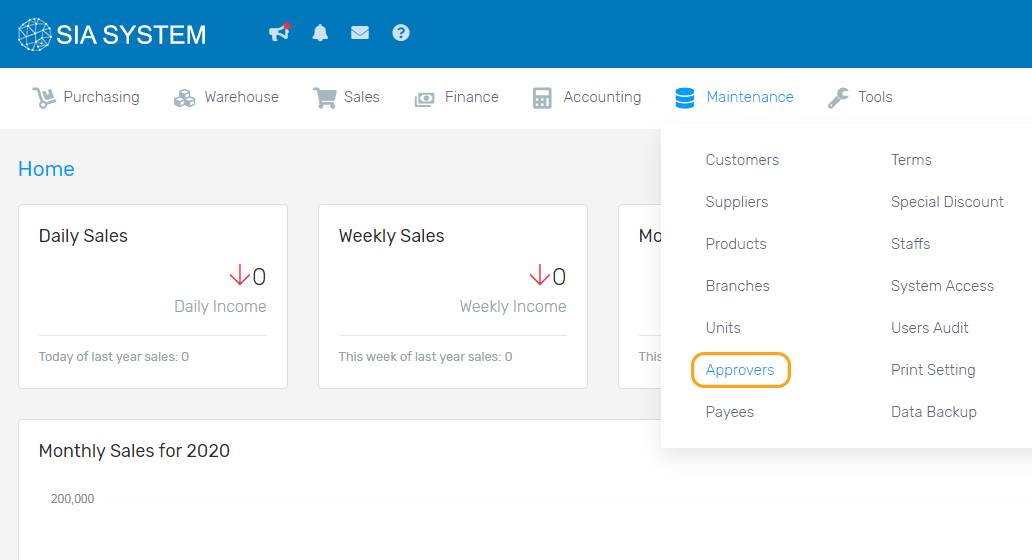
1. On the Maintenance, click Approvers, and click Add button.
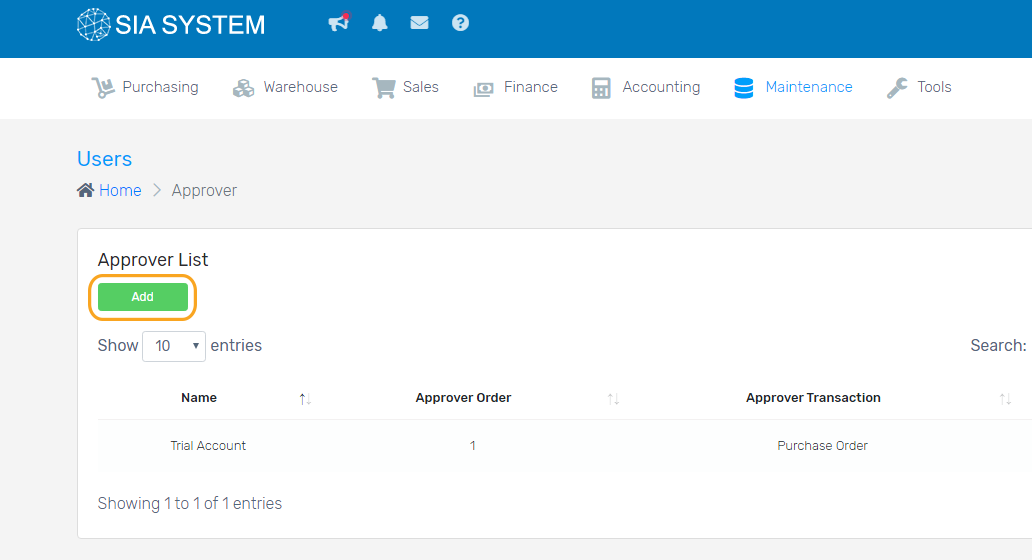
2.Select a staff or user who will be the approver.
3. Select in which order the approver needs to approve the transaction.
4. Choose what transaction needs to be approved then click Save.

Have more questions ? Submit a request
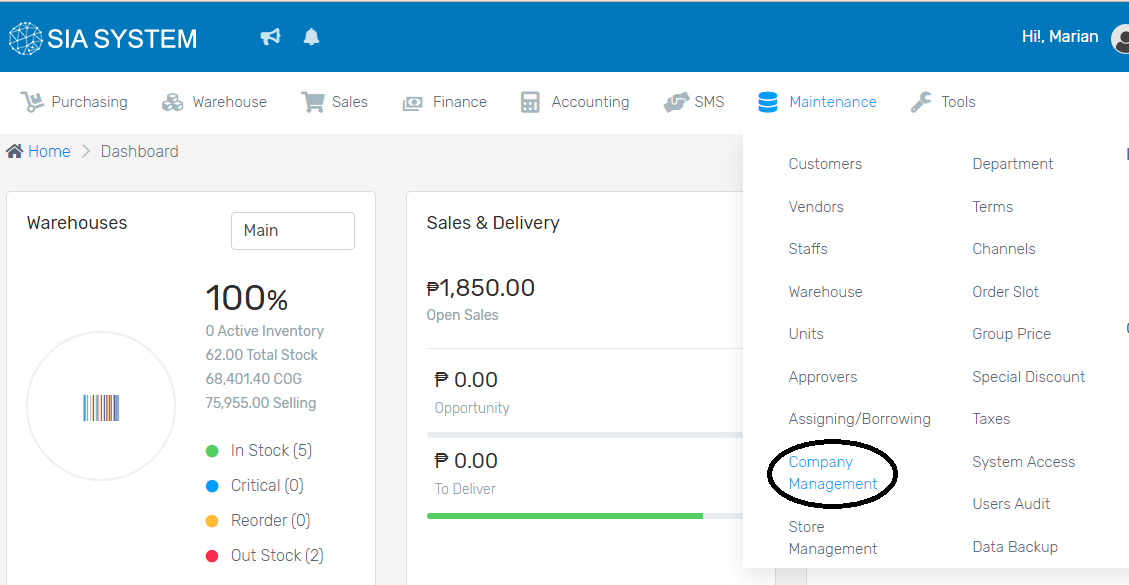
Saving your company details is important for your business transactions and various print-outs. So it’s better to update and keep a record of your company information.
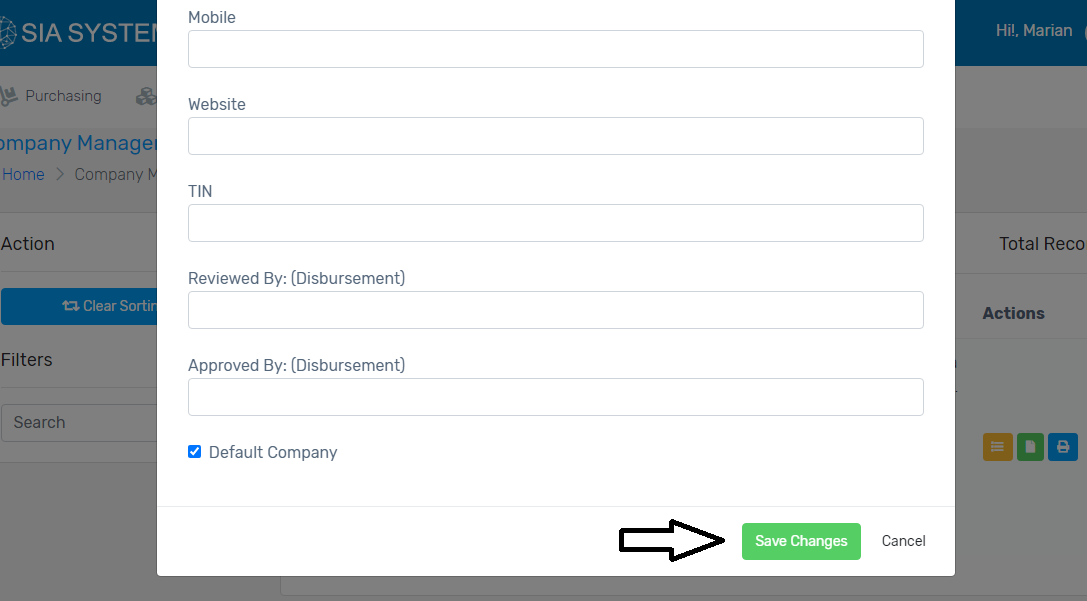
1. On the Maintenance tab, select Company Management.
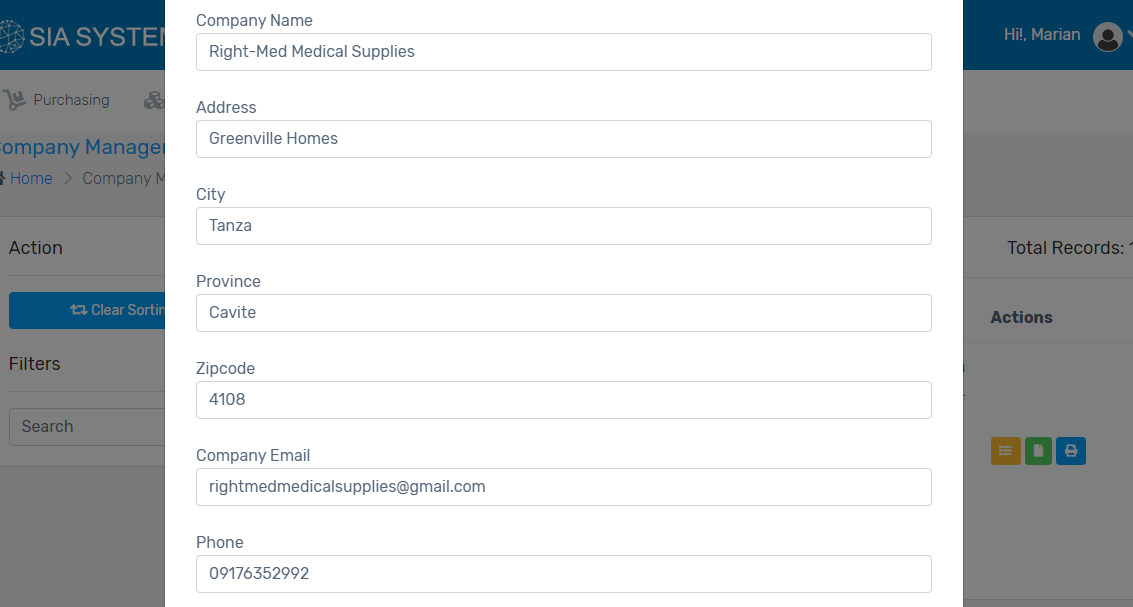
2. Click on your Company Info and edit your company details. Make sure to provide all the important details.
3. Add your company logo by dropping the file on the image.
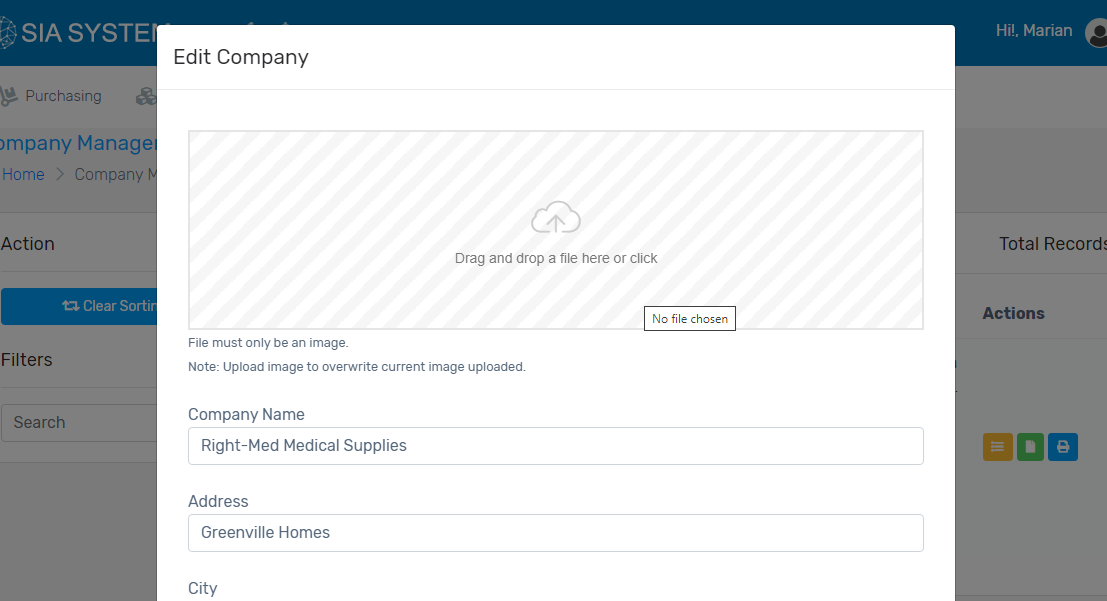
4. Click Save when done.
Other company settings:
Have more questions ? Submit a request
When you have to return a certain item or product to your supplier, follow the instructions below.
Note: An RR No. is required prior to returning your item. If you have no RR number yet, kindly follow the instructions on How to receive delivered items.
To create a record, please follow the steps below:
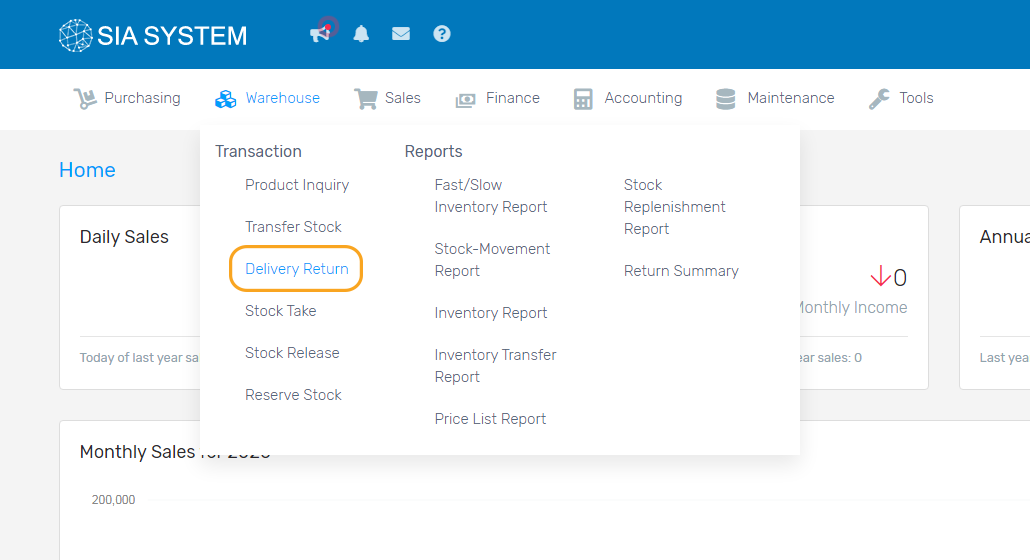
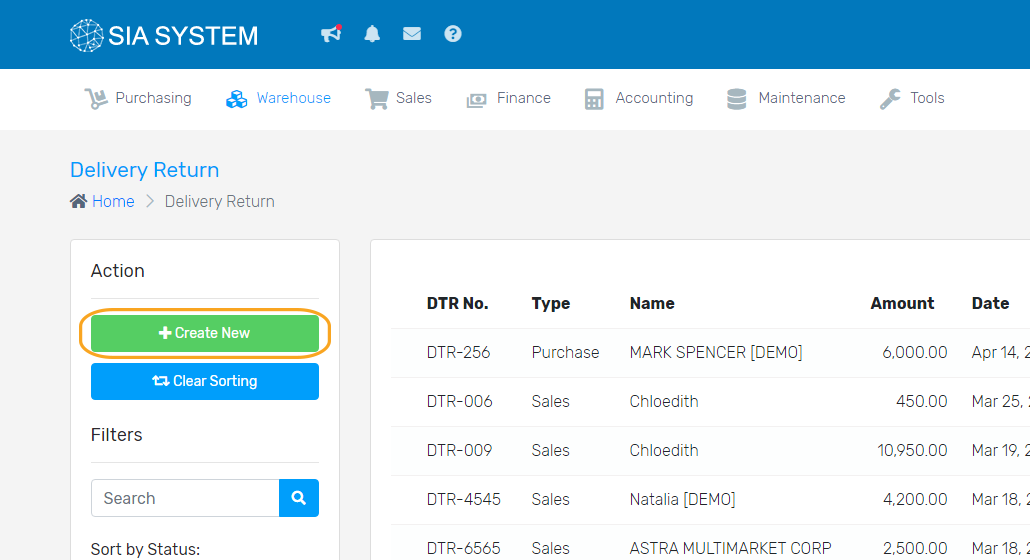
1. On the Warehouse menu, go to Delivery Return and click Create New button
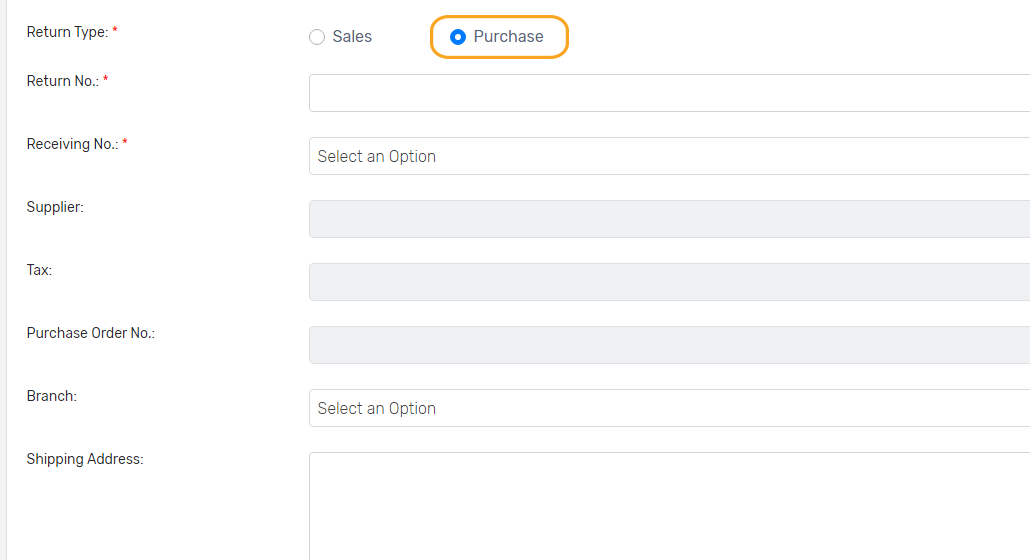
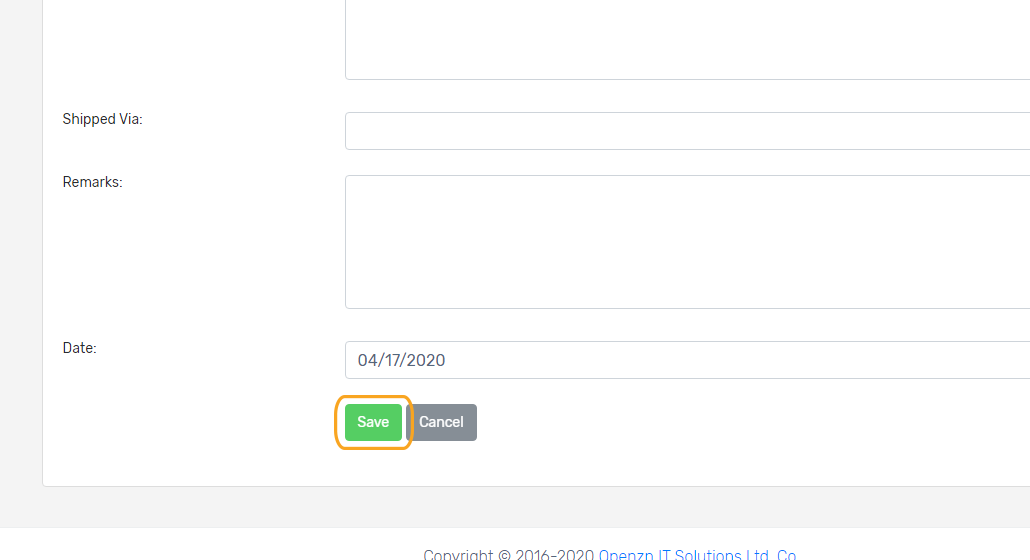
2. On Return Type field, select Purchase and fill in the details. Click Save.
3. Select the product from the dropdown. Note: The items in the dropdown are only the items included in the RR number you selected. Input the quantity you are going to return to your supplier. Choose status why you have to return the item(s) and click Add button.
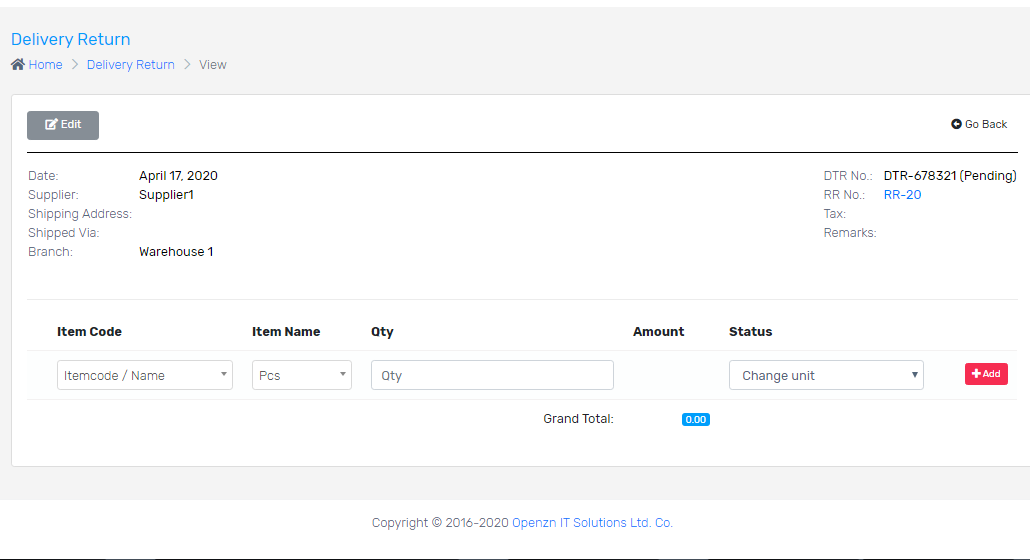
4. Double check the details and click Return then Proceed button. You may now print your Delivery Return record.

Have more questions ? Submit a request
After orders and deliveries have been fulfilled for your customers, you can now save their payments for their orders.
Note: An Invoice or DR must be created first as those are the references of your Collection. If you have not created an Invoice or DR yet, kindly follow these instructions on How to create an Invoice or How to create a Delivery Receipt.
Follow the steps below to add a record in Collection
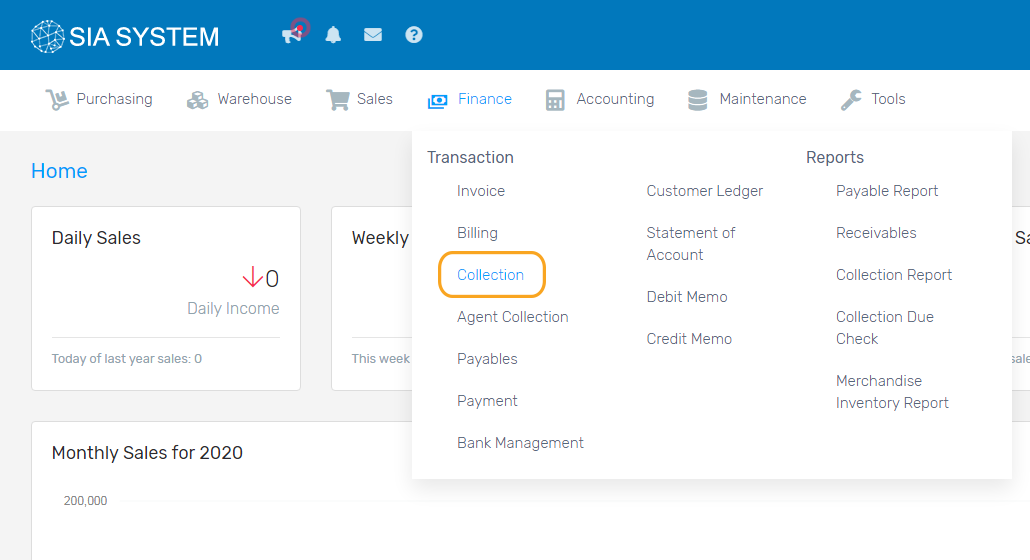
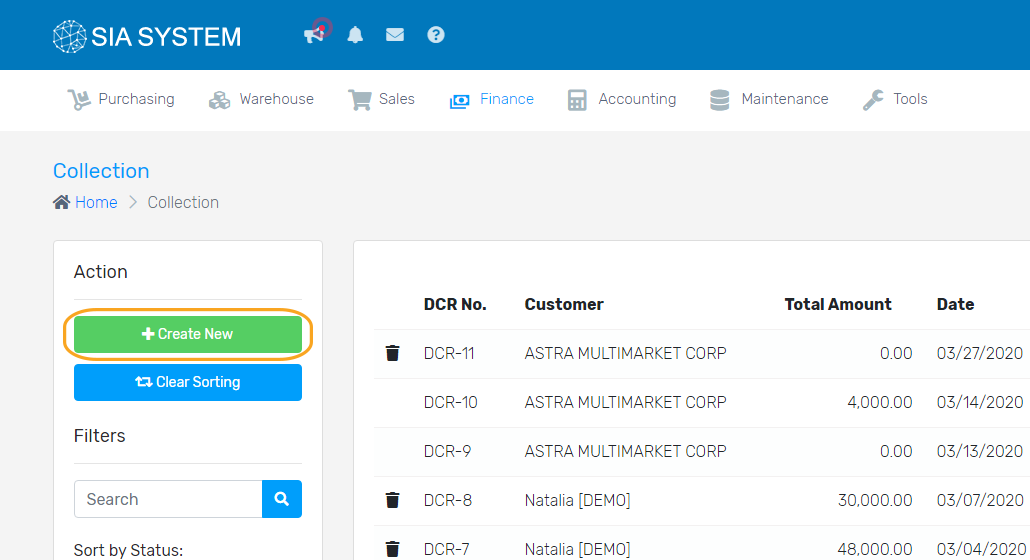
1. On the Finance menu, click Collection and click Create New button.
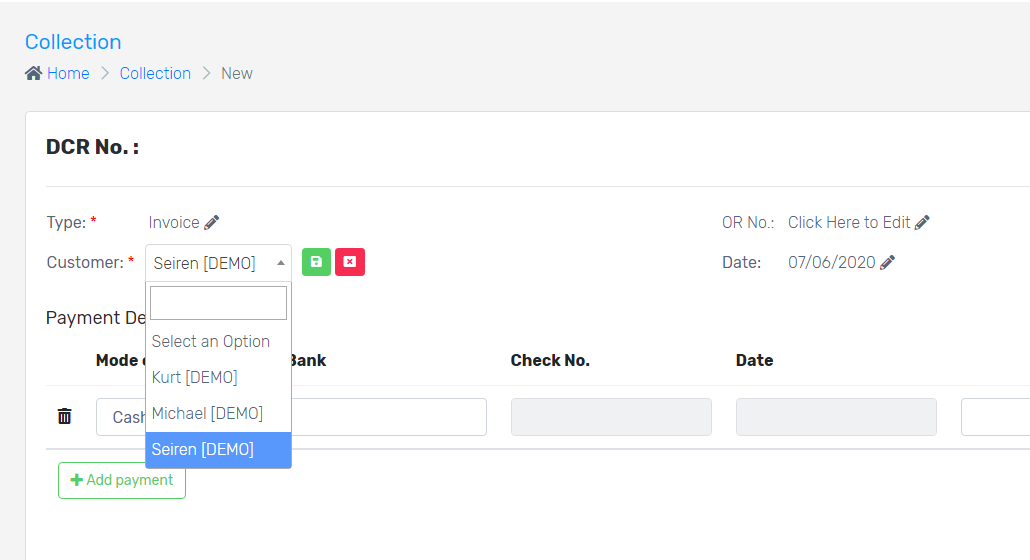
2. Select the Type by clicking the pencil. Select the information source from the dropdown. Click the green button to save.

3. Select the customer name from the dropdown. Click the pencil to select the Customer, then the green button to save.
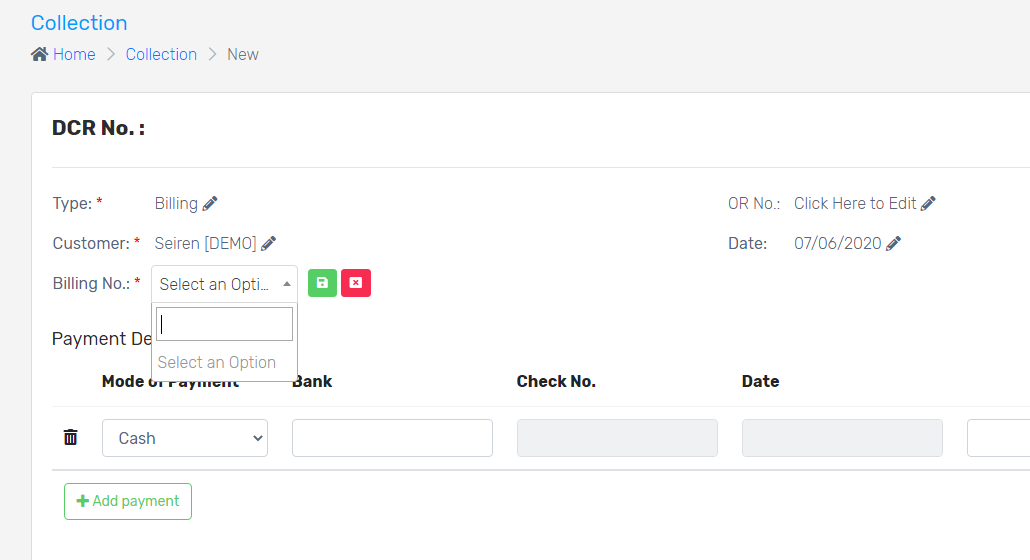
4. If Billing is chosen from the Type field, select the Billing number from the dropdown. Click the green button to save.
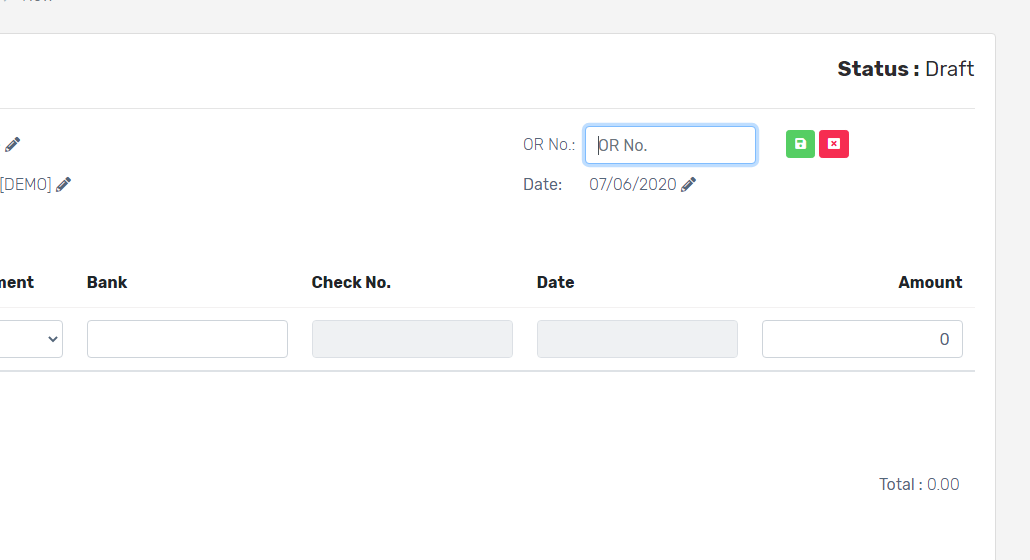
5. Input the OR number by clicking the pencil icon. Click the green button to save.
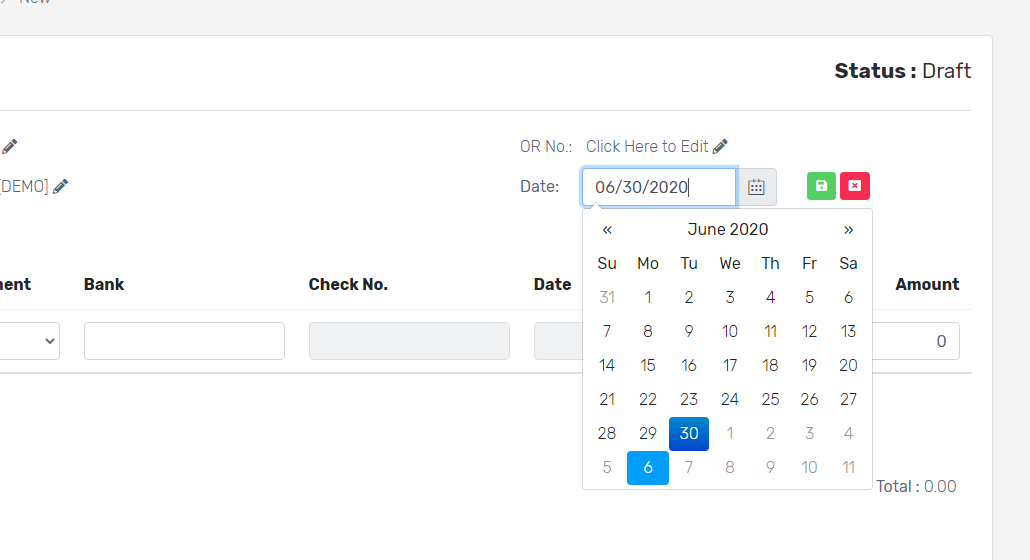
6. Input the Date by clicking the pencil icon. Click the green button to save.
7. Select the Mode of Payment for the customer’s payment. Fill out all the important details of the payment. Add Remarks if necessary. Click Add payment button if there is more than one payment transaction.
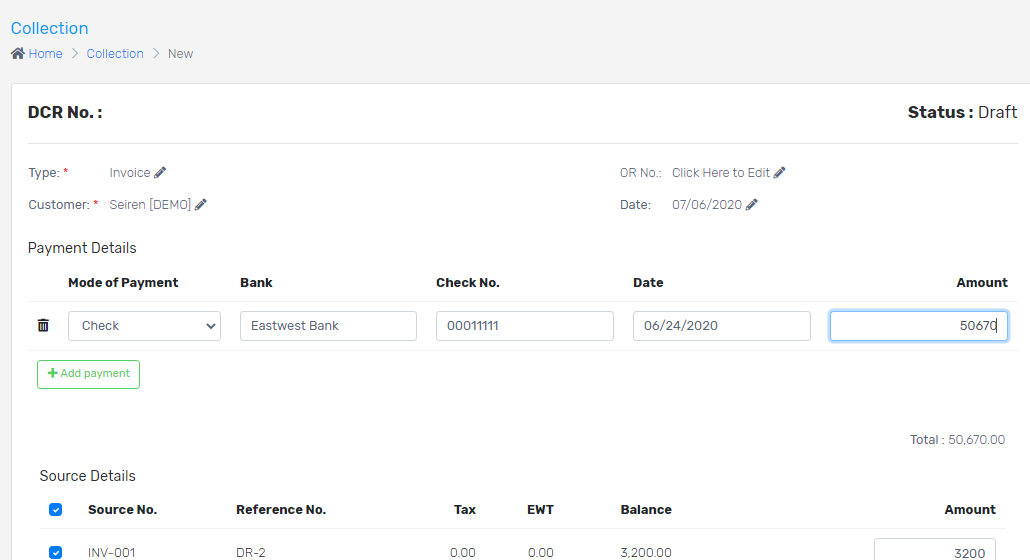
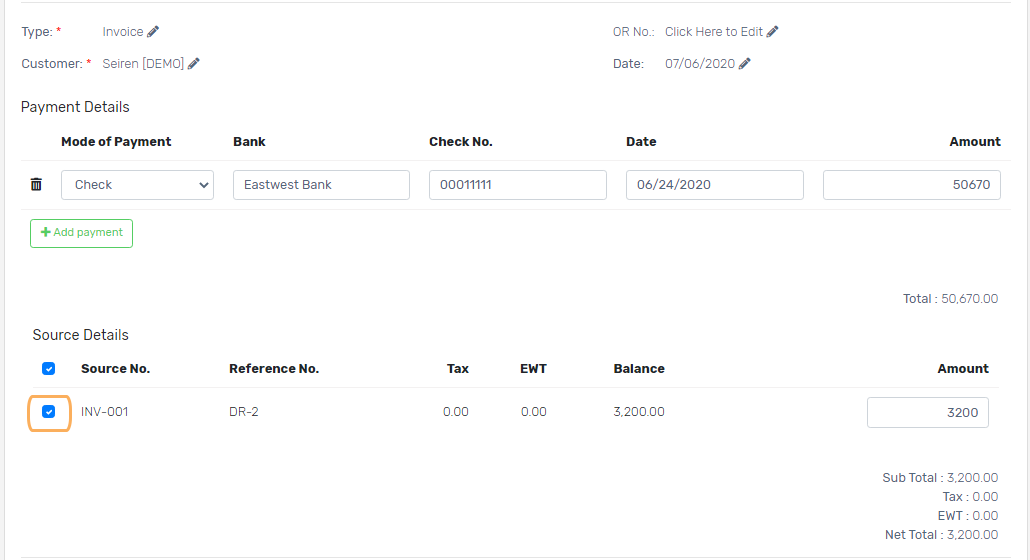
8. If Invoice is chosen from the Type field, select the Invoices made under Source Details. Input the Amount of invoice. You can check the Invoice Details below for your reference.
9. You can save Remarks by clicking the pencil at the bottom left corner of the page. Click the green button to save.
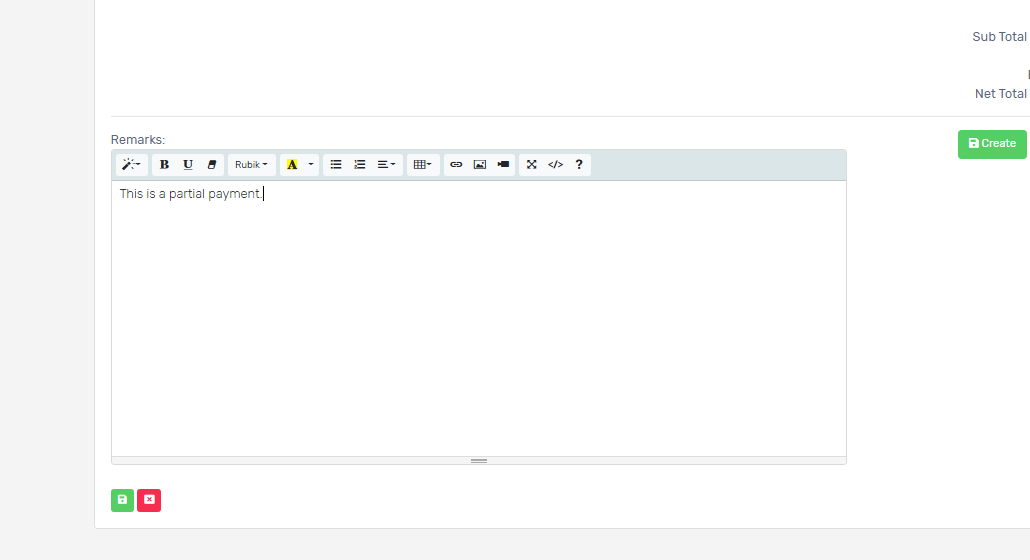
10. Double check and once done, click Create then Post and Proceed. The status will now change to COLLECTED.
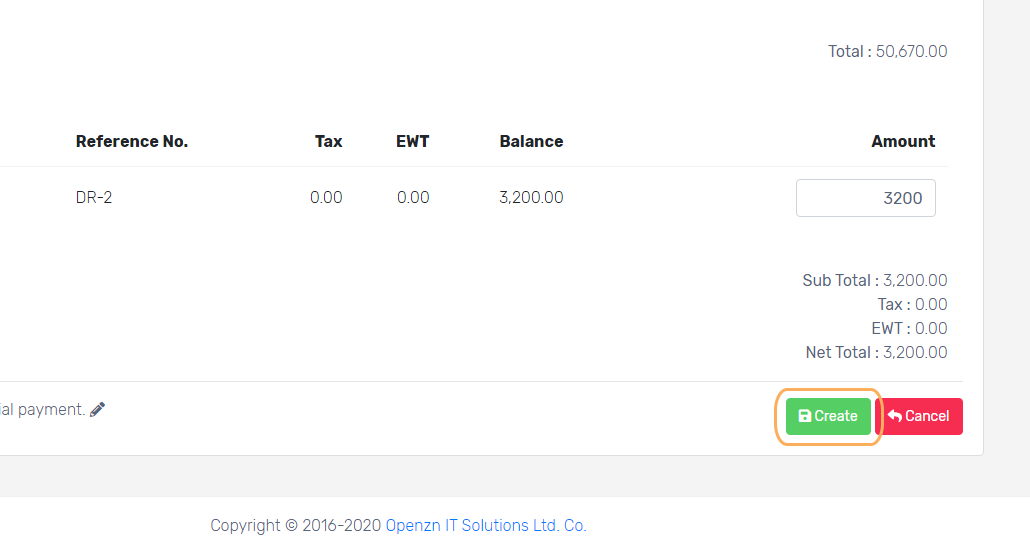
You may now proceed with generating of Statement of Account to see all the transactions.
Have more questions ? Submit a request
Create a current billing order of your customers or vendors based on the total or selected orders.
Note: An Invoice or DR must be created first as those are the references of your Billing Order. If you have not created an Invoice or DR yet, kindly follow these instructions on How to create an Invoice or How to create a Delivery Receipt.
Follow the steps below to create a Billing Order
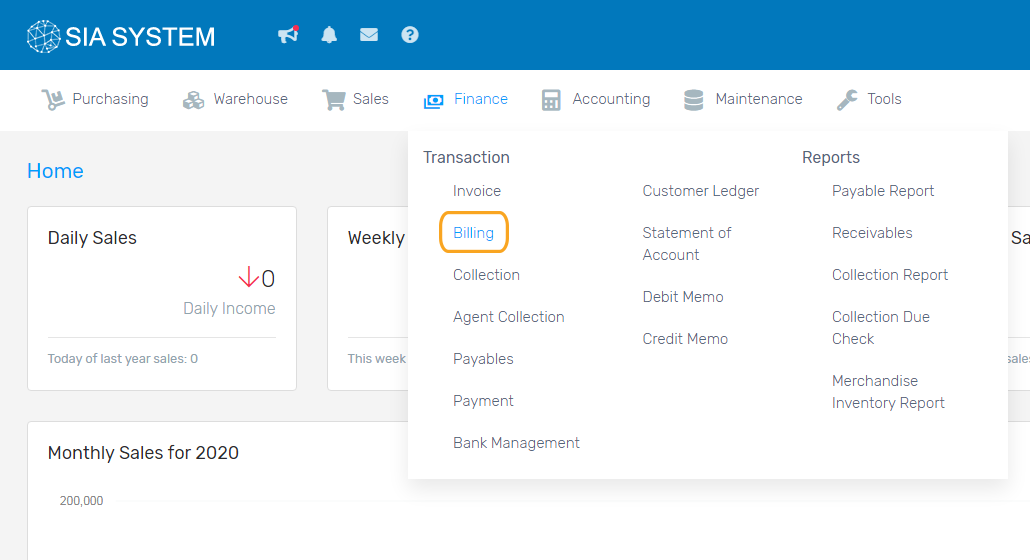
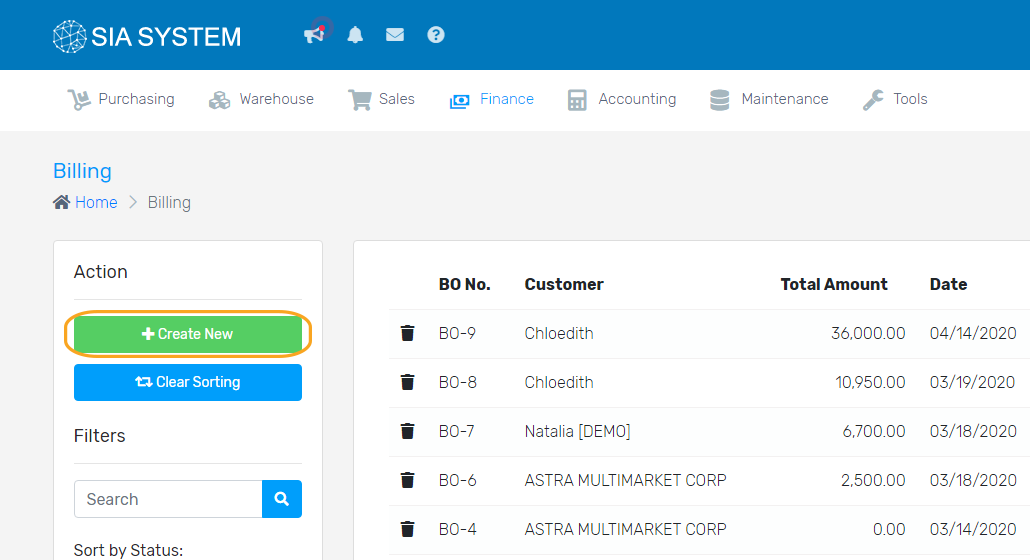
1. On the Finance menu, click Billing and click Create New button.
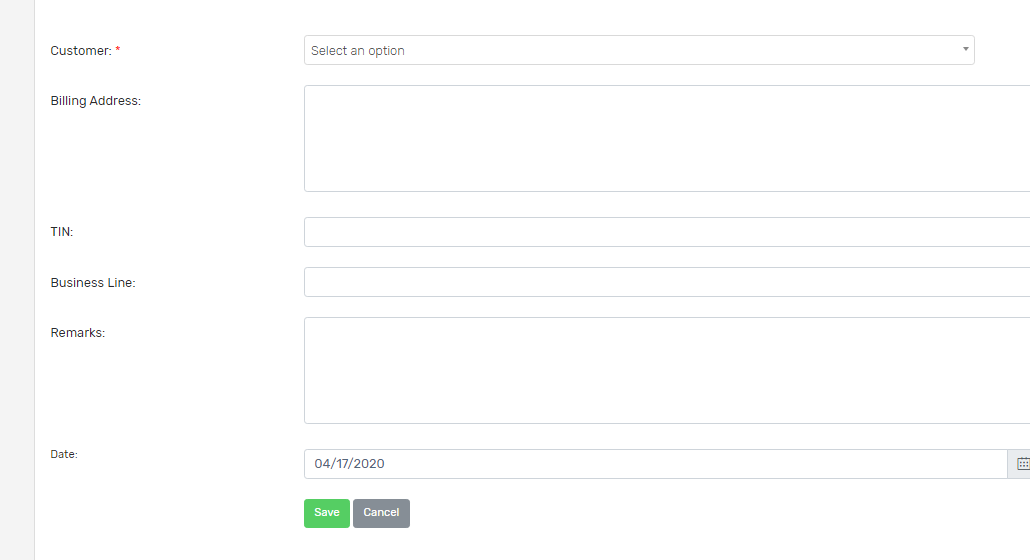
2. Select the Customer on the dropdown. Other information are displayed automatically if you create a record of that customer in Maintenance tab. Otherwise, input the details manually. Click Save after filling out the details.
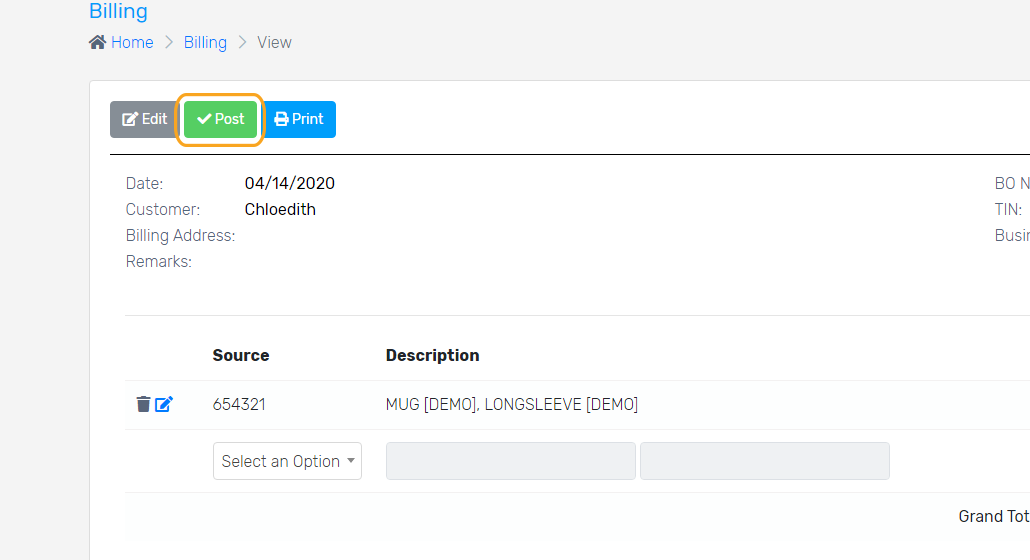
3. In the new tab, click on the Source for invoice or DR, then click Add.
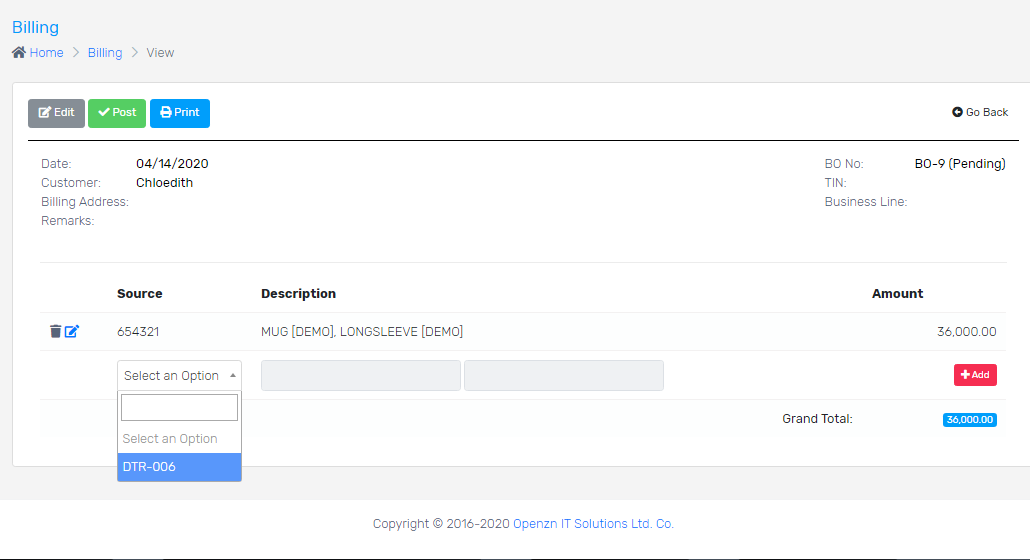
4. Double check all the details. If the details are correct, click Post button then Proceed. You cannot edit nor delete this record by doing these actions. The Billing Order is now ready for printing.
Have more questions ? Submit a request
After transactions have been made with your customers, you can create an invoice to request for their payments. Remember that after your products and customer from the Maintenance tab of Product and Customer section, you can now create your invoicing.
There are 2 ways of creating an invoice. 1) Creating invoice directly, and 2) from a Delivery Receipt as reference.
a. Creating Invoice directly
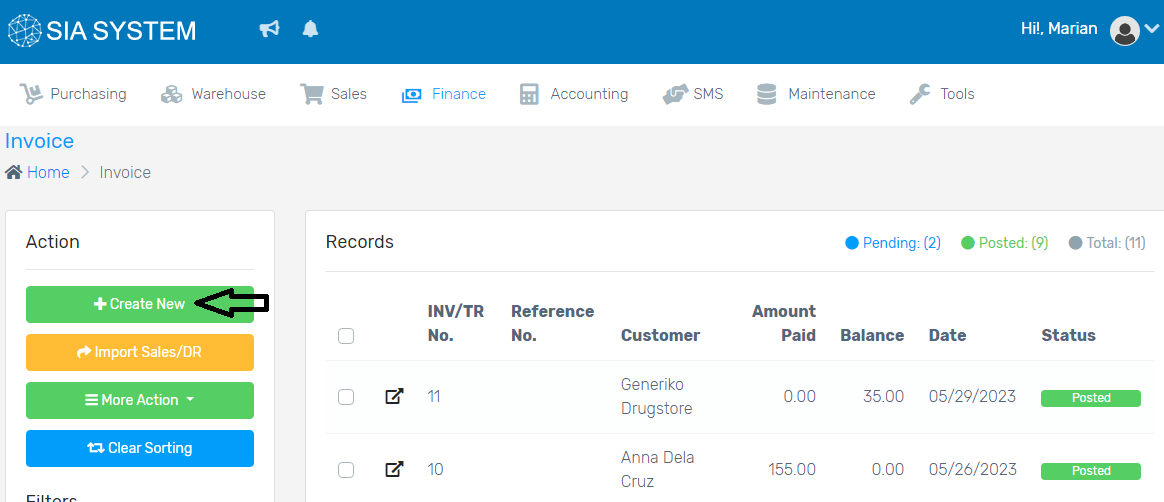
1. In the Finance tab, select AR/Invoice.

2. Click Create New button at the Action sections on the left side.
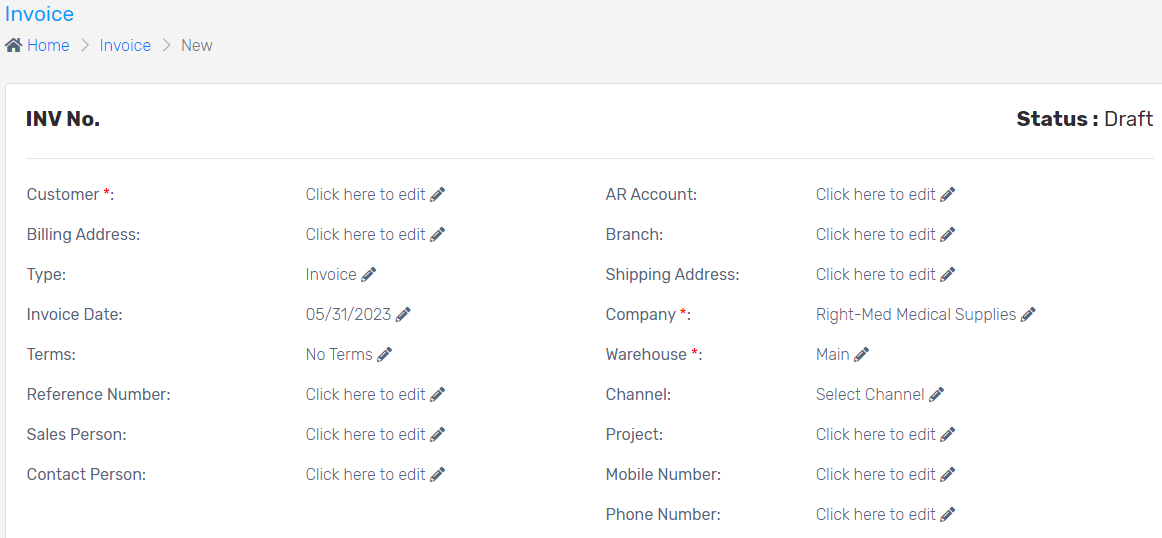
3. Select the required details, Customer Name, Invoice Number, and Company. Once done, you can now add a product.
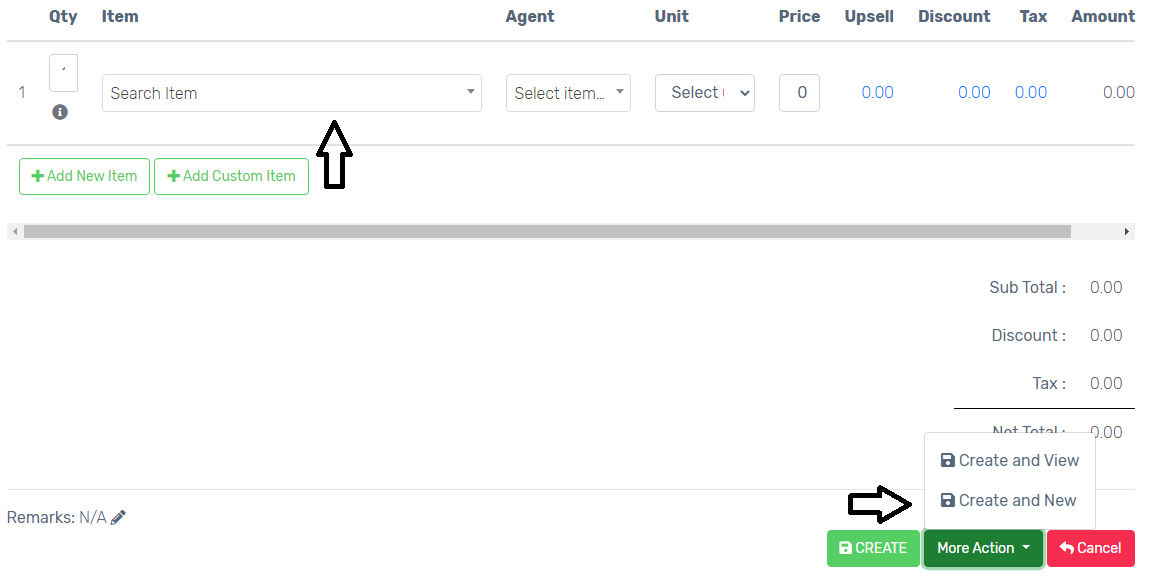
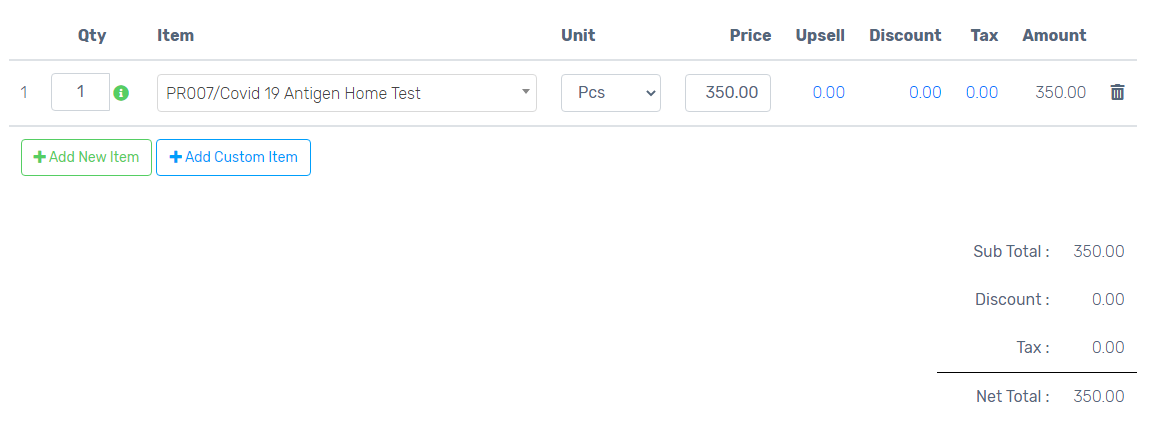
4. Click add a New Item to add items to your sales order. Once done, click Submit and choose between Create and View or Create and New.
5. Click Post then Proceed. When post has been clicked, the Invoice will be posted and cannot be edited.
b. Creating invoice from a Delivery Receipt as reference
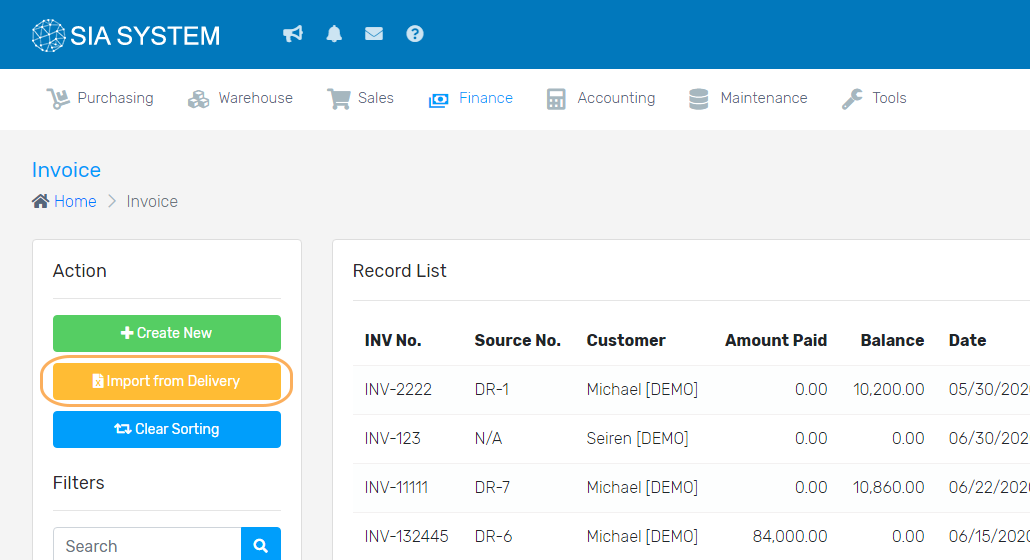
1. Look for the Finance menu, select AR/INVOICE, and click IMPORT FROM SALES/DR button at the Action section on the left side.
2. On the pop-up, select the Source of Destination you want to create an invoice, then proceed.
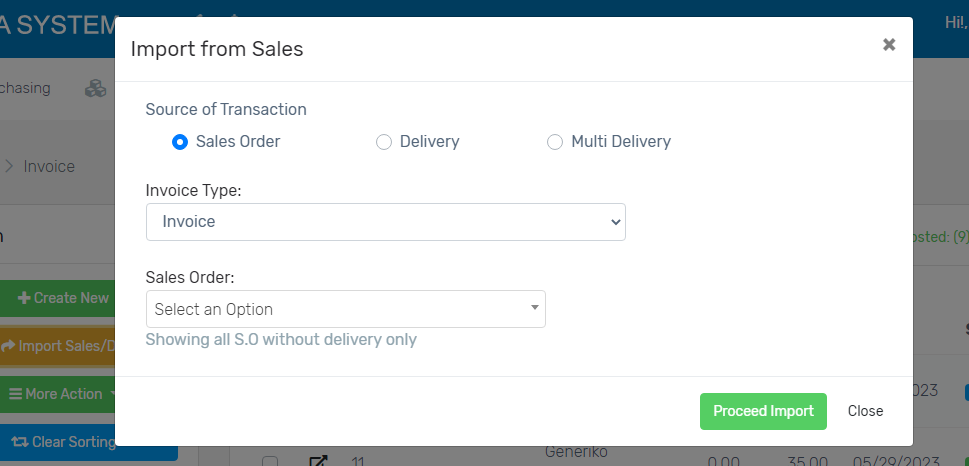
a. Sales Order– if you want to create invoice out from your sales order without delivery
b. Delivery– if you want to create an invoice for your delivered items
c. Multi Delivery– if you want to create an invoice of multiple delivered items
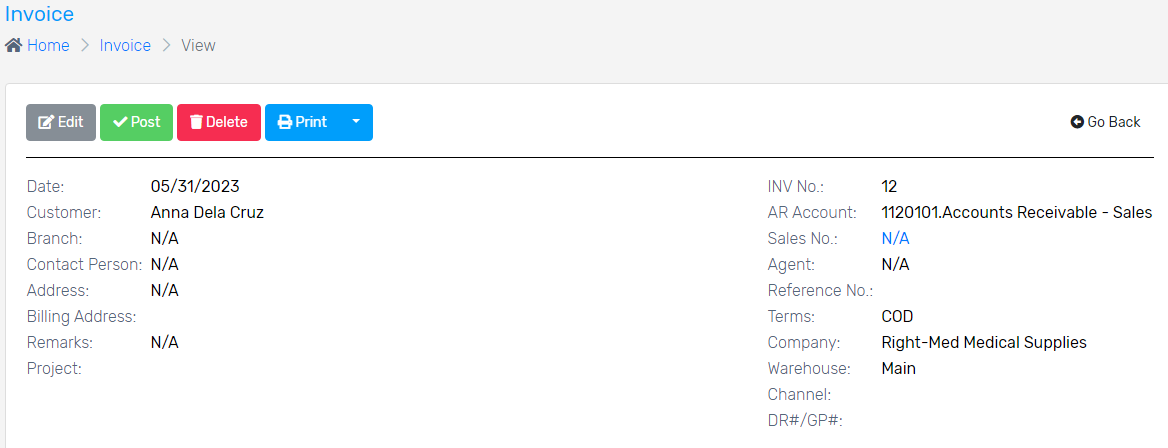
3. Double-check the details and click Print to finalize. When Print has been clicked, the Invoice will be posted and cannot be edited.
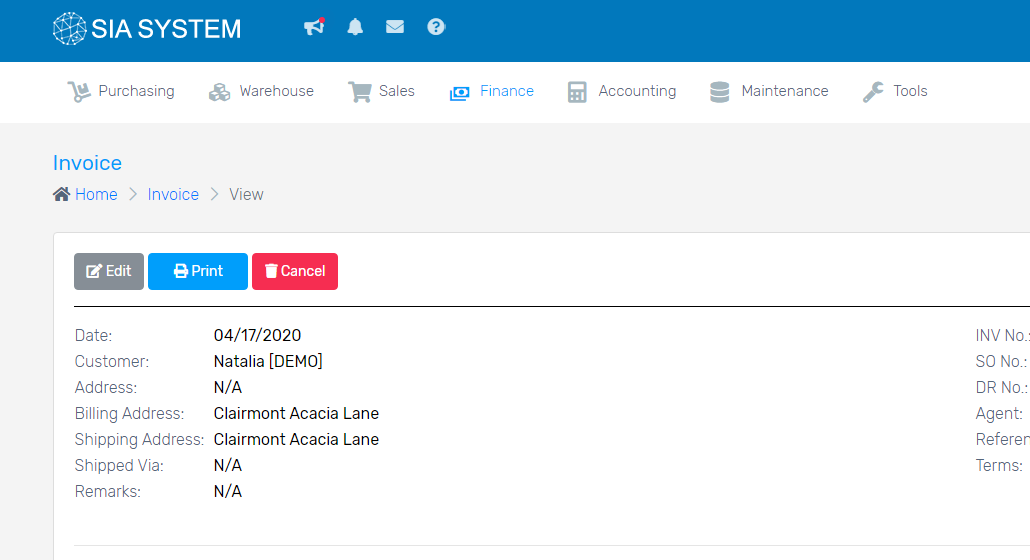
4. Go Back to check the status. It should be marked Posted.
Next Step:
Have more questions ? Submit a request
To keep track and check if the orders are correct, a tracking record may be created for the warehouse and delivery personnel.
Note: To do this, you must first create a Delivery Receipt before creating a tracking record. The Delivery Receipt is the reference of your tracking record. Follow our instructions on How to create a Delivery Receipt.
In order to create a tracking record, please follow the steps below:
1. On Sales menu, click Tracking, and click Create New button.
2. Fill in the tracking details and click Save.
3. Select the Delivery/Invoice Number to be picked as this is the reference of your tracking record and click Add.
4. Check the items before clicking Post then click Proceed. click Print Pick-list button. When Print Pick-list has been clicked, the tracking record will be posted and cannot be edited.
Have more questions ? Submit a request
Note: A Sales Order must be created first before creating a Delivery Receipt. You can follow our instructions on How to create a Sales Order.
When the customer orders are ready for delivery, you may now create a Delivery Receipt. But before creating a delivery receipt, a Sales Order must be created.
To create a delivery receipt, please follow the steps below:
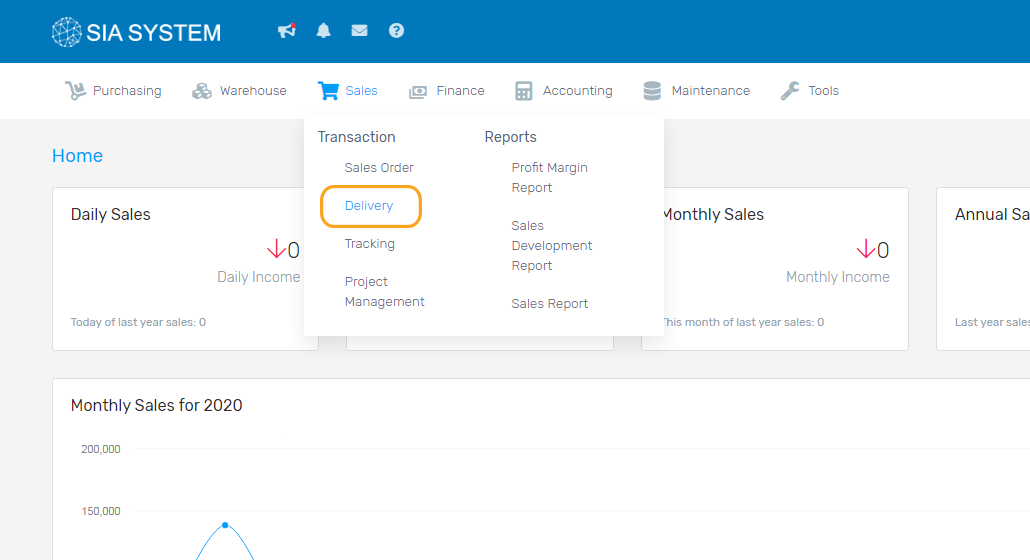
1. On Sales menu, select Delivery, and click Create New.

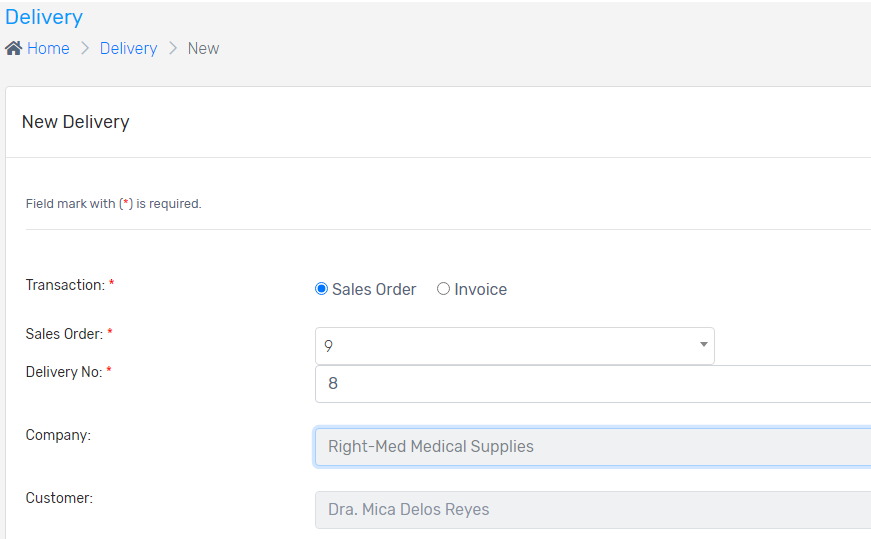
2. Select Sales Order number, then select the Sales Order on the dropdown. Input the Delivery Number, if necessary. Company and Customer will automatically display once the sales order number is chosen.
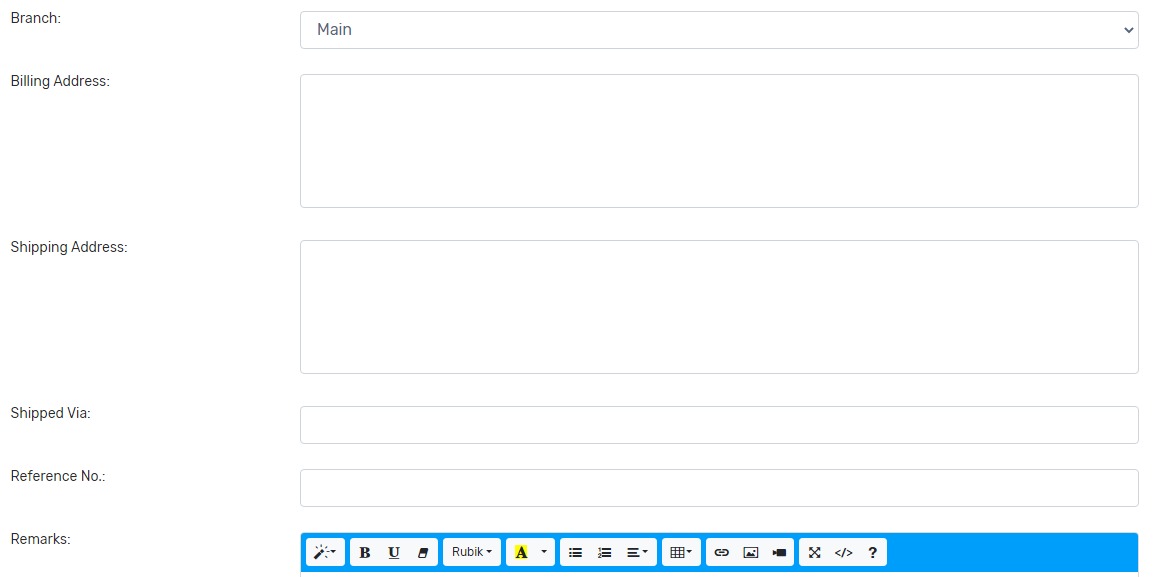
3. Select the Branch where the items were taken. Fill out the Shipping Details, and other necessary information. Add Remarks if you want to add a note on the delivery.
4. Always click Save every after filling all the details.

5. Items from the selected Sales Order is automatically displayed. Edit the quantity to be delivered (can be in full or partial), and click Save Changes button. Note: Multiple Delivery Receipts can be created for 1 Sales Order until fully delivered.
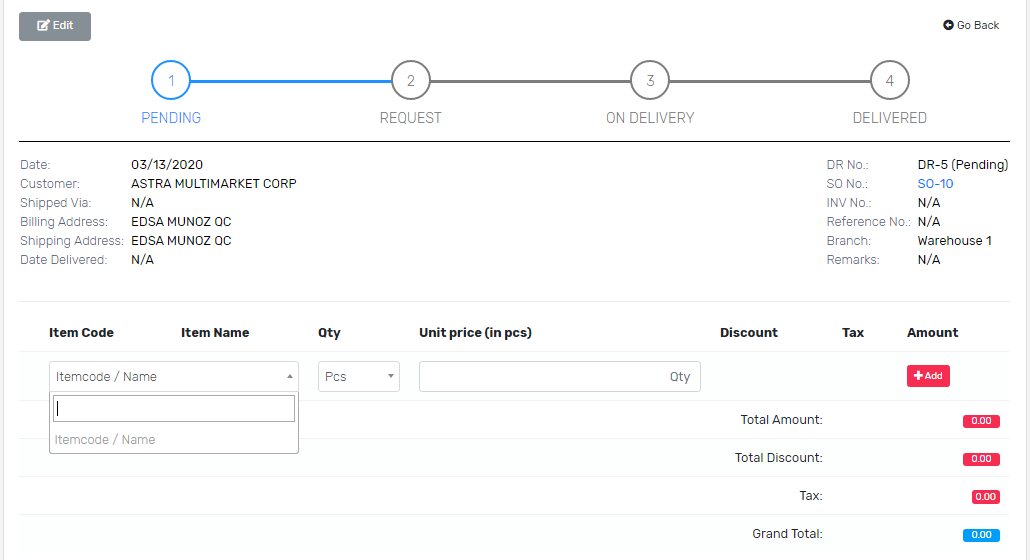
6. Double-check the details and click For Delivery, then Proceed. You may now print your copy and customer’s copy by clicking the Print button. Then you’re now ready to deliver the items. The status will be marked ON DELIVERY.
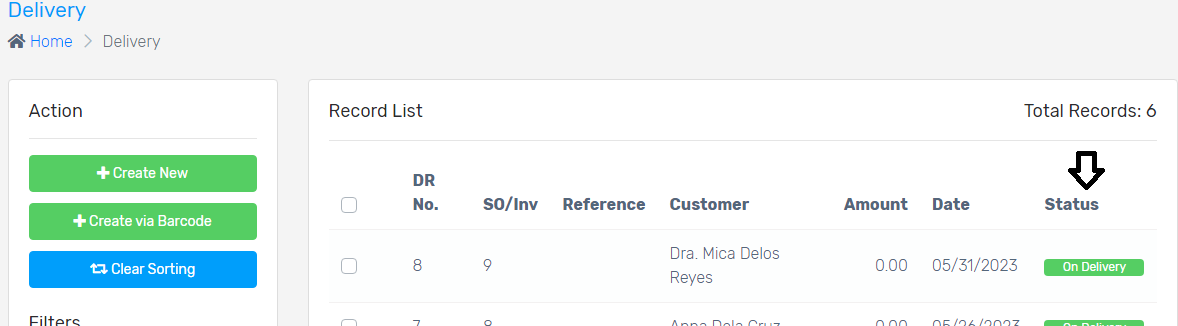
Note: After the item(s) have been delivered, go back to Delivery. Select the DR NUMBER of the delivered items and click Delivered button. Set the delivery date and click Proceed. The status will now be marked DELIVERED.
Have more questions ? Submit a request
Begin your transaction with your customer by creating a Sales Order. Look at the details below for the complete instructions.
Note: Products must be encoded in the system in order to create a Sales Order. If you have not encoded products yet, follow our instructions on How to setup a product record.
How to create a Sales Order
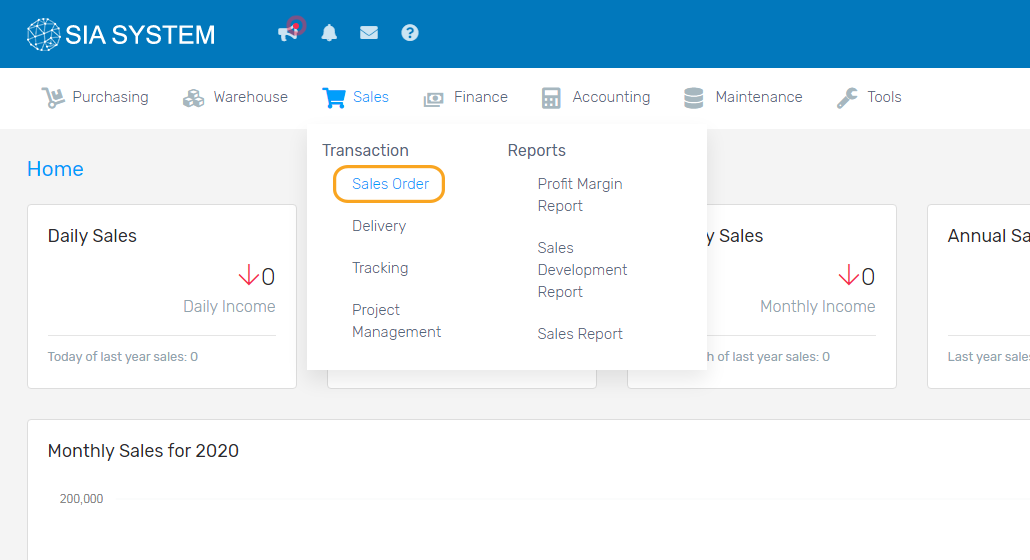
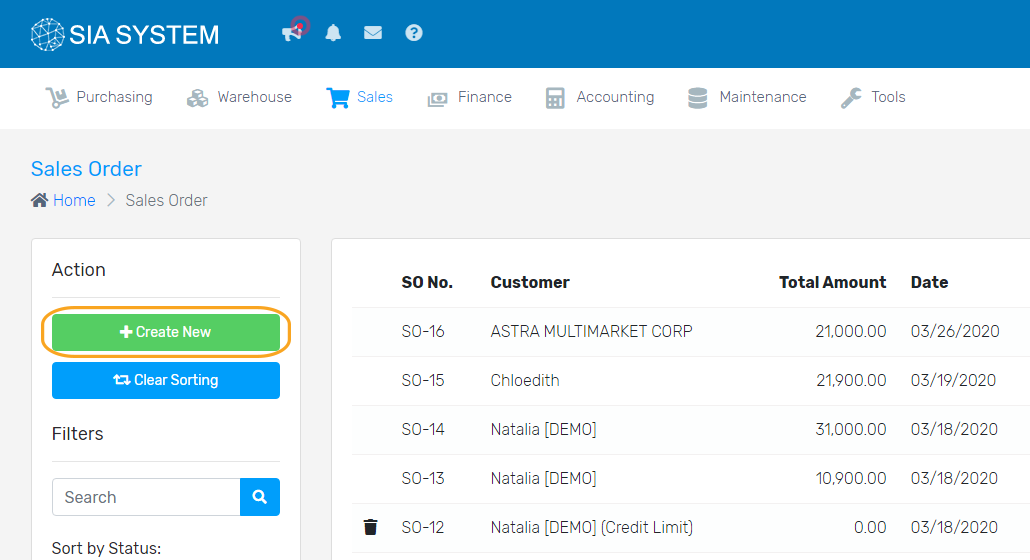
1. On Sales menu, select Sales Order, and click Create New button.
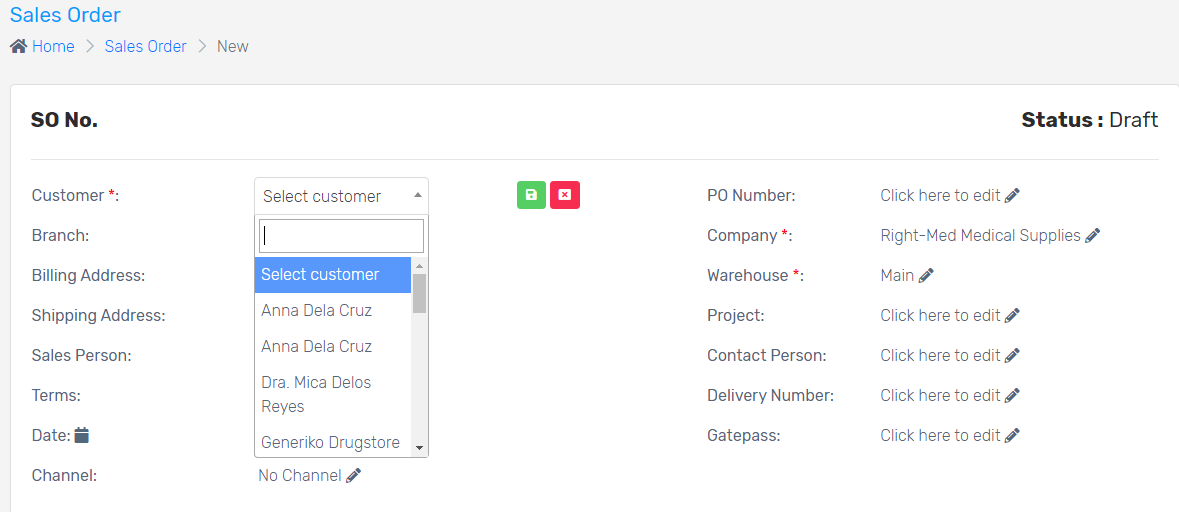
2. Select the name of the Customer. Click Save. Other details are automatically displayed if you fill out all its details in the MAINTENANCE tab. Otherwise, input the information manually.
3. Choose the item ordered by the customer, including the quantity. The price will be automatically computed. Click Add to add more sales order.
4. Double check the details and click Submit then Proceed.

Note: You may now proceed on How to add payment record to Collection.
Have more questions ? Submit a request