How to create a warehouse record

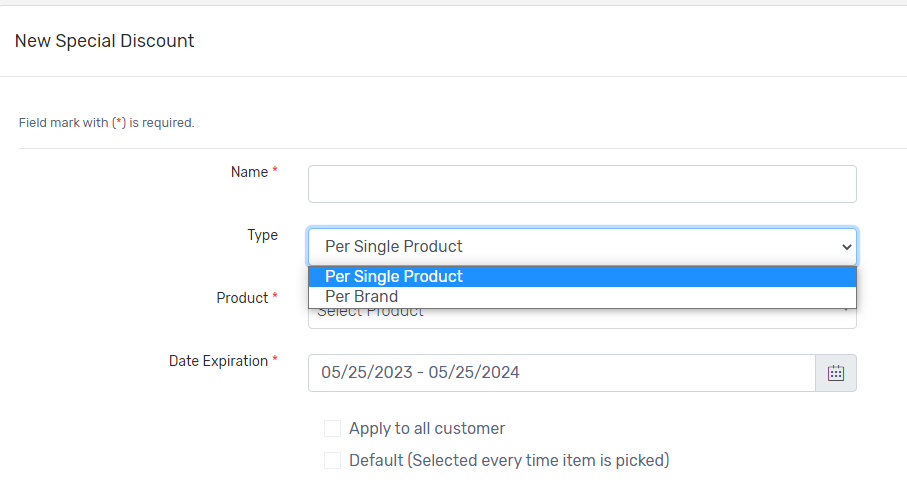
If your business has multiple warehouses located at different areas, it’s better to keep a record of all warehouses for better tracking of inventory and transferring of products in case one branch will need stocks.

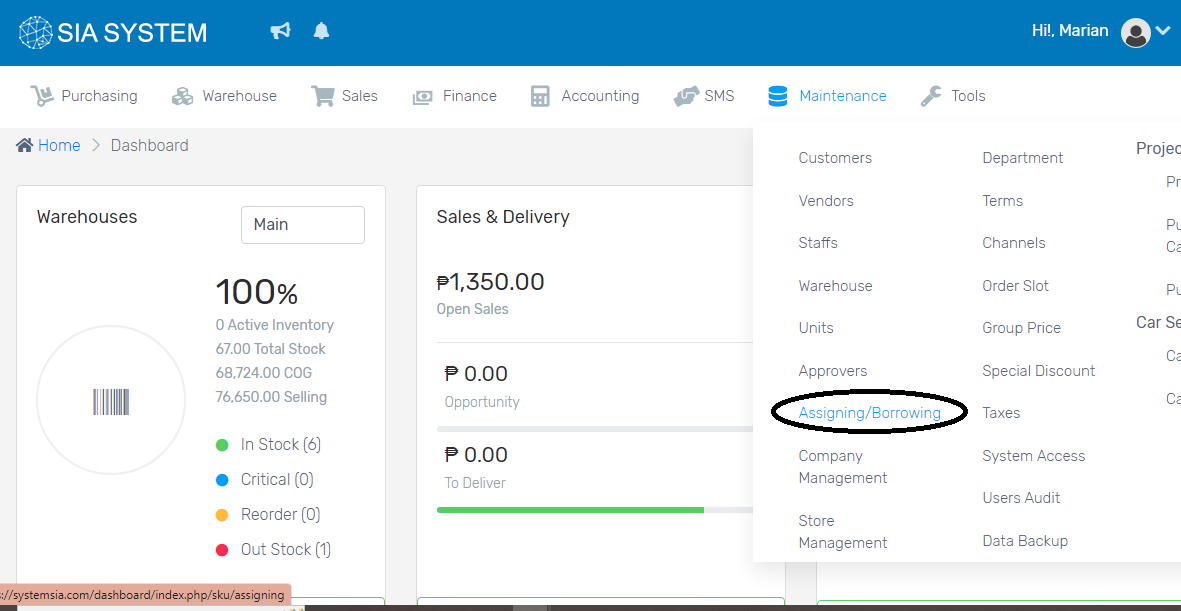
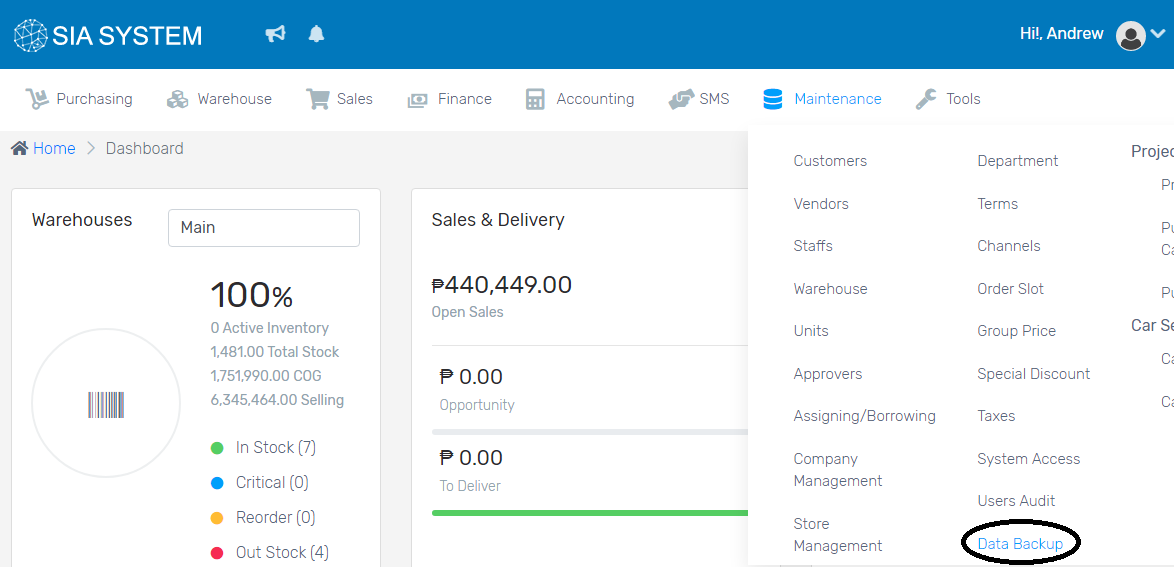
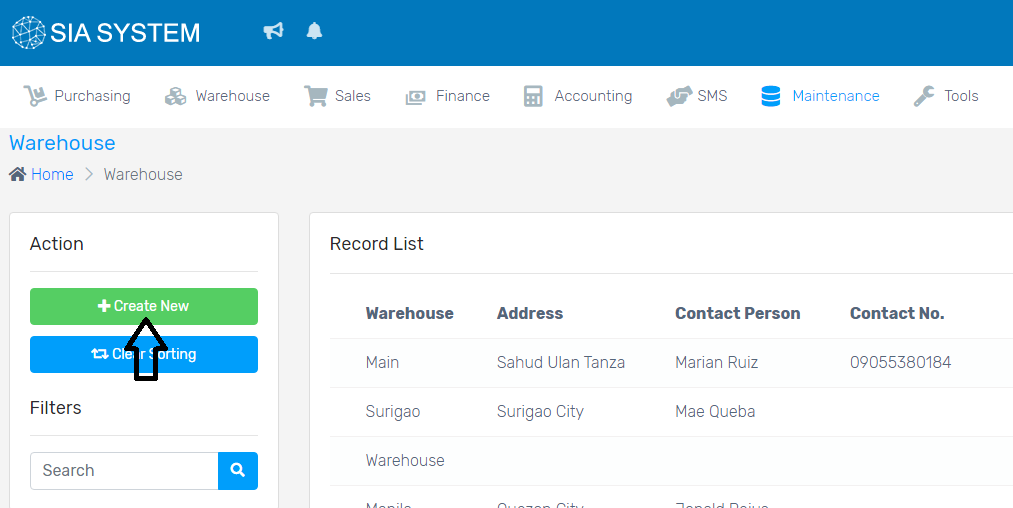
1. In creating branch or multiple warehouse, simply go to Maintenance click Warehouse.

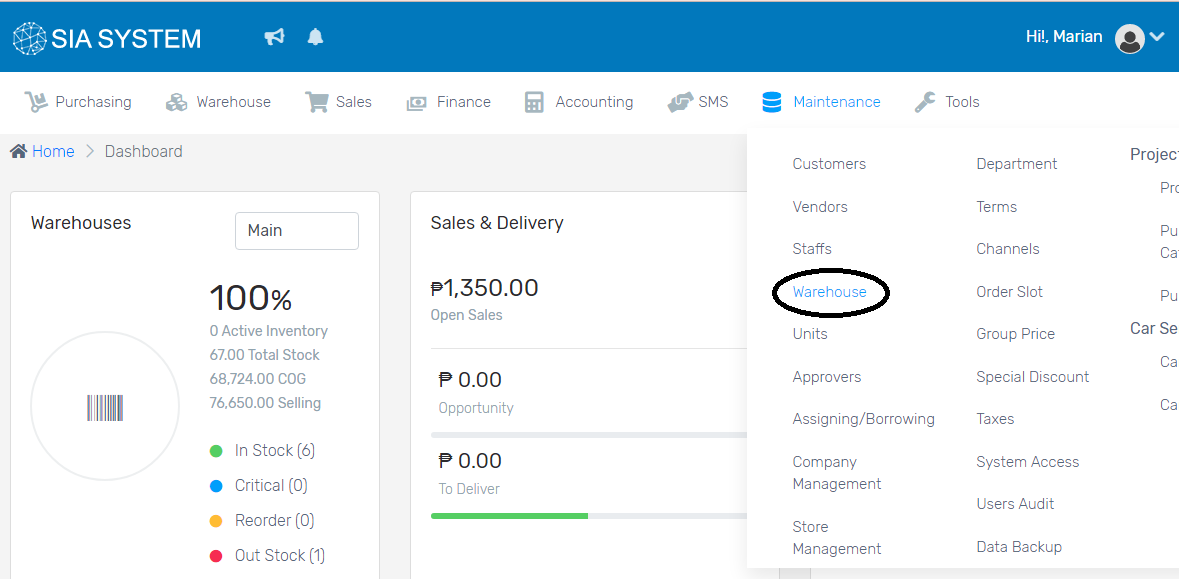
2. Click the Create New button to add new warehouse.

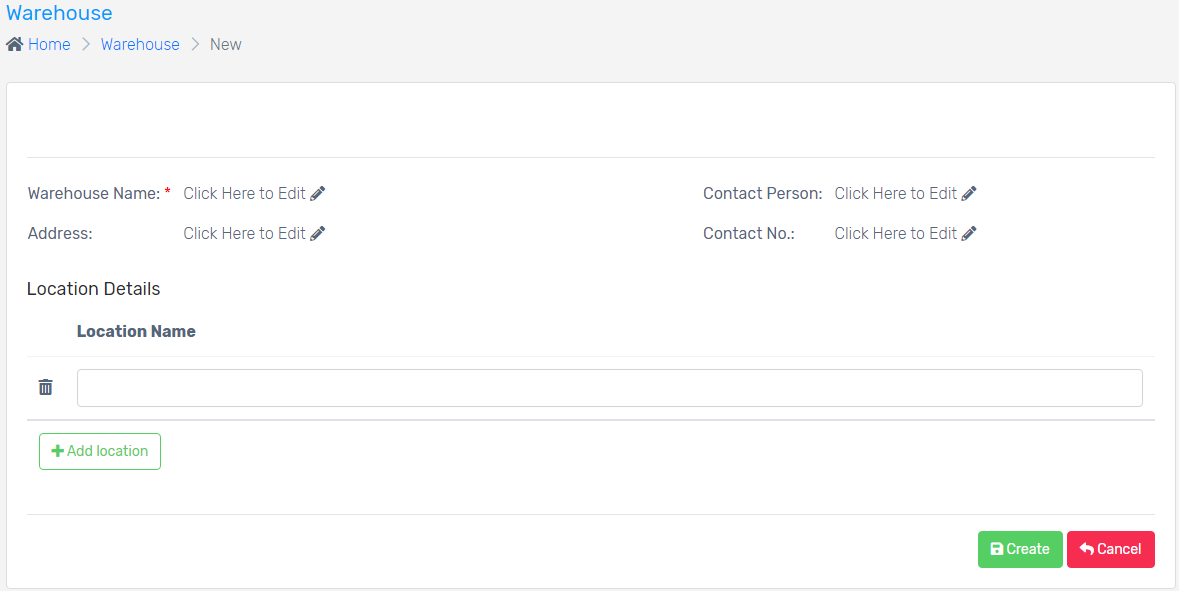
3. Add a Warehouse Name, input the Address, Contact Person of that designated warehouse and Contact Number. Assign a Location Name for that warehouse.

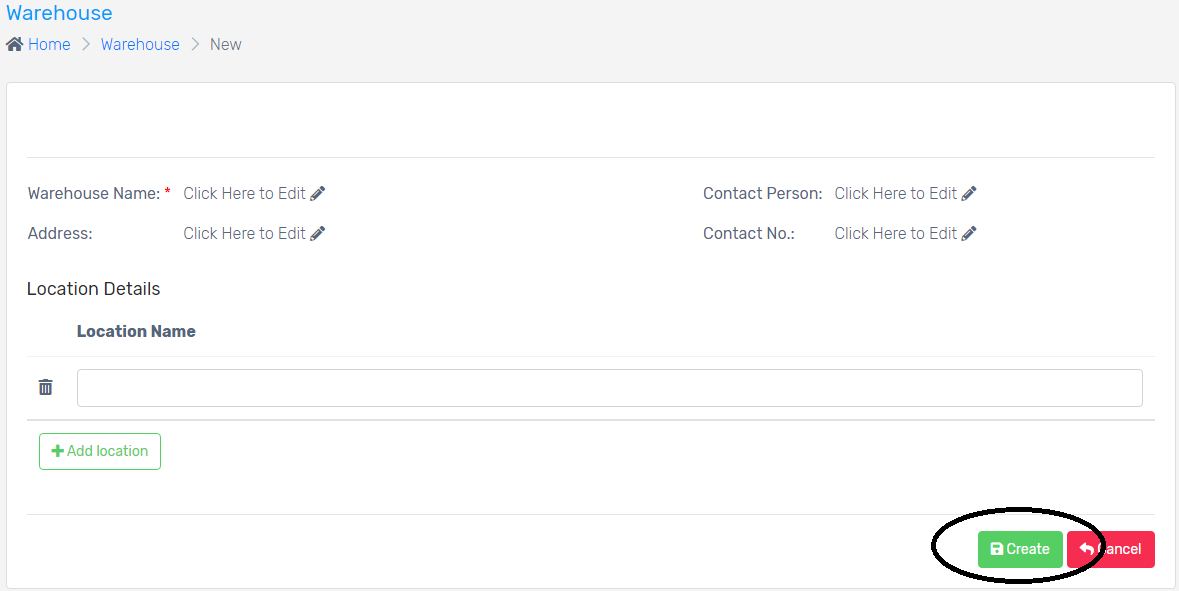
4. Click Create once done. Repeat the process when adding another warehouses.


Was this article helpful ?

[yasr_visitor_votes null size=”–“]

Have more questions ? Submit a request

How to set-up assigning/borrowing record

Keeping up with every asset record is important for smooth workflows and business operations. When a certain asset was originally issued to a staff, then assigned or borrowed to another staff, it is important to keep a record of that transaction for asset tracking.

  1. On the Maintenance menu, select Assigning/Borrowing.

2. Click Create New to add new assignment.

3. Click on the Date the asset is assigned. Select the Staff whom the asset was assigned to.

4. Click on the Asset, input its Serial Number and choose the Condition of that asset on the date of assignment.

5. Add a Note if necessary. Then click Save.

How to set-up staffs record

All businesses assign each staff who plays a significant role in every department. To keep track of who is using the system, it is important to create a staff record.

  1. On the Maintenance tab, select Staffs.

2. Add users by clicking the Add button.

3. Manually input all the details, including the Staff Code and the warehouse they are assigned.

4. Make sure to also input the Account Details, with their username and password. Click Save once done. Repeat the process for another record of staffs.

How to received item with Serialization

1.On the menu, click Purchasing and select Receiving Delivery.

2.Click to create new and Select the required details, Supplier, Purchasing type, Company, and Date. Once done, you can now add a product.

3.Click Add new item button to add items to your order. Once done, click the dropdown and select the item to purchase.

4. To Serialize item, Click Serialize button then click serialize. Once done Click View SKU.

5.SKU number is autogenerated, manually input your SKU name in SKU title and Select Expiration and warranty if you have one. Once done click Save button and Click the receive to add quantity to your stock.

6. Review the item, once done click receive button to finalize receiving.

How to approve a purchase requisition

1. Go to purchasing, click purchase requisition

2. Choose Purchase order that needs an approval, or you can get a notification for purchase order requisition approval at the upper left beside the SystemSIA logo.

3. Check the requisition. Once the requisition is okay, you can change the status of the items (refer to the status list below) and click Convert to PO button. You may now proceed to Purchase Orders.

The Purchase Request has 4 statuses:

Pending – unresolved item

Submitted – submitted for approval if there are approvers 

Note: If you have not encoded approvers yet, kindly follow the instructions on How to set up an approver.

Approved – approved items will be included in the Purchase Order

Disapproved – not approved

Note: One Purchase Request with different suppliers will be separated into different POs per supplier.

How to create a record of returned items

When your customer has to return a certain product or item, follow the instructions below to create a record.

Note: An Invoice or DR must be created first as those are the references of your customer’s returned item(s). If you have not created an Invoice or DR yet, kindly follow these instructions on How to create an Invoice or How to create a Delivery Receipt.

To create please follow the step below:

1. On the Warehouse menu, click Inventory Return.

2. Click Create New to add arecord of returned items.

3. Select where the return came from; either from SALES, ISSUANCE or PURCHASE. Fill out all the necessary details then click Save.

4. On the new tab, select the product from the dropdown. Input the Quantity your customer returned to you then click the Add button.

Note: The items in the dropdown are only the items included in the Invoice or DR number you selected.

4. Double-check the details and click Post then Proceed button. You may now print your Delivery Return record.

Now, you already have a record of returned items. To check if the item is added back to your inventory, click Inventory and the Product, then check the movement of the inventory.


Was this article helpful ?

[yasr_visitor_votes null size=”–“]

Have more questions ? Submit a request

How to adjust stock quantity

To make sure that the physical stock quantity is in sync with the system quantity of your items, you may check and adjust it easily.

How to adjust stock quantity

1. On the Warehouse menu, select Stock Adjustment.

2. Click the Create New button to add adjustment.

3. Select what warehouse should the stocks be adjusted.

4. Select the Brand, Category and Supplier of the stock you want to adjust. Choose All if you want all the details. Click Generate once done.

5. You can adjust manually all the stocks by selecting the item and changing the number of stocks in Adjustment column. Click Save Changes when done.

You can also create stock adjustment by batch upload in Import Inventory. If you don’t have an excel file yet, click Download Template and fill out the details. Click Save Changes if no error occurs.


Was this article helpful ?

[yasr_visitor_votes null size=”–“]

Have more questions ? Submit a request

How to transfer stock to a different branch or warehouse

If a company has multiple warehouses, it is important to keep track of the stocks that are transferred and issued from different warehouse. When a branch or warehouse urgently needs stocks, you can transfer stock to a different branch or warehouse with System SIA.

Note: Transferring stocks is only possible if you already created multiple branches or warehouses. Kindly follow our instructions on How to setup a Store Branch.

1. On the Warehouse menu, select Stock Transfer and click Create New button.

a. For DIRECT transfer

  1. Choose Direct Transfer. Select what warehouse the stocks will be coming from in Transfer From field. Then choose where it will be transferred in Transfer to field.

2. Input the reference number, if there is any. Click Save afterwards.

3. Search for the item on the dropdown. Add the item(s) you want to transfer.

4. Click Transfer then Proceed. Go back to check the Status of the transfer.

b. For RECEIVE transfer- stocks issued is subject for transfer

  1. Select Receive Transfer.

2. Select a record of Stock Issuance. The stock issuance record previously made will then be automatically displayed. Input the Reference Number, if there is any. Click Save afterwards.

3. Search for the item on the dropdown. Note: Stocks that are issued from STOCK ISSUANCE will only be displayed in the dropdown.

4. Add the item(s) the click Transfer and Proceed. Go back to check the Status of the transfer.


Was this article helpful ?

[yasr_visitor_votes null size=”–“]

Have more questions ? Submit a request

How to set-up a special discount

SIA special discount is used by setting a discount per product which can be offered or assigned to your customers.

1. On the Maintenance menu, click Special Discount and click Add button.

Note: For the import, we already have a template for you to fill in. After filling out the template you can select the file you import then upload it on the system.

2. Input the Name you want to record. Select the Type of the product, whether it’s PER SINGLE PRODUCT or PER BRAND.

3. Select which product you’re going to provide a discount. Add the Date of Expiration of that certain special discount. If the special discount was not availed within the date, no discount will be given to customers.

3. Choose the discount by either Percentage or Fix Amount. Type in the Amount and click Save.


Was this article helpful ?

[yasr_visitor_votes null size=”–“]

Have more questions ? Submit a request