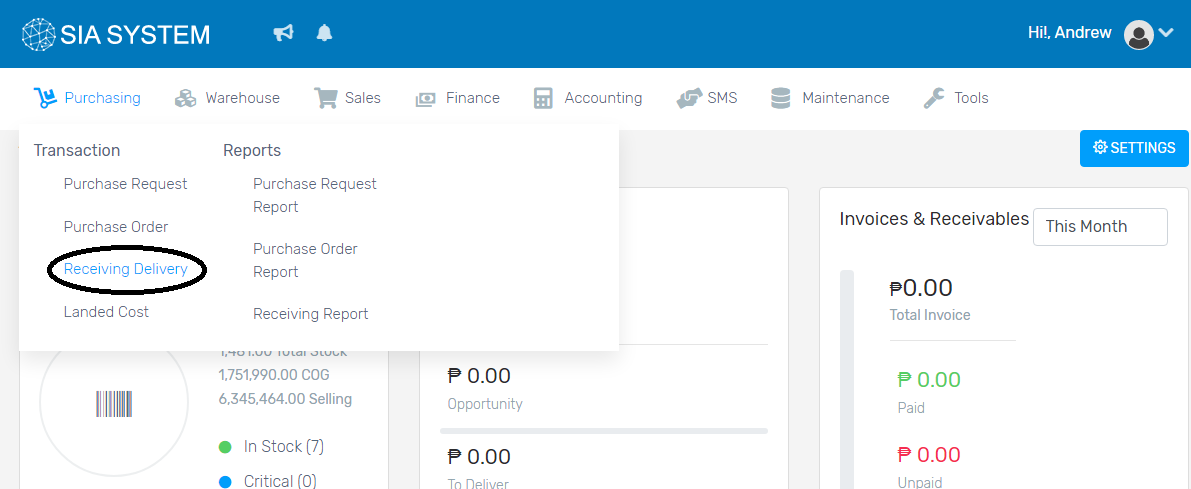
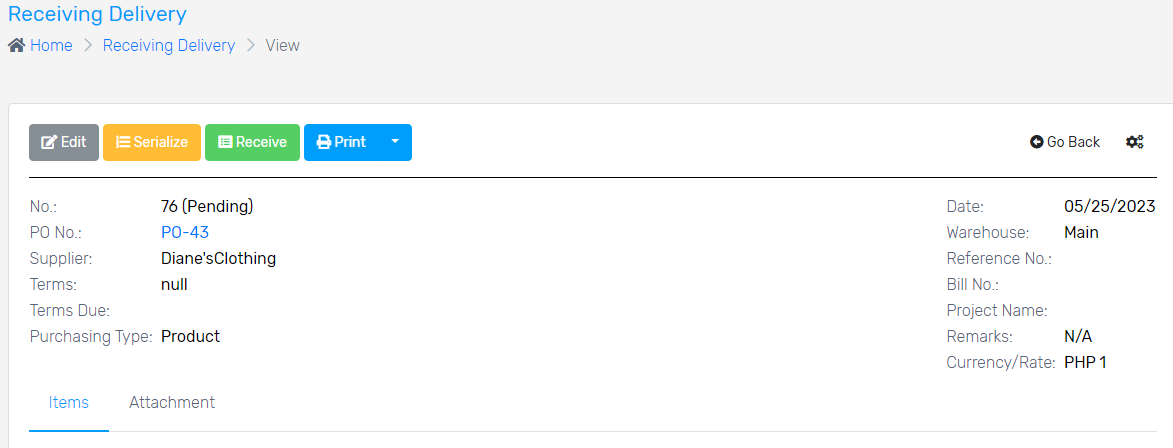
1.On the menu, click Purchasing and select Receiving Delivery.
2.Click to create new and Select the required details, Supplier, Purchasing type, Company, and Date. Once done, you can now add a product.
3.Click Add new item button to add items to your order. Once done, click the dropdown and select the item to purchase.
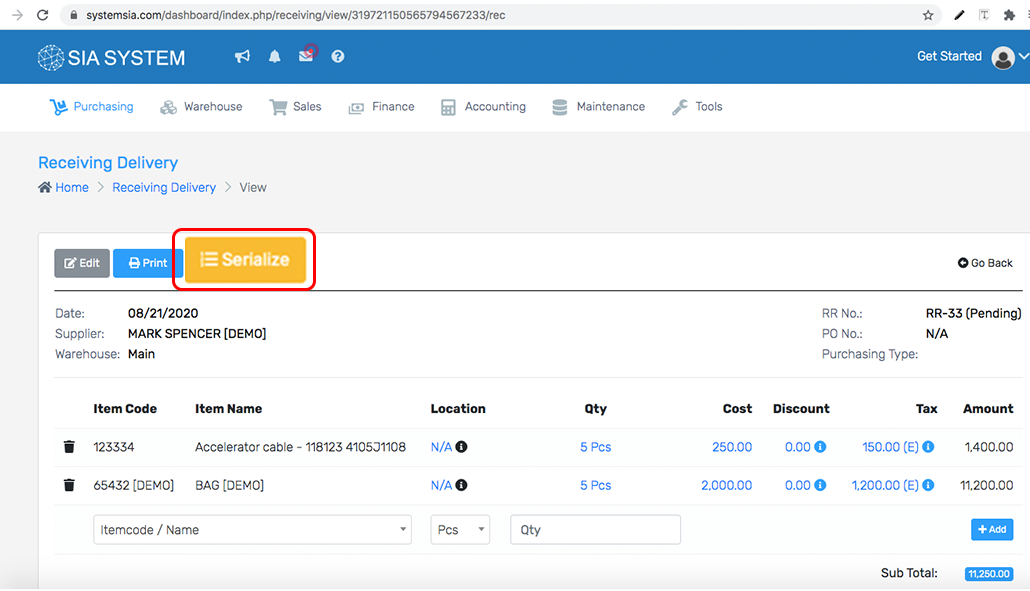
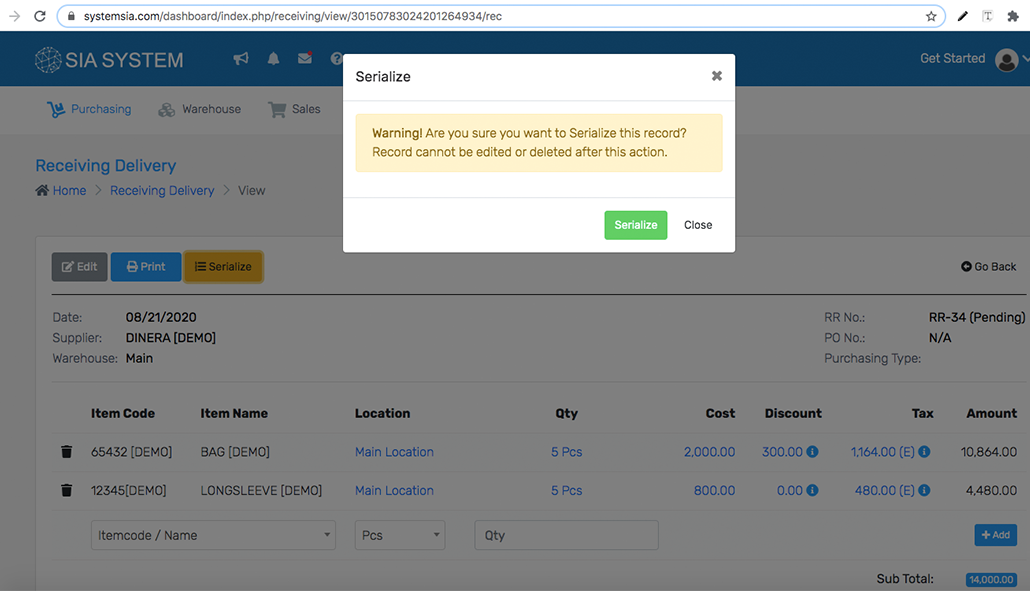
4. To Serialize item, Click Serialize button then click serialize. Once done Click View SKU.
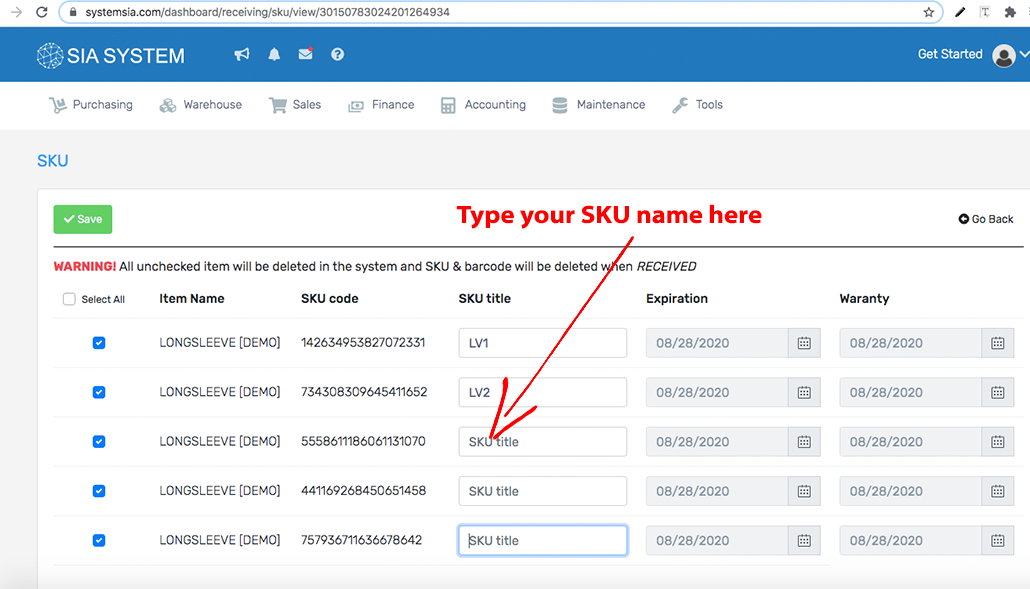
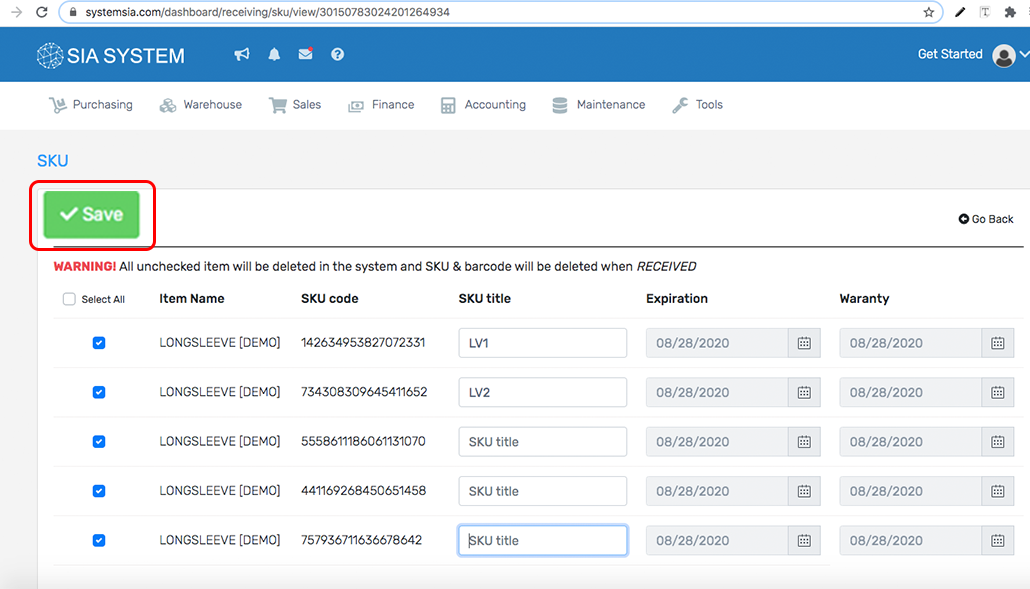
5.SKU number is autogenerated, manually input your SKU name in SKU title and Select Expiration and warranty if you have one. Once done click Save button and Click the receive to add quantity to your stock.
6. Review the item, once done click receive button to finalize receiving.
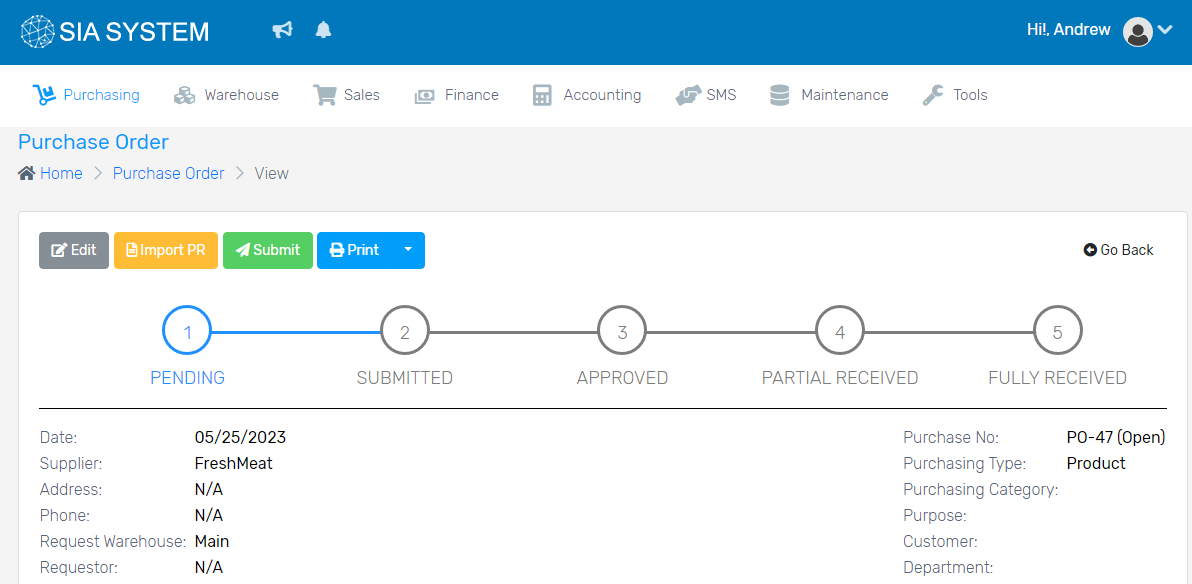
2. Choose Purchase order that needs an approval, or you can get a notification for purchase order requisition approval at the upper left beside the SystemSIA logo.
3. Check the requisition. Once the requisition is okay, you can change the status of the items (refer to the status list below) and click Convert to PO button. You may now proceed to Purchase Orders.
The Purchase Request has 4 statuses:
Pending – unresolved item
Submitted – submitted for approval if there are approvers
Note: If you have not encoded approvers yet, kindly follow the instructions on How to set up an approver.
Approved – approved items will be included in the Purchase Order
Disapproved – not approved
Note: One Purchase Request with different suppliers will be separated into different POs per supplier.
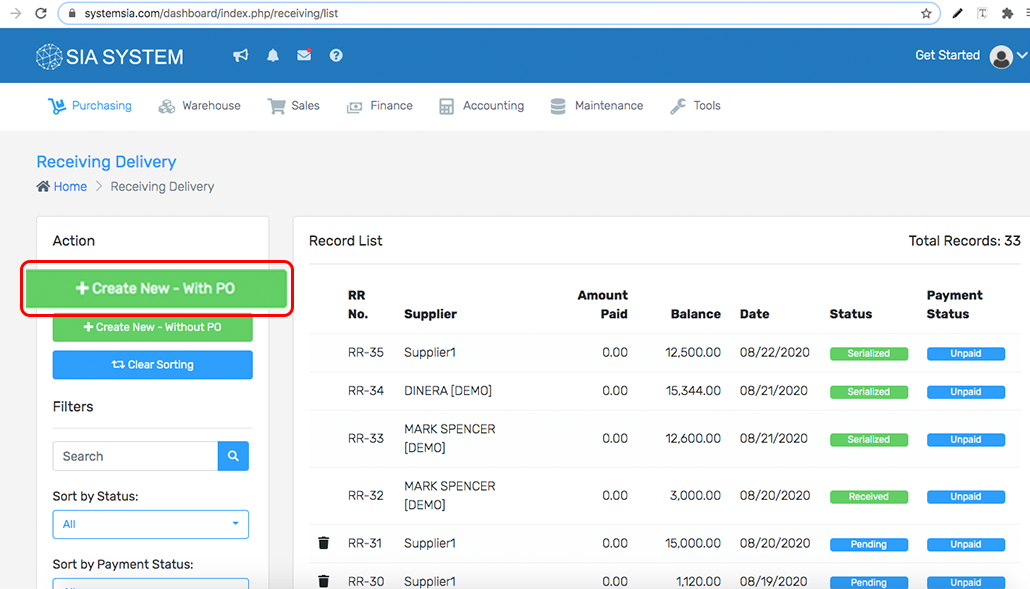
Adding of quantity to your inventory can be automatically done by receiving delivered items. This is also an accurate way of tracking of inventory. Once your purchases are delivered, you are now ready to receive the items.
1. On the menu, click Purchasing and select Receiving Delivery.
2. Refer to the PO of the delivered items if it contains a purchase order. Click IMPORT WITH PO. In the new tab, choose the Vendor and Warehouse then save. Other details should be filled out manually, if necessary.
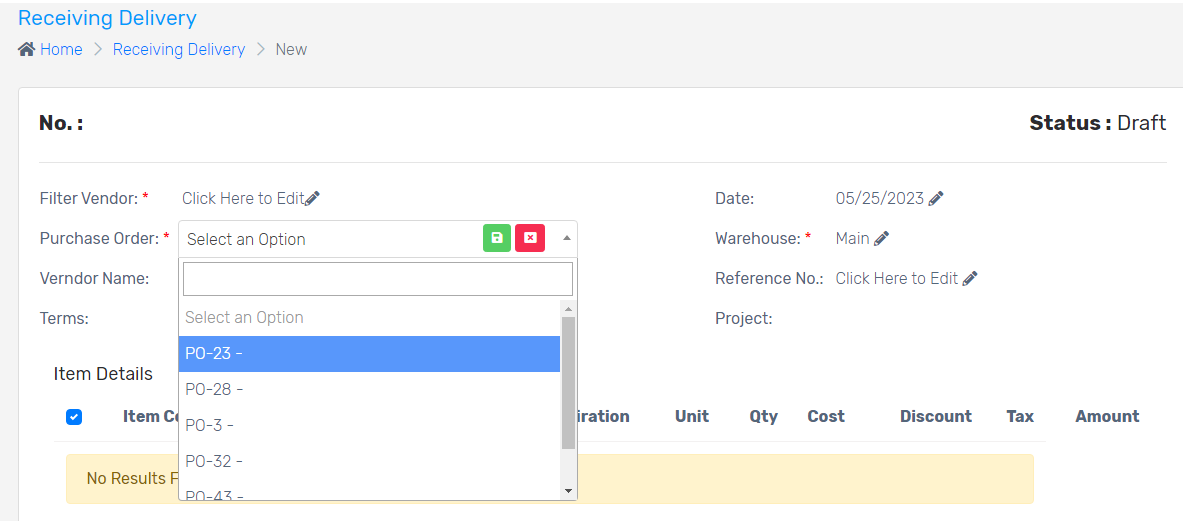
4. Click on the Purchase Order tab. Select the PO form the dropdown then make sure to save. The items from the PO will then automatically show. Check if all the items are delivered with the right quantity, then just click Create.
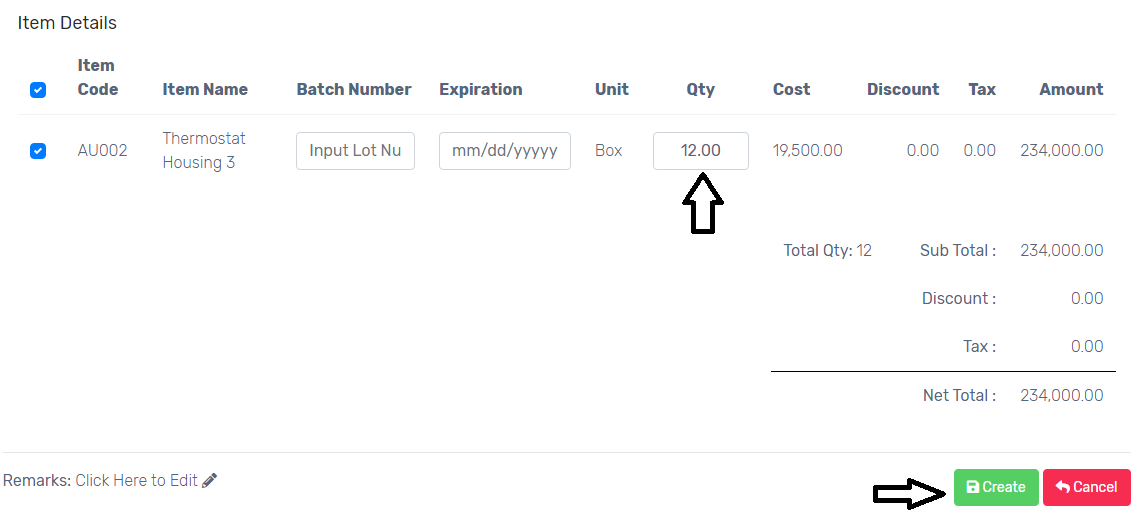
5.If the items are partially delivered, just tick that items and manually input the quantity received. Once done, click Create.
6. On the new tab, check carefully the items before you proceed. Once cleared, click Receive to finalize the delivery, then Proceed.
7. If you wish to print the RECEIVING DELIVERY, just click PRINT.
Control the purchasing of products and services by creating an official document. Purchase Orders can be created directly or created from an approved Purchase Request. The difference between a purchase order and a purchase request is that, the latter needs permission, while purchase order is a document outlining the details of the actual purchase.
Note:
In order to create a Purchase Order, products must be encoded in the system. If you have not encoded products yet, follow our instructions on How to setup a product record.
For a secure process, approval of orders is implemented but is optional as well. If you have not encoded approvers yet, follow our instructions on How to setup an approver.
How to create a Purchase Order
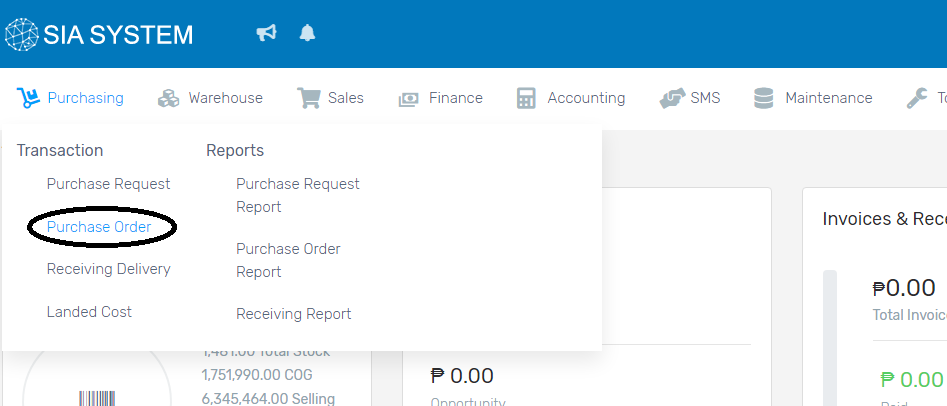
1. On Purchasing menu, click Purchase Order.
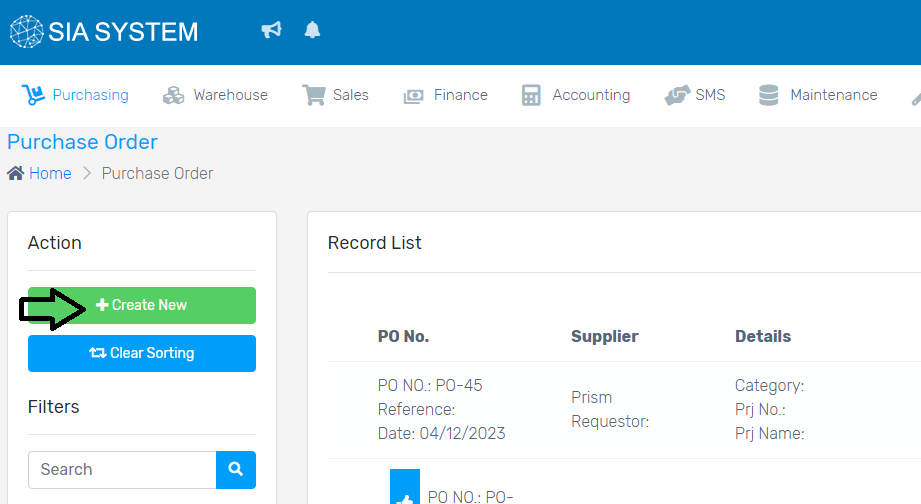
2. Click the Create New button.
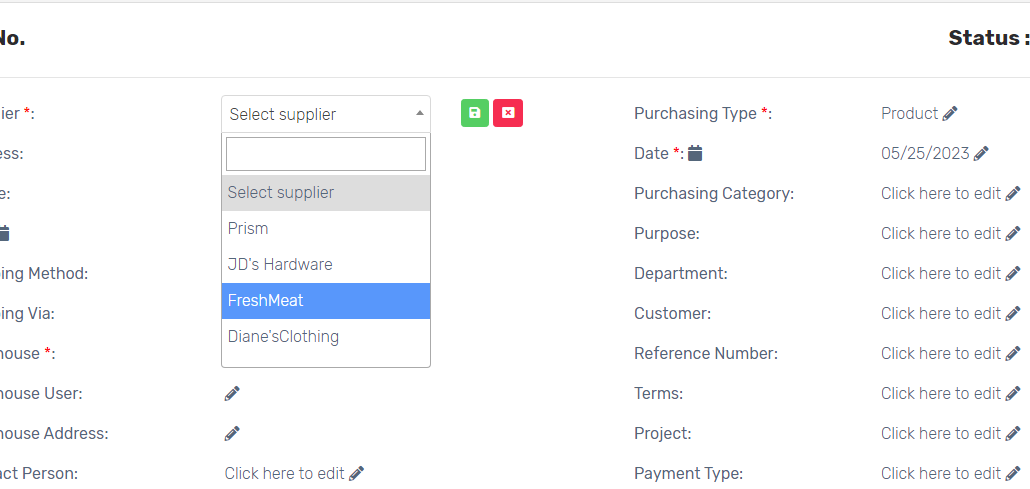
3. Click and select the name of the Supplier. Remember to also click the save button or the green image every after choosing.
4. Other details will be automatically shown once you edit all your vendor’s info in the VENDOR section, on the MAINTENANCE tab. Otherwise, manually input all the necessary details.
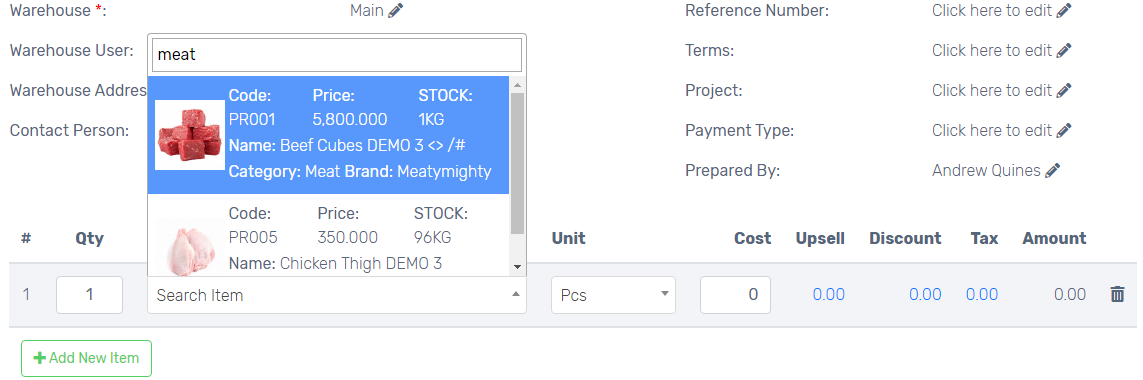
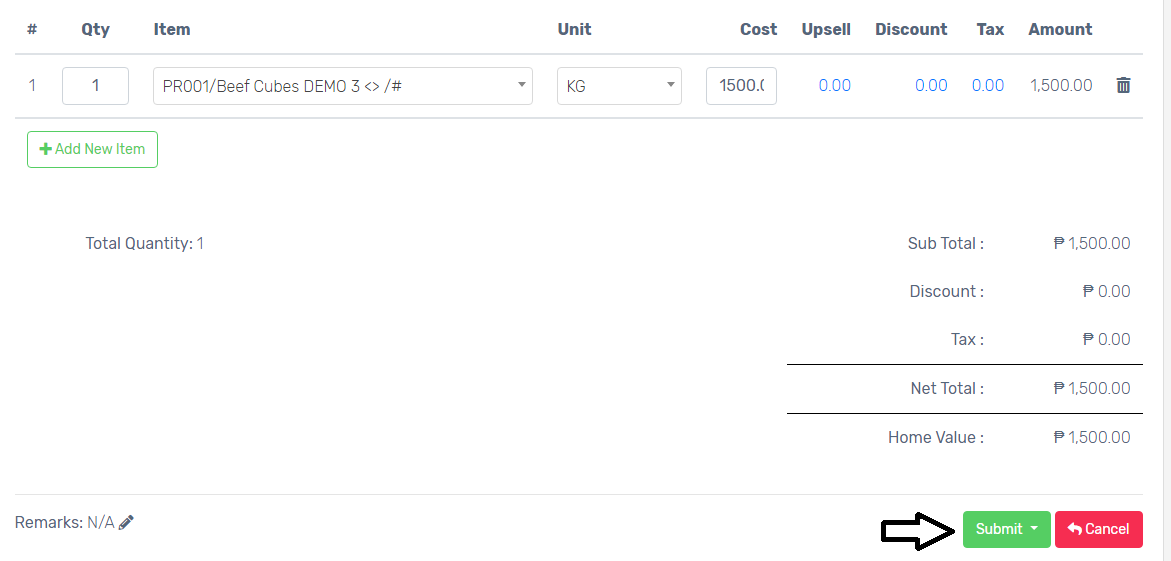
5. Search the item, manually put the Quantity then select the Unit. The Cost of the item will then be automatically shown.
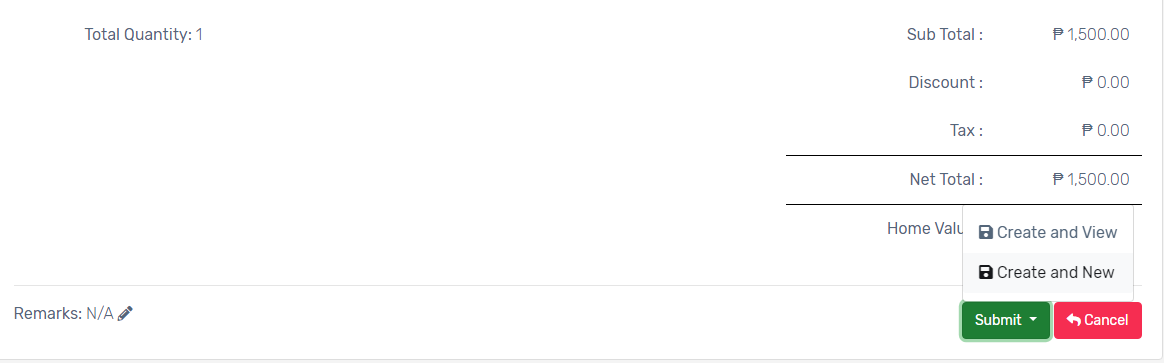
6. Once done, click Submit.
7. If you happen to forget an item, you can still add it on the VIEW mode. Note that the purchase order won’t push through if you did not click the SUMBIT button.
8. After checking, you may want to submit your PO. Just click the Submit button.
If a purchase request has been previously created, just follow these following steps.
Click Create New button.
2. Make sure to select the supplier from the dropdown.
3. Click the arrow down in the SUBMIT button, then click CREATE AND VIEW.
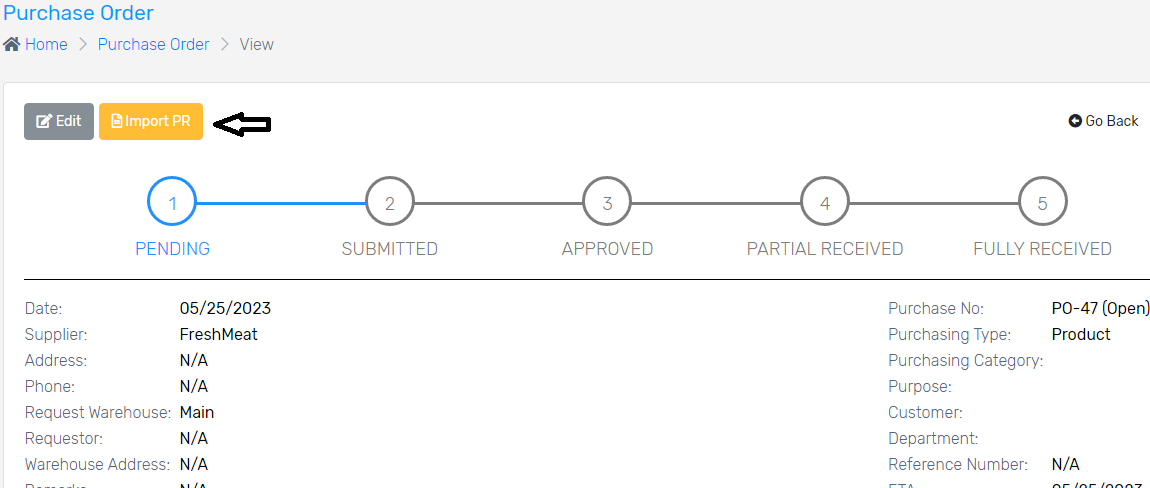
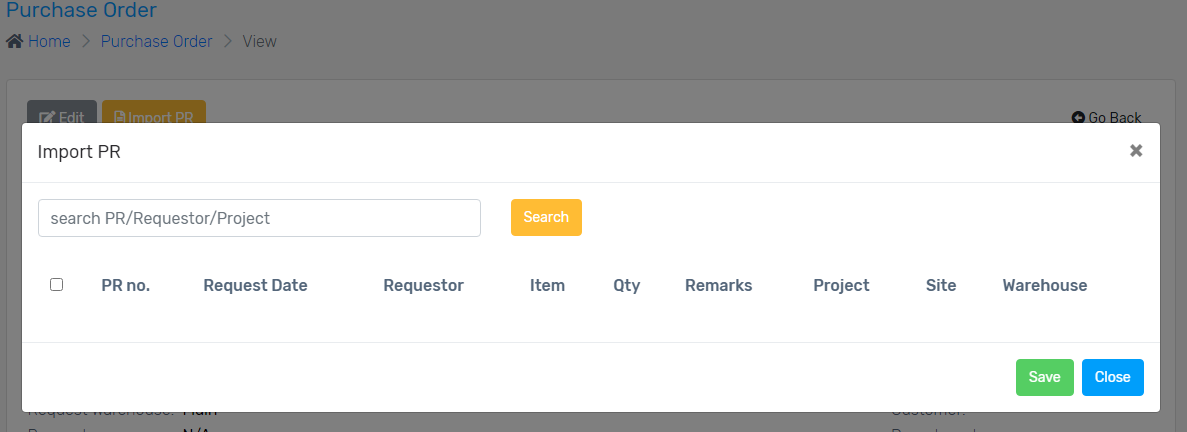
4. Click the IMPORT PR button, and search for the PR number, then Save.
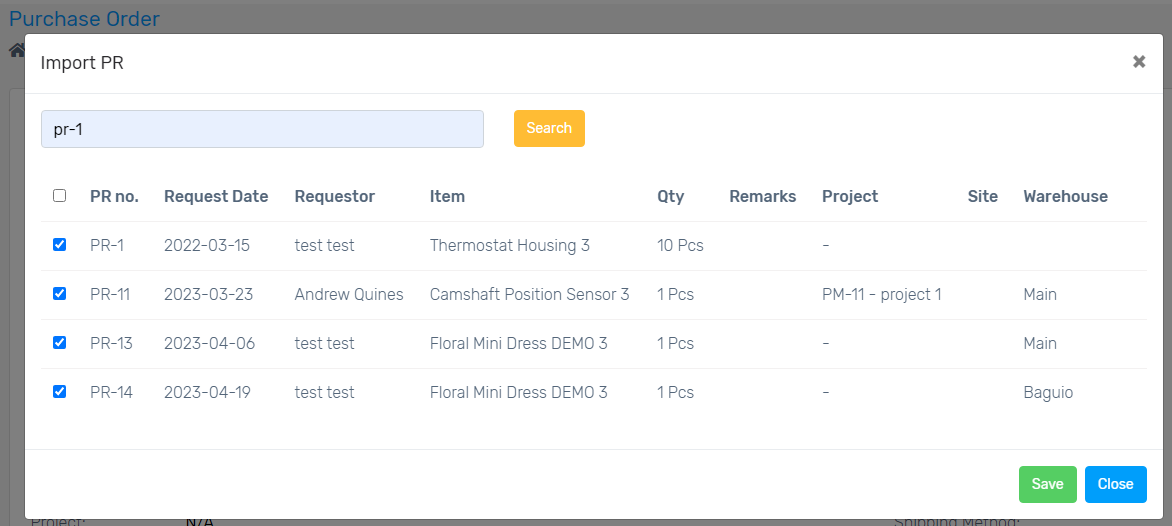
5. If you want to create purchase order with multiple PR, just search for the PR number. Tick all the PR you want to add, then Save.
6. Once done, click the Submit button.
Note: If your process requires approval, the Purchase Order will be pending. Wait for it to be approved to proceed.
To ensure the importance and correctness of every purchase to be made by the department, a request of the orders can be created for approval. A purchase request is a list of what you want to buy or order.
Note:
In order to create a Purchase Request, products must be encoded in the system. If you have not encoded products yet, follow our instructions on How to setup a product record.
For a secure process, approval of requests is implemented but is optional as well. If you have not encoded approvers yet, follow our instructions on How to setup an approver.
How to Create a Purchase Request
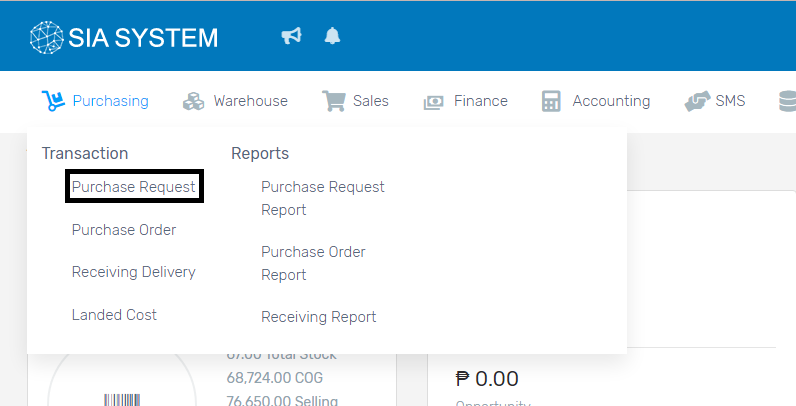
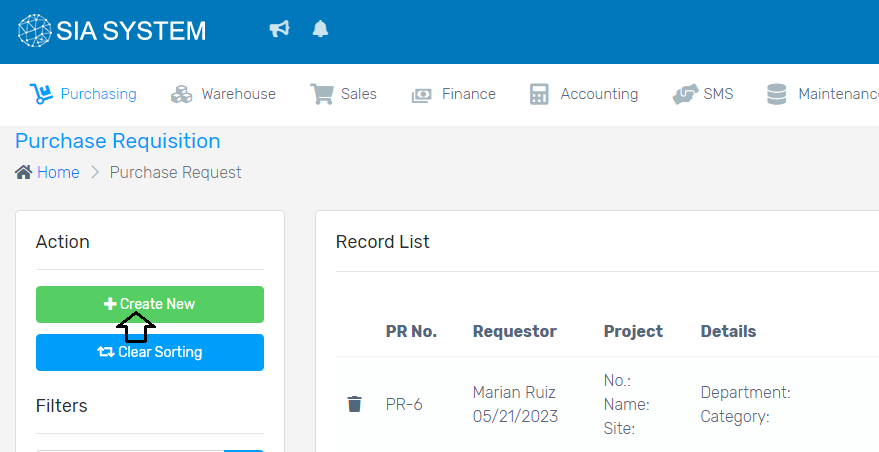
1. On the Purchasing menu, select Purchase Request.
2. Click Create New button on the action section.
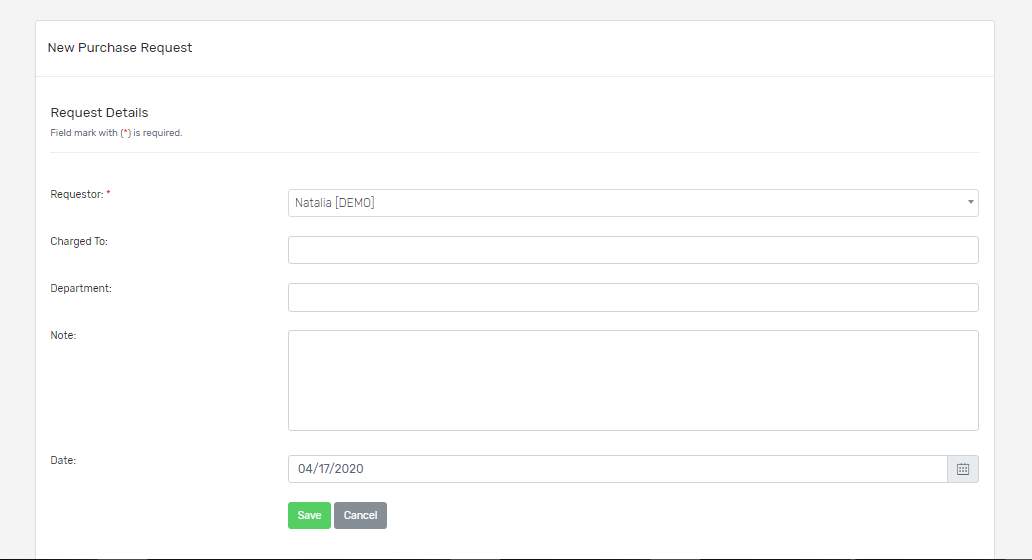
3. Fill out all the necessary details, especially those field marked with *.
4. Select the items you want to request from the dropdown, input the quantity and click Add button. Note: You can add items from different suppliers in one request.
4. If you want to add another item, just repeat the steps 1 to 3.
5. Once done, click the SUBMIT button.
That’s it! Click GO BACK and check the status of your purchase request.
The Purchase Request has 4 statuses:
Pending – unresolved item
Submitted – submitted for approval if there are approvers Note: If you have not encoded approvers yet, kindly follow the instructions on How to setup an approver.
Approved – approved items will be included in the Purchase Order
Disapproved – not approved
Note: One Purchase Request with different suppliers will be separated to different POs per supplier.
Once approved, you are now ready to create a purchase order.