Barcodes encode product information into bars and alphanumeric characters, making it much faster and easier to receive delivered items or track inventory in a warehouse.
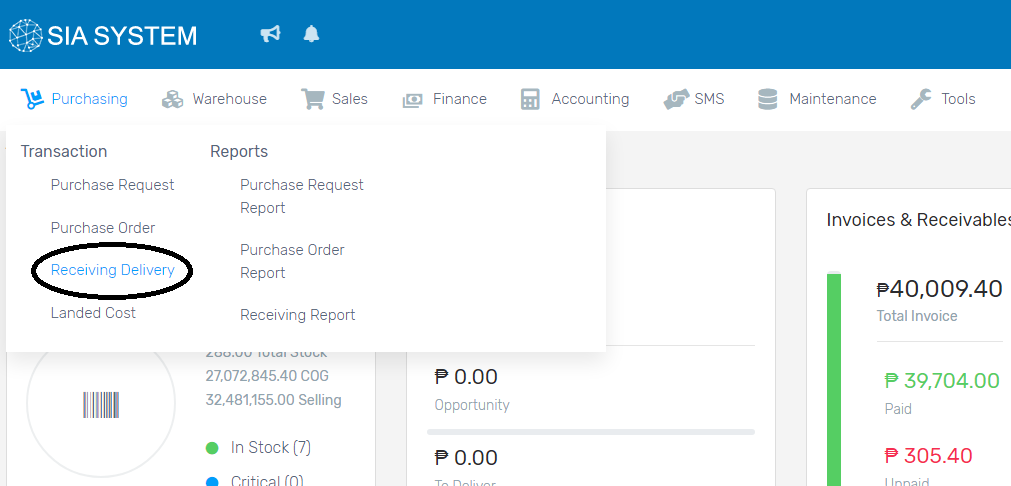
- On the Purchasing Tab, click Receiving Delivery.
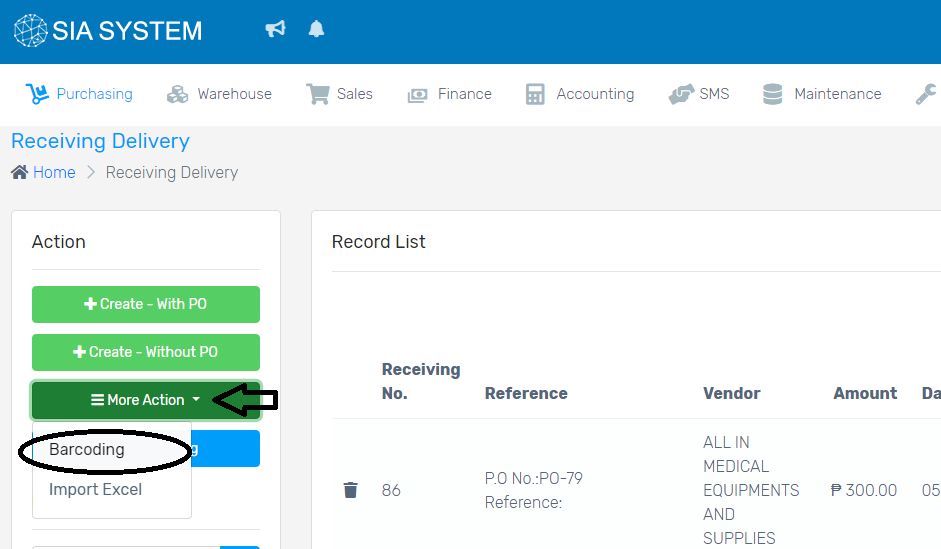
2. Click More Action then choose BARCODING.
3. If the items delivered has a PO, just choose the PO number then click SCAN. The details of that PO will be shown, including the items purchased and its quantity.
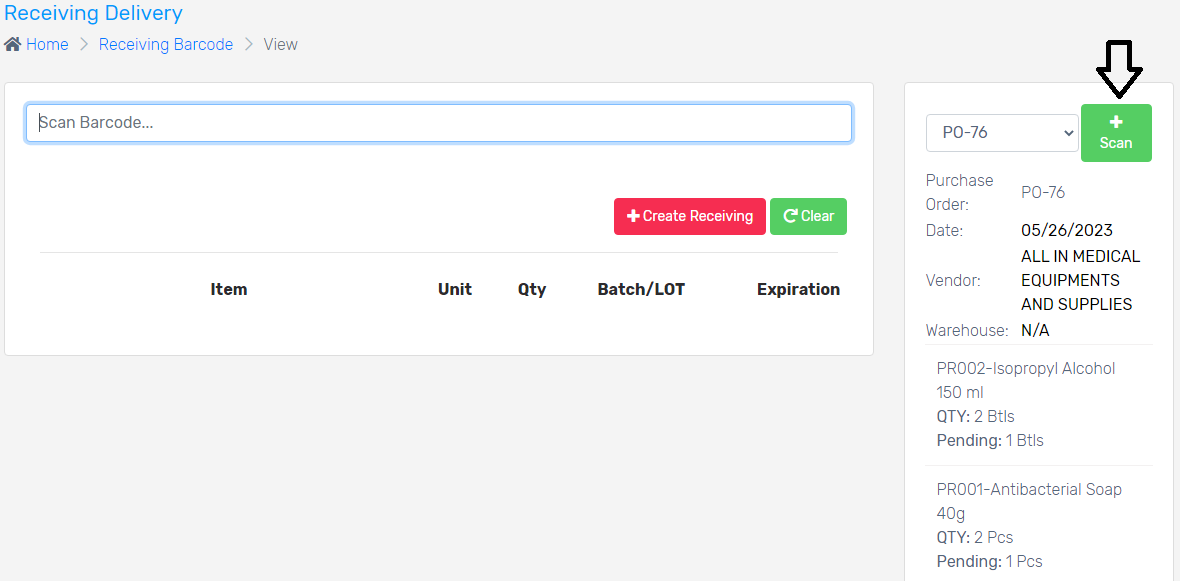
4. Scan the barcode of each item and its barcode will automatically display.
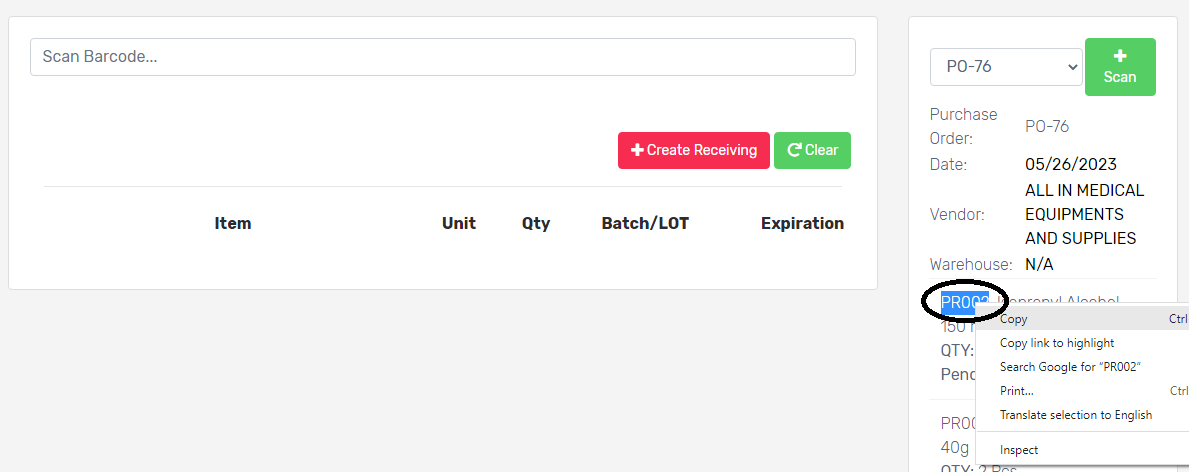
In case the item doesn’t have a barcode yet, you can generate its barcode through Product/Inventory Inquiry.
- Just copy the Product Code located at the right side of the dashboard.
2. On the new window, click Warehouse then choose Inventory Inquiry.
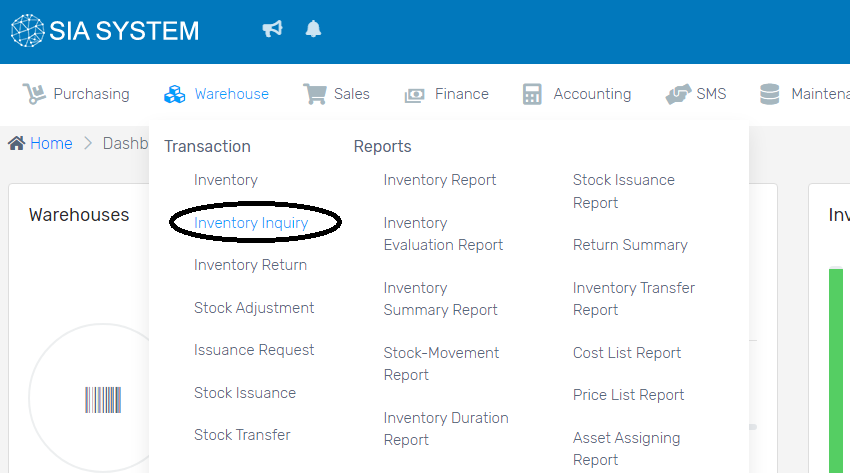
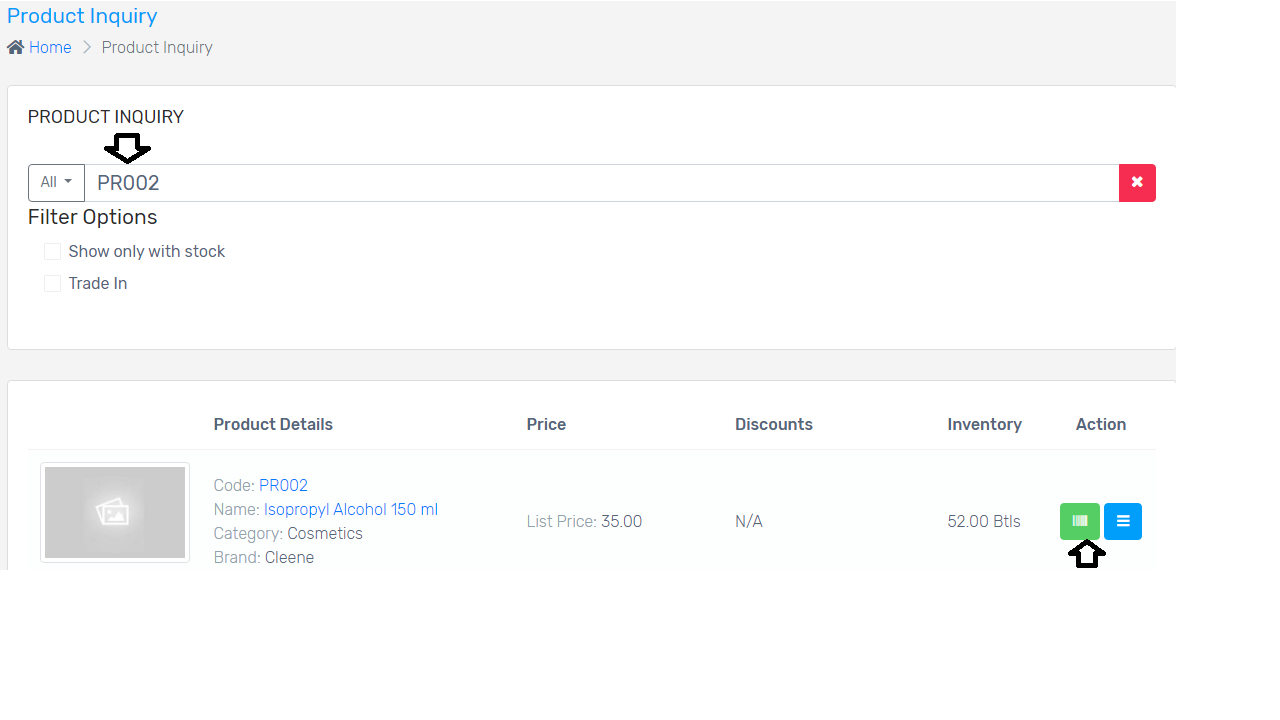
3. Paste the Product Code and click the Search button. The details of that product will then be displayed. Click the Green Tab or the Barcode.
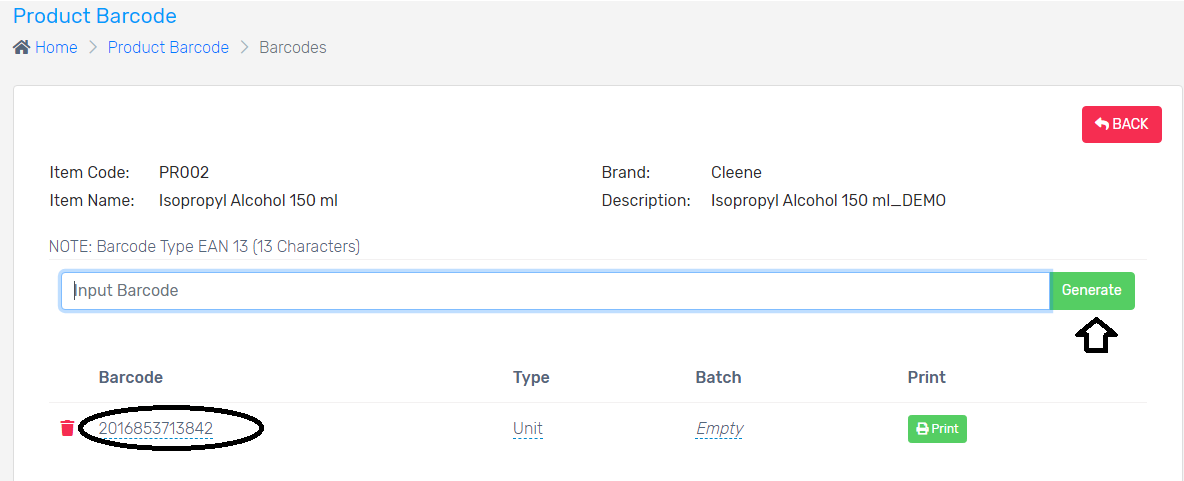
4. Click Generate, then Enter. Now the item already contains a barcode.
5. Scan it again then proceed to the next step. Note: Don’t forget to click ENTER every after scanning.
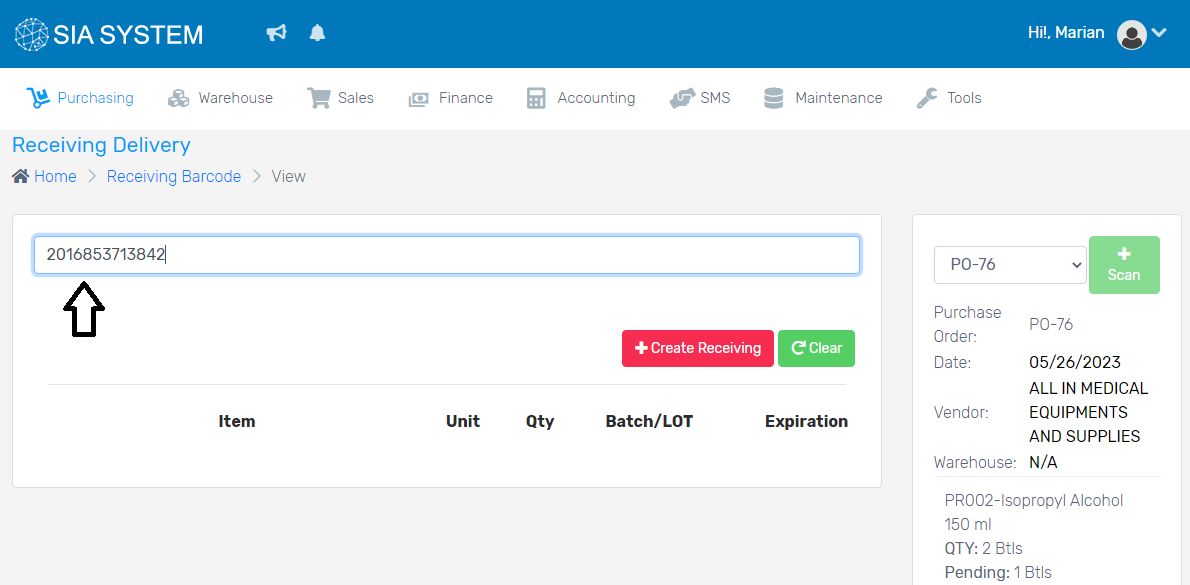
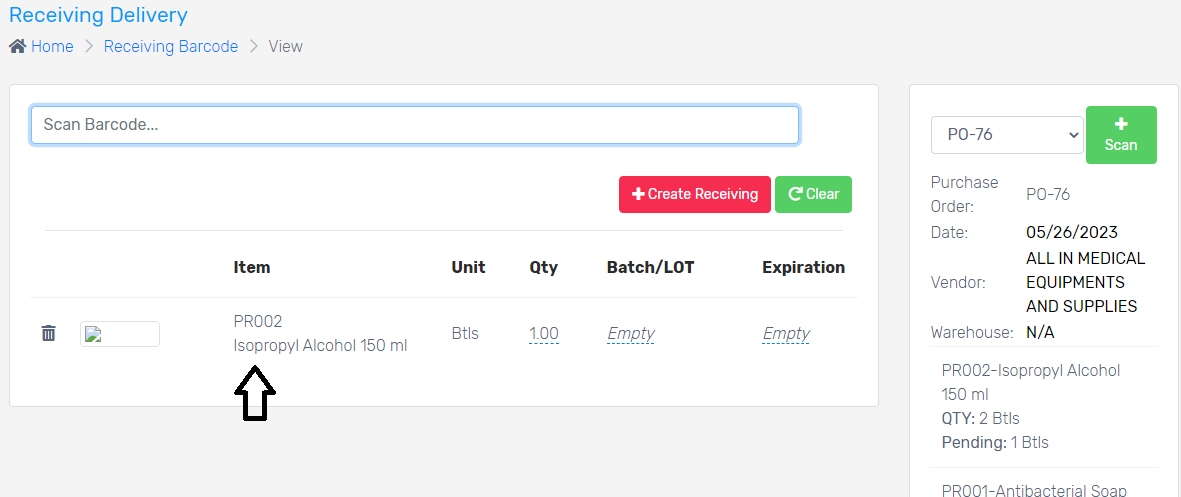
6. Once all items are scanned, click Create Receiving.
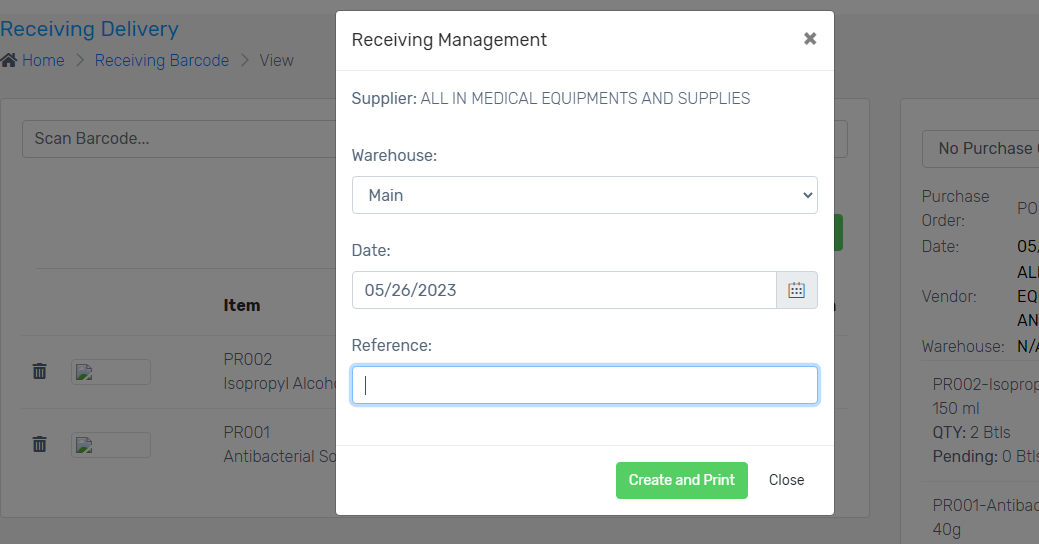
7. Enter the Reference or the Delivery Receipt. Click Create and Print. You can now print your receiving delivery, as necessary.
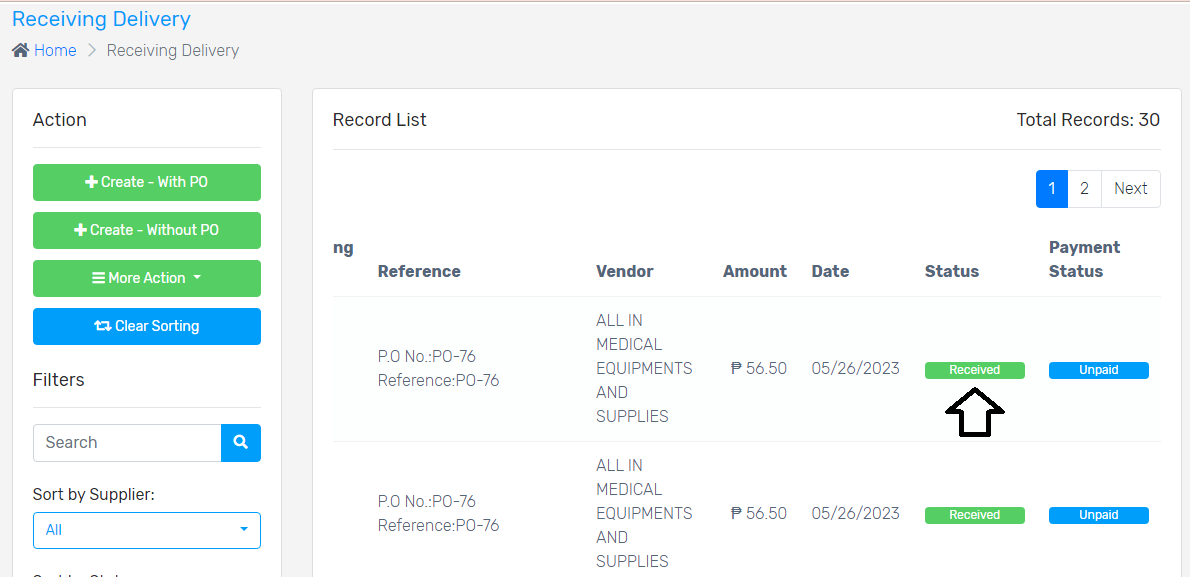
8. Lastly, click GO BACK and always check for the status of the delivery.
- FULLY RECEIVED – received all the items purchased
- PARTIALLY RECEIVED – some items are not delivered
If items were partially delivered, just follow the same process stated above and only input the actual items you received. Go back with that transaction until all the items are fully received.