Products can be added in SIA in two ways:
One at a time – Use this approach if you have a limited number of products.
Batch upload – Import your product details all at once by using our Excel template.
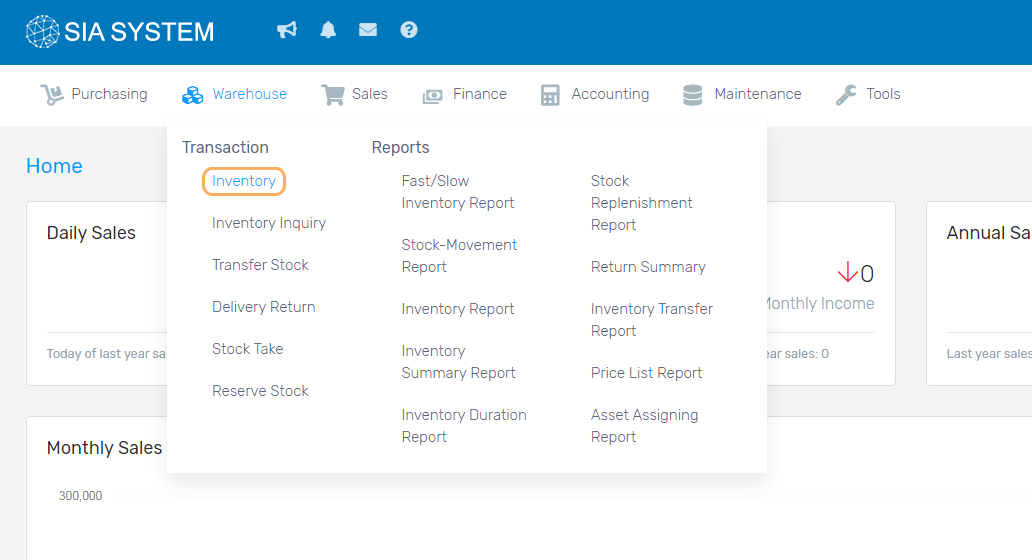
On the menu, click Warehouse and select Inventory.
How to setup a product record one at a time
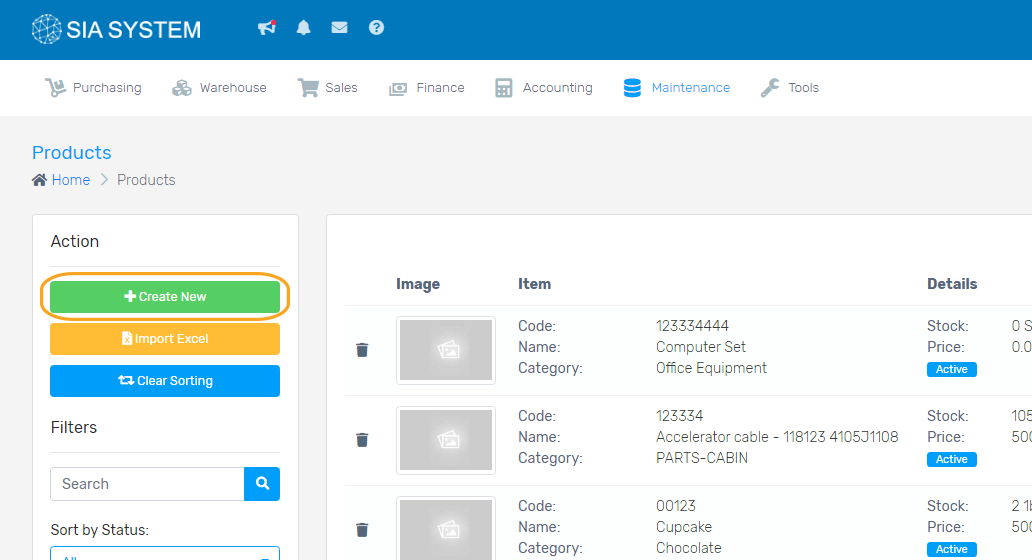
1. On the Action section (left side), click Create New button.
2. Fill up the product details. On the Image field, click the grey square to upload a photo.
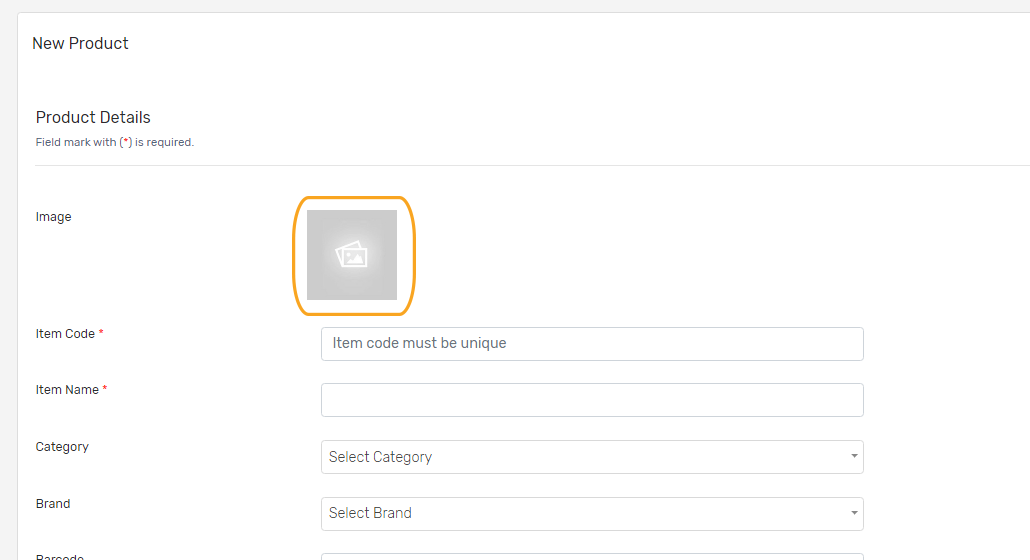
3. Input Item Code and Item Name. Note: Item Code and Item Name must be unique.
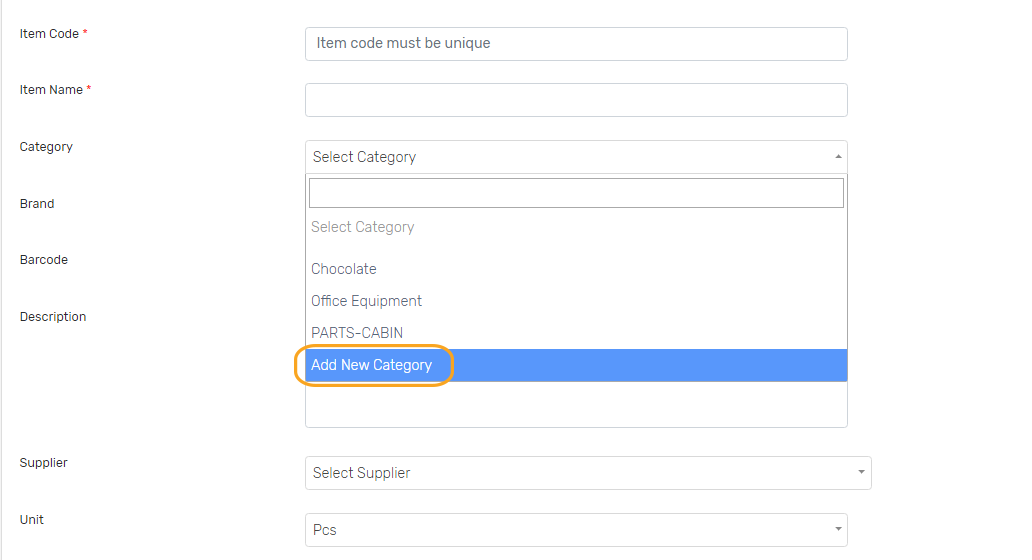
4. Select category. If the category is not on the list, click Add New Category and type the category you want to add. Note: Group your products into distinct categories. This might help you in organization and analysis.

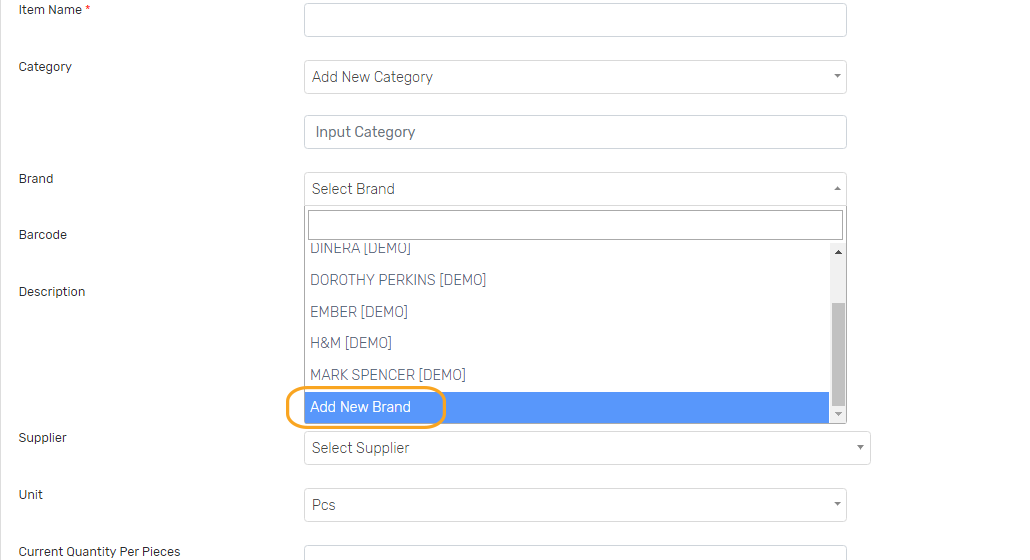
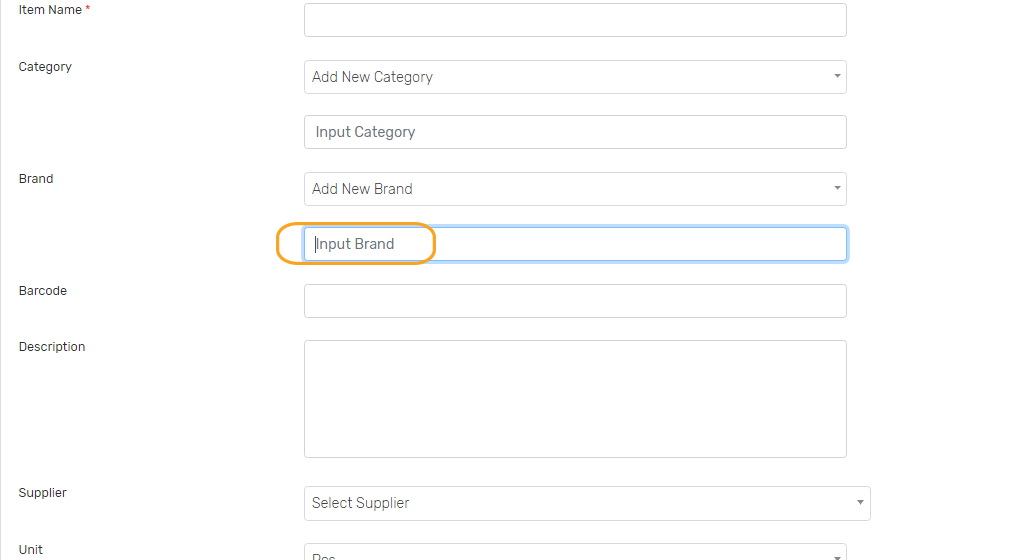
5. Select a Brand. If the Brand is not on the list, click Add New Brand and type the brand you want to add.
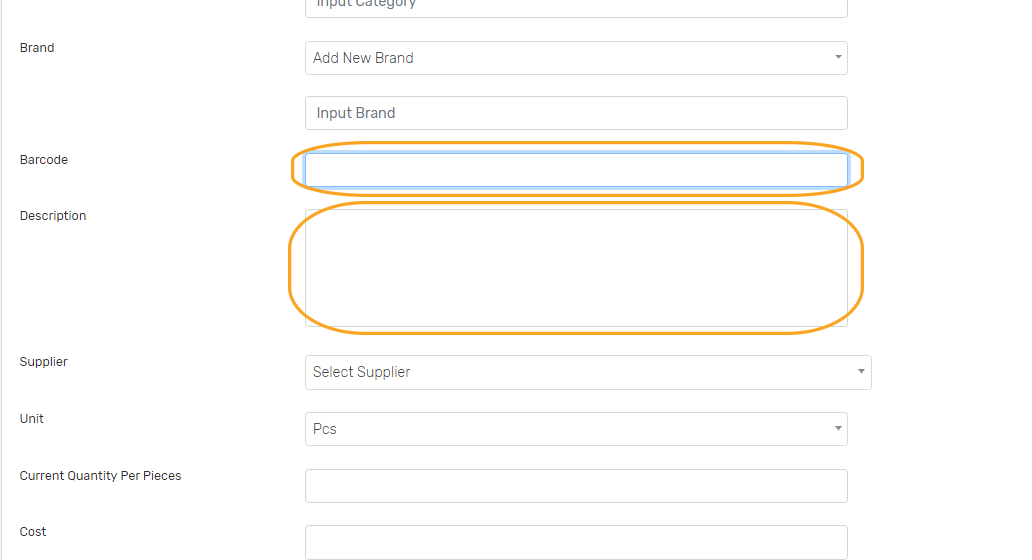
6. Type in the Barcode and Description.
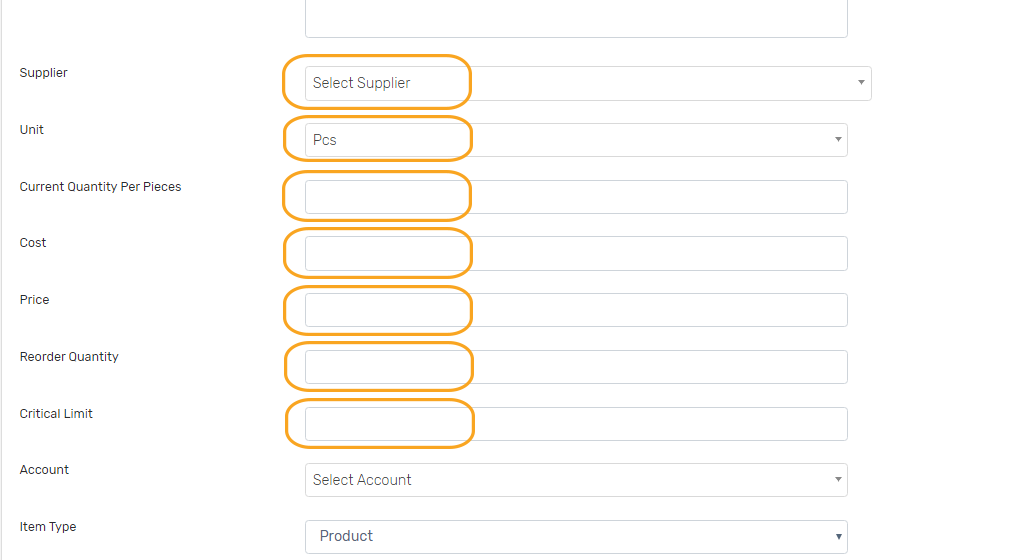
7. Select Supplier and Unit. Note: The unit is what term you use to measure the quantity of your product (Example: Pcs, Kg, Box)
8. Input the Current Quantity, Cost, Price, Reorder Quantity, and Critical Limit. Note: Reorder Quantity is the quantity when your item is needed to be reordered. Critical Limit is the critical level of your item’s quantity. Get notified before you go out of stock.
9. Select Item Type if Product or Service. Note: COGS Account is connected on your income statement. Tax type: If your item is VATable or Non VATable.
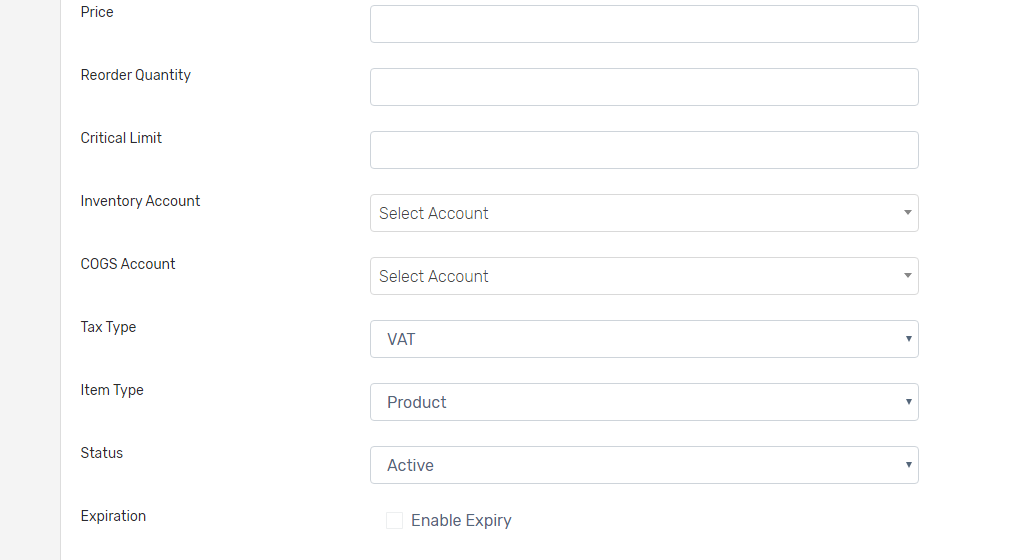
10. Select Active in Status to display the item. Note: Inactive status will not display the item for your transactions.

11. If you want to set expiration, tick Enable Expiry. Note: Adding of Expiration Date is upon receiving the item.

12. Tick Enable Group Price, if you have multiple pricing for different customers and input the prices for your item. Note: One group price of an item can be assigned to your customer. This is the amount they have to pay.
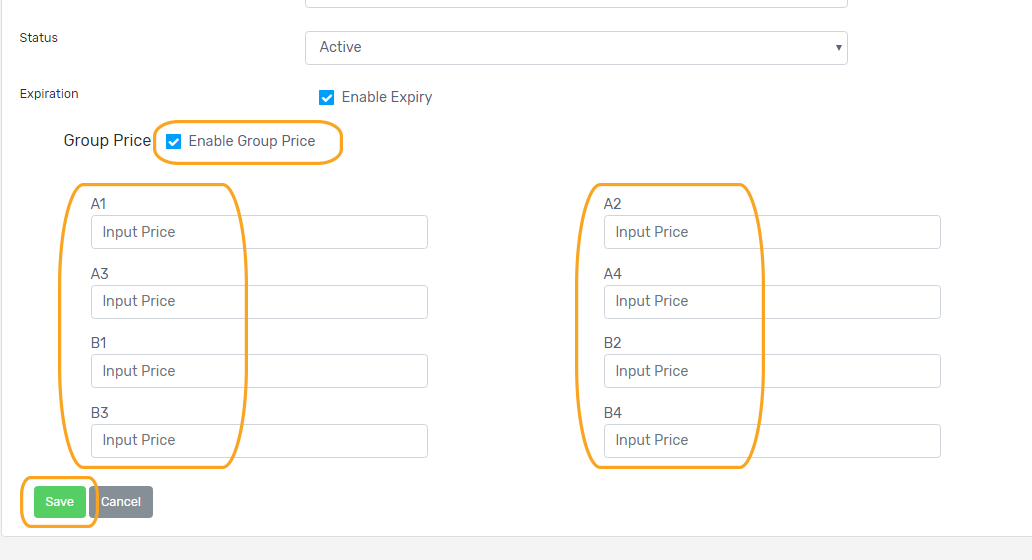
13. Click the Save button.
How to upload product records by batch
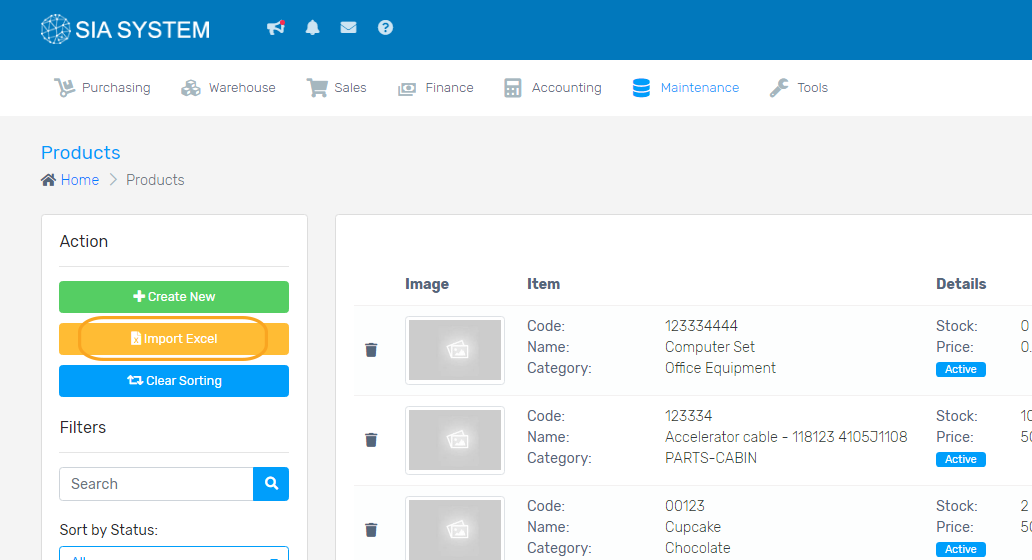
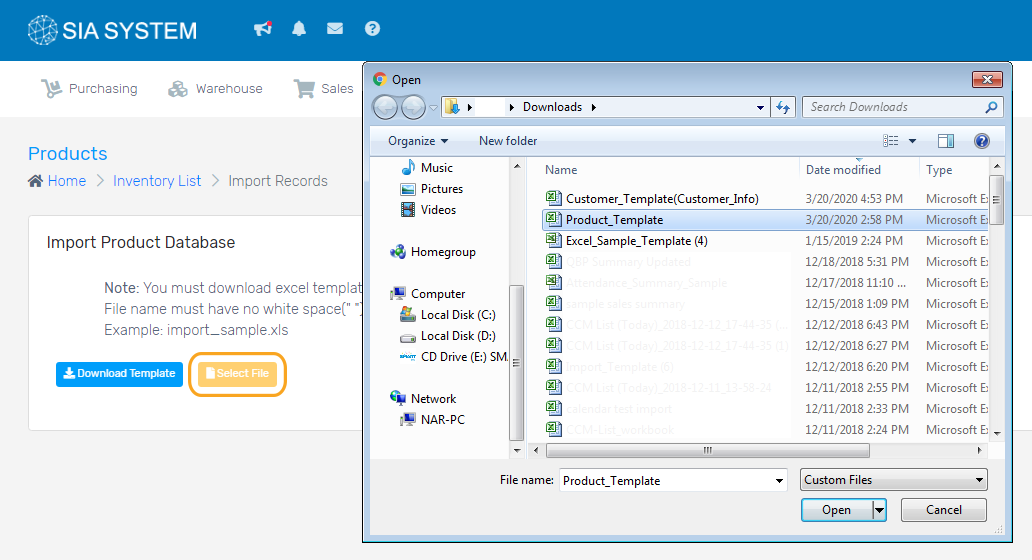
1. On the Action section (left side), click Import Excel button.
2. Click the Download Template button.
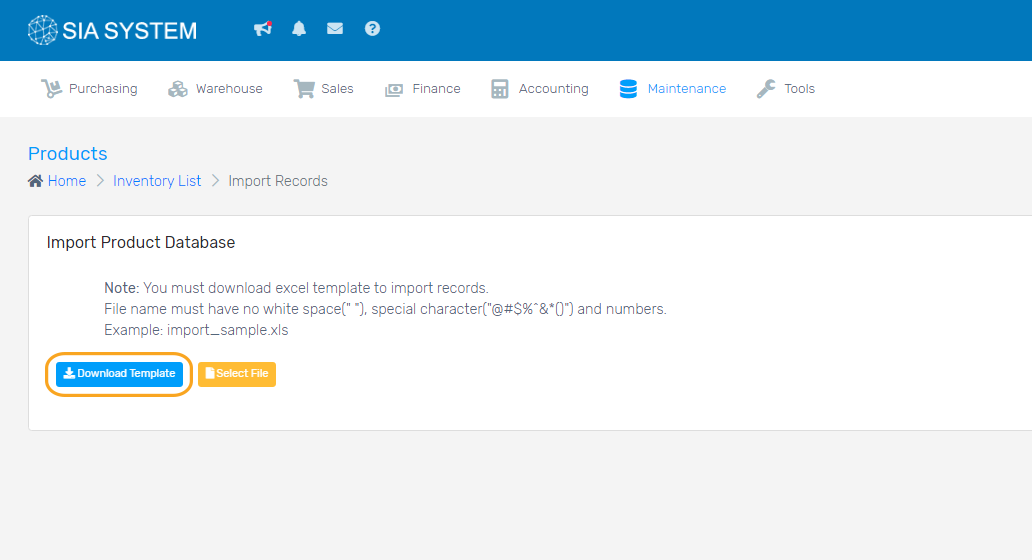
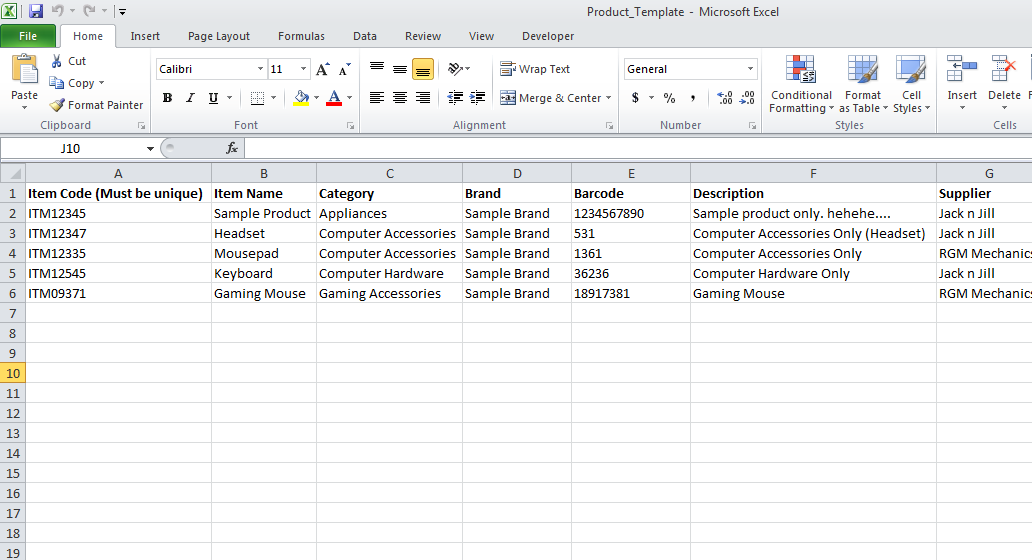
3. Open the Excel template, fill up the fields, and save on your computer.
4. Go back to the system, click Select File and select the Excel file you saved.
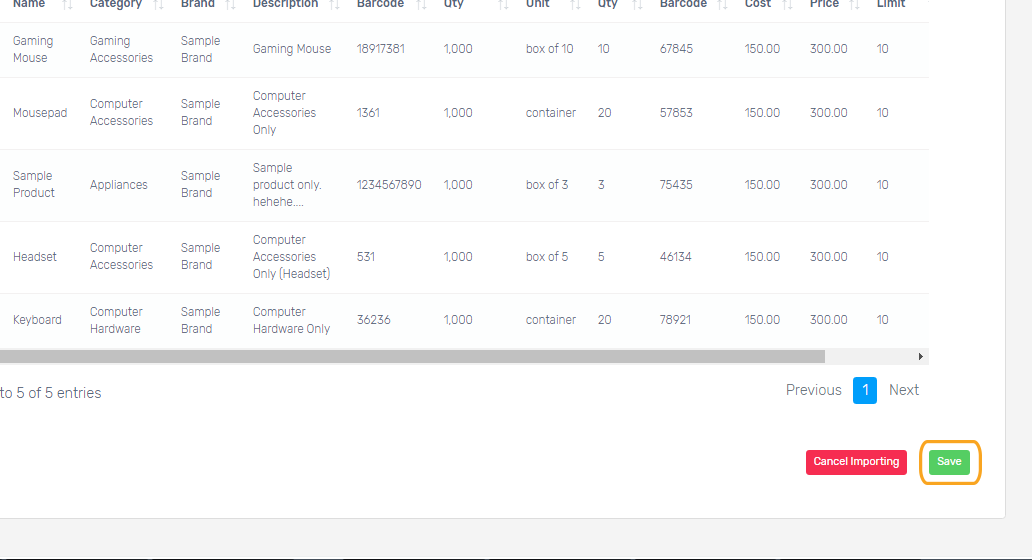
5. Wait for the file to upload.

6. Click Save once done.
Was this article helpful?
Have more questions ? Submit a request