How to pay your payables/bills

After creating a record of your payables or bills, it is now time for payment.

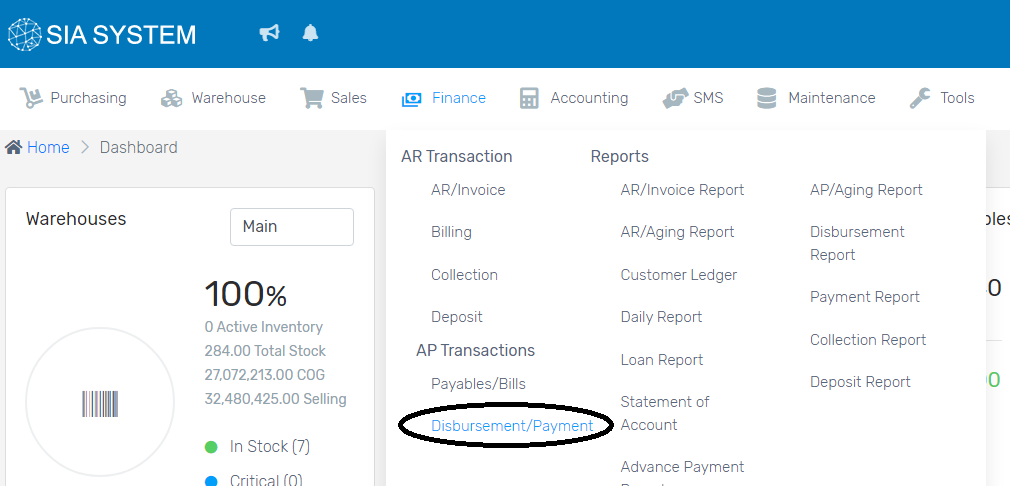
  1. On the Finance tab, select Disbursement/Payment.
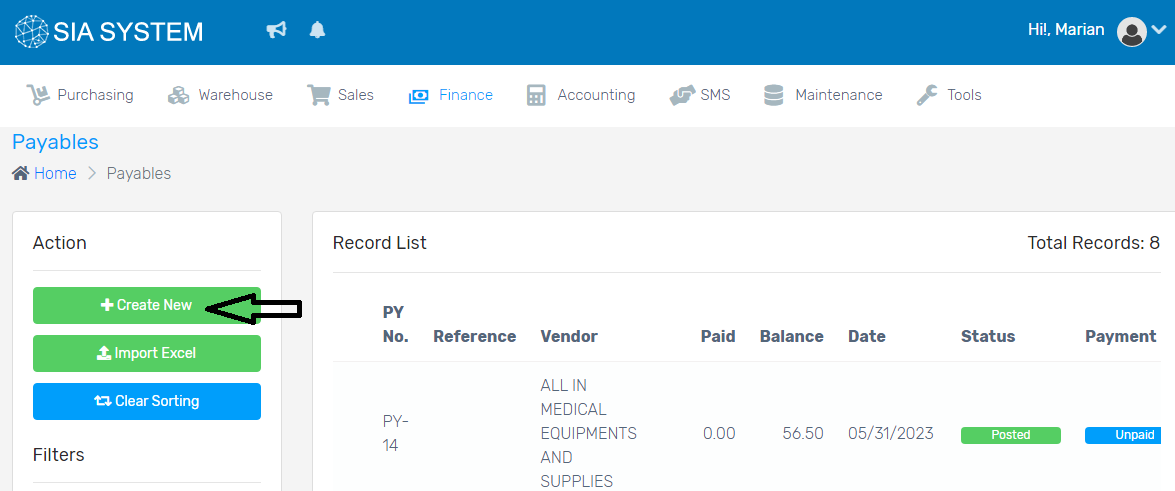
2. In the Create New button, add the payable you want to pay.
3. Input the Bank Account and Payee first. On the Bank Account, select where do you want to get the disbursement. Select the Type of payment; whether it’s regular or advanced. Next, select the Payee or the Supplier you want to pay. Remember to always click Save or the green button every after selecting. Fill out the other details, if necessary.
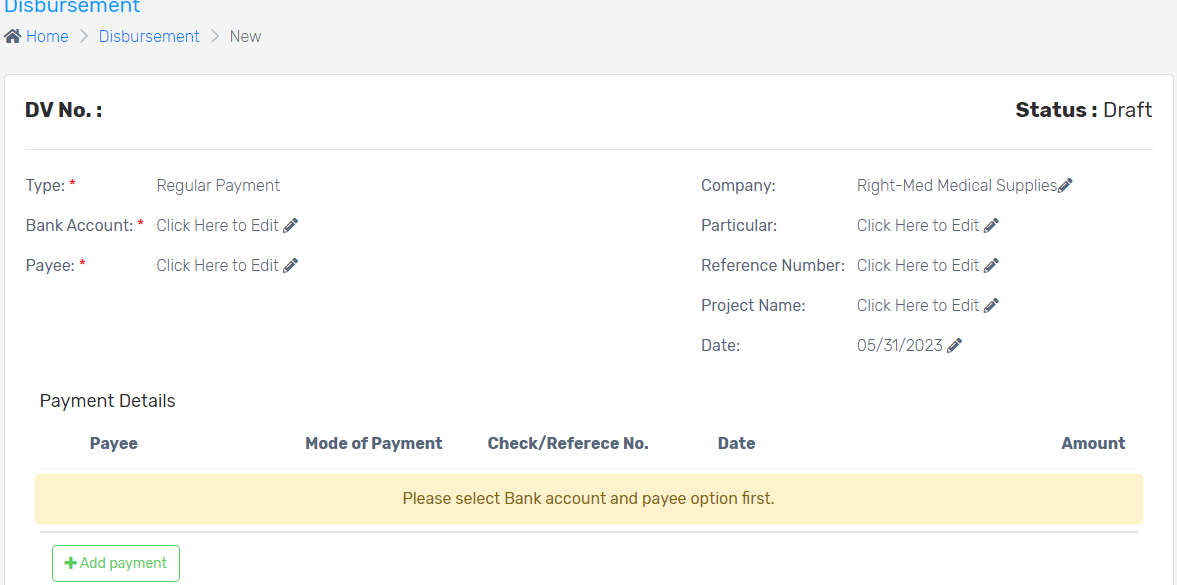
4. On the Payment Details, select the Mode of Payment. If through Check, input the check booklet or check number with the exact date.
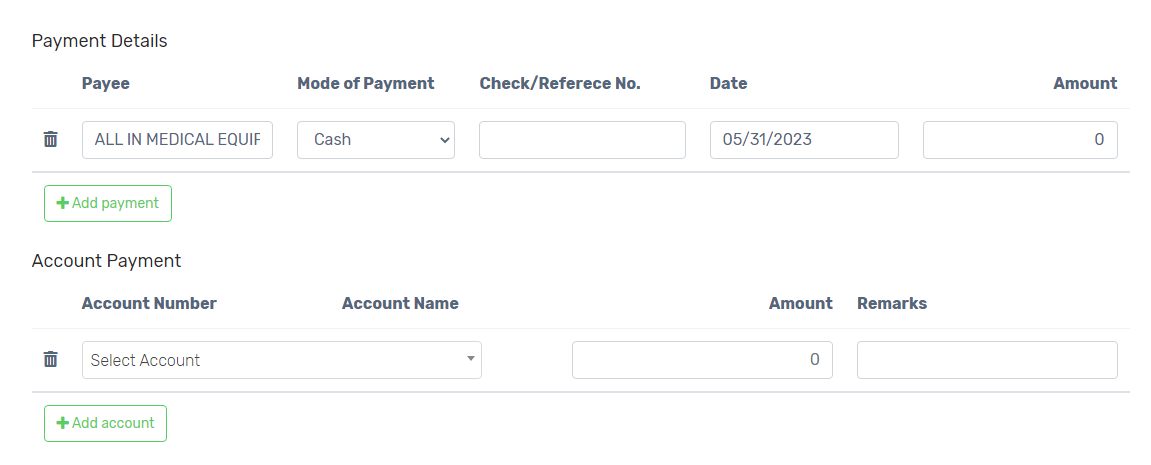
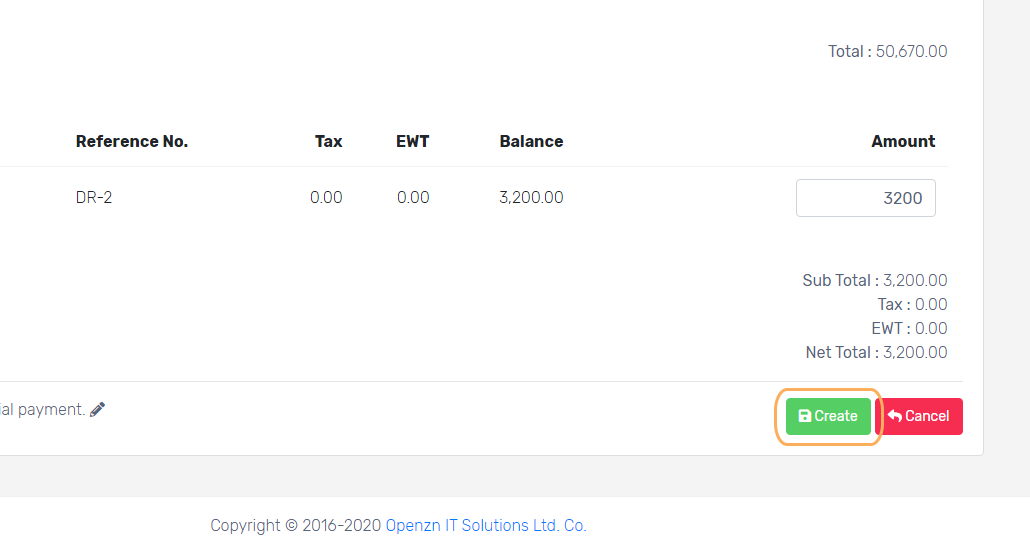
5. Type the Amount manually. Scroll down to check your total payable.
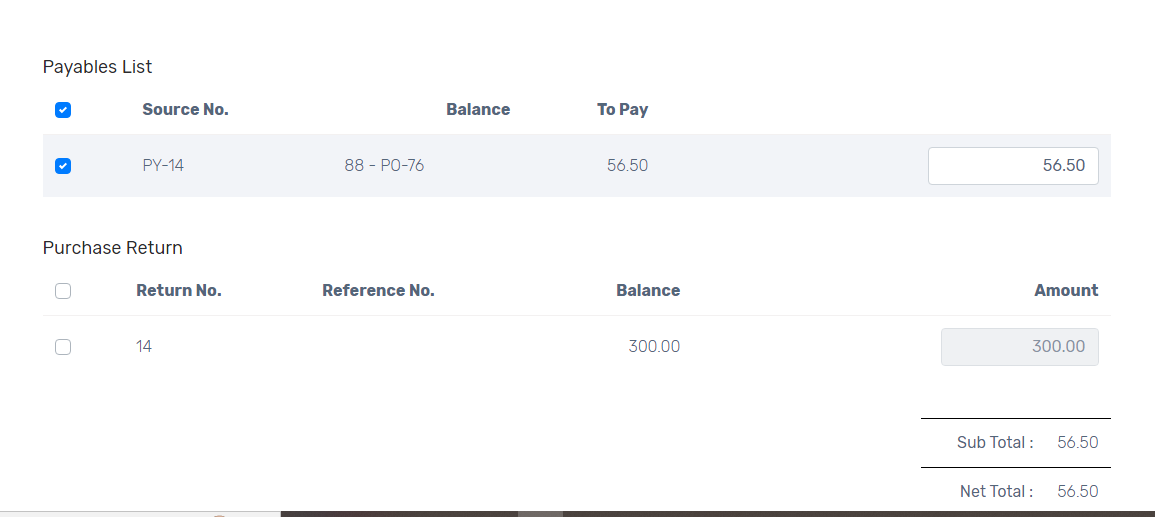
6. Once done, click Create. After reviewing your data, click Post then Proceed.
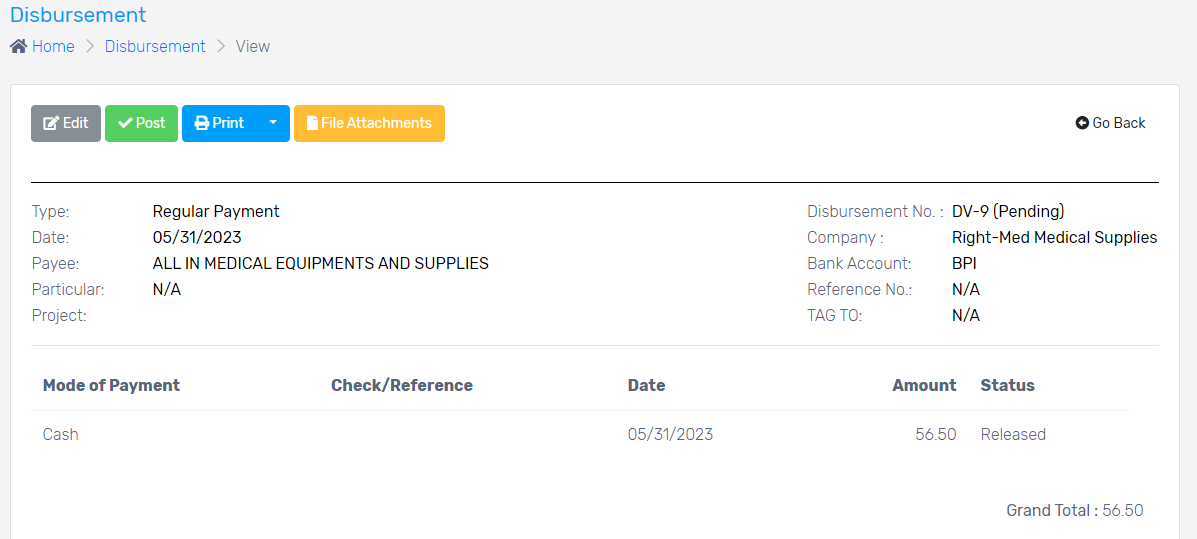
To check the status of your payment, click PAYABLES/BILLS. Make sure that it is marked PAID.
How to add a record in Collection

After orders and deliveries have been fulfilled for your customers, you can now save their payments for their orders.  

Note: An Invoice or DR must be created first as those are the references of your Collection. If you have not created an Invoice or DR yet, kindly follow these instructions on How to create an Invoice or How to create a Delivery Receipt.

Follow the steps below to add a record in Collection

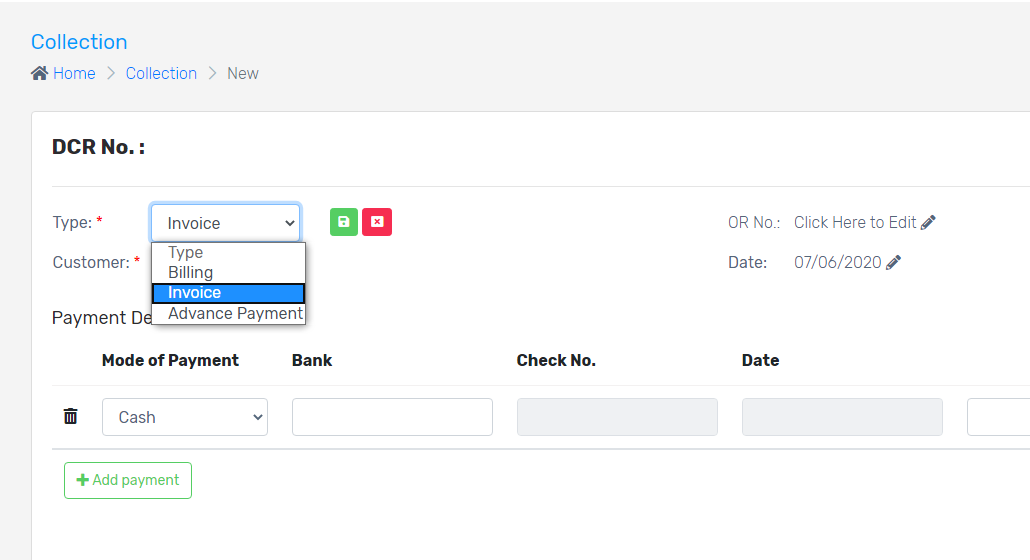
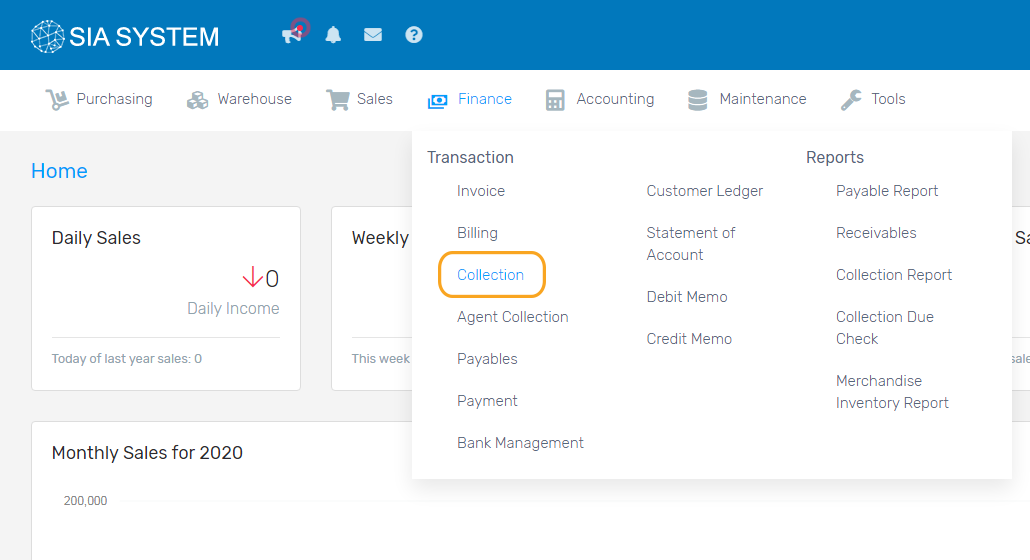
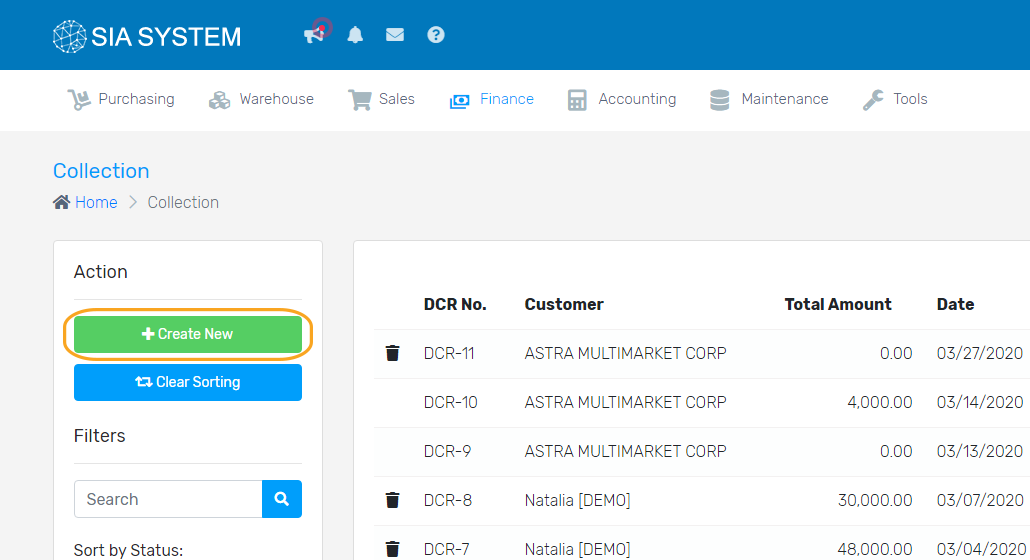
1. On the Finance menu, click Collection and click Create New button.

2. Select the Type by clicking the pencil. Select the information source from the dropdown. Click the green button to save.

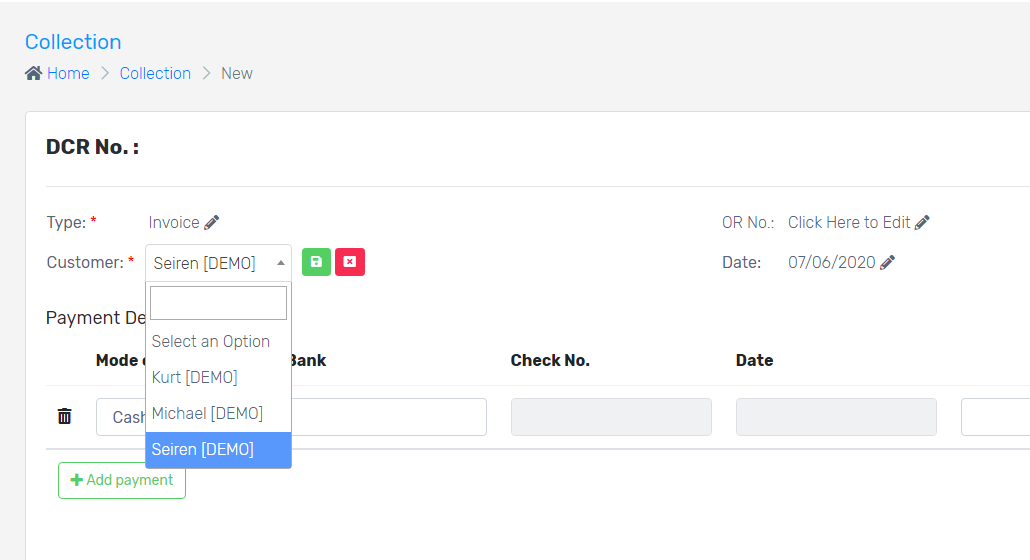
3. Select the customer name from the dropdown. Click the pencil to select the Customer, then the green button to save.

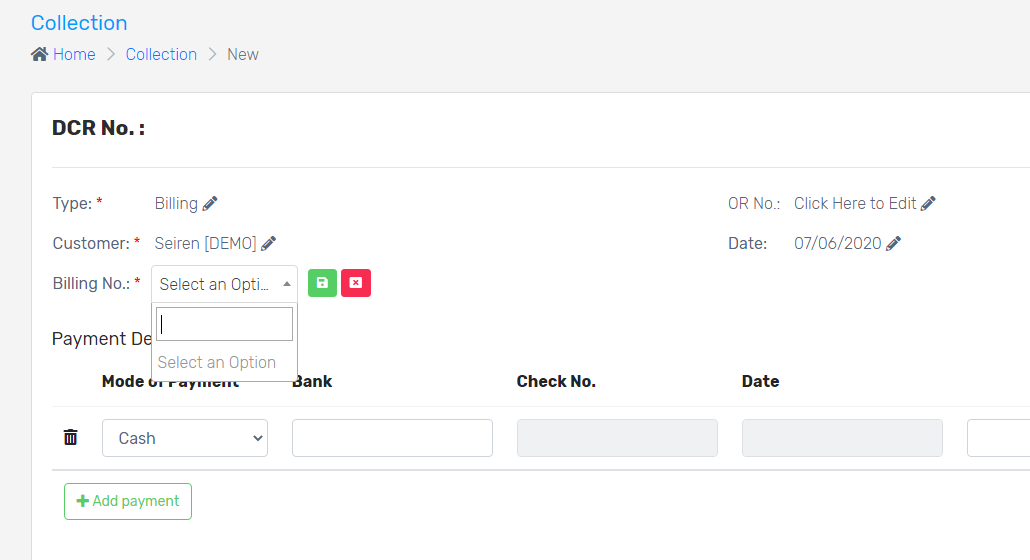
4. If Billing is chosen from the Type field, select the Billing number from the dropdown. Click the green button to save.

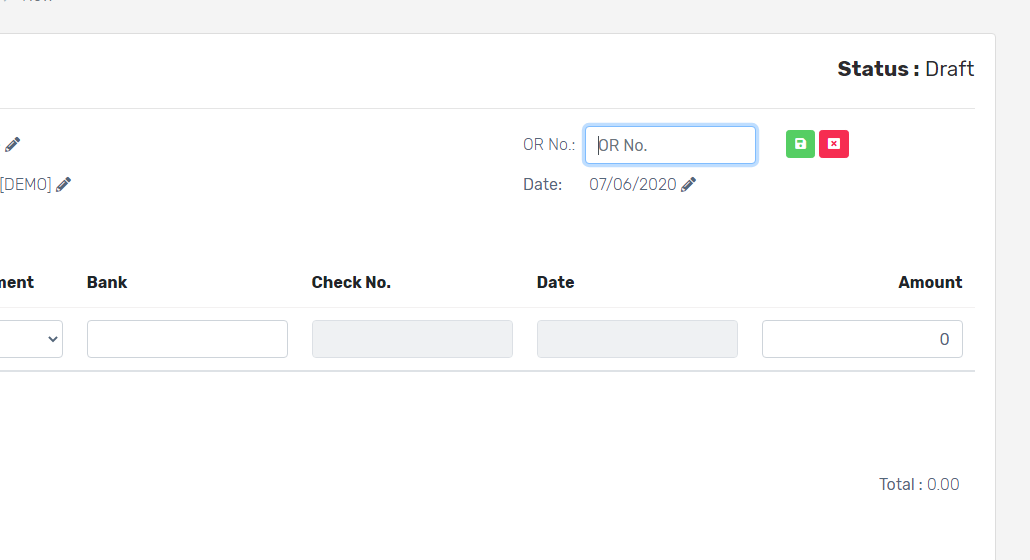
5. Input the OR number by clicking the pencil icon. Click the green button to save.

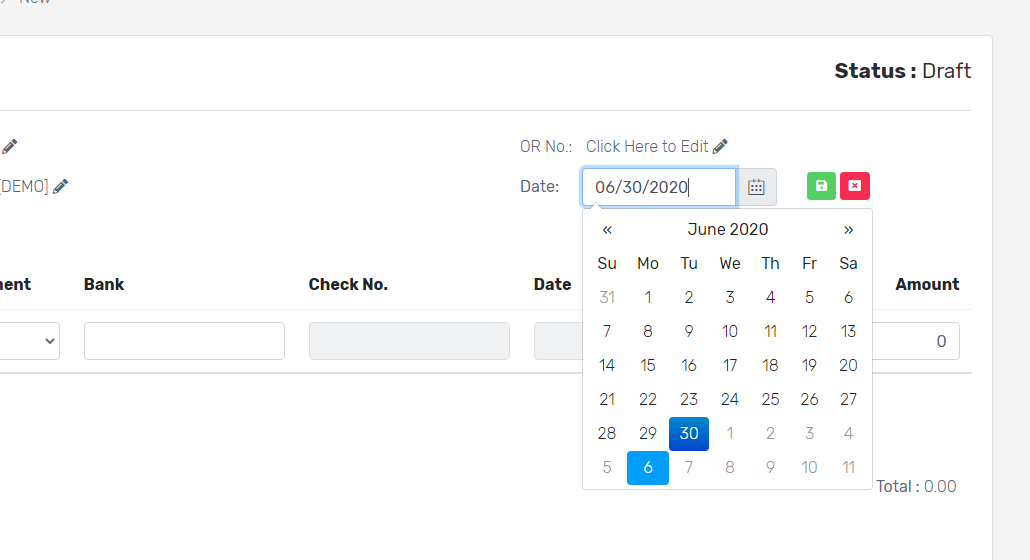
6. Input the Date by clicking the pencil icon. Click the green button to save.

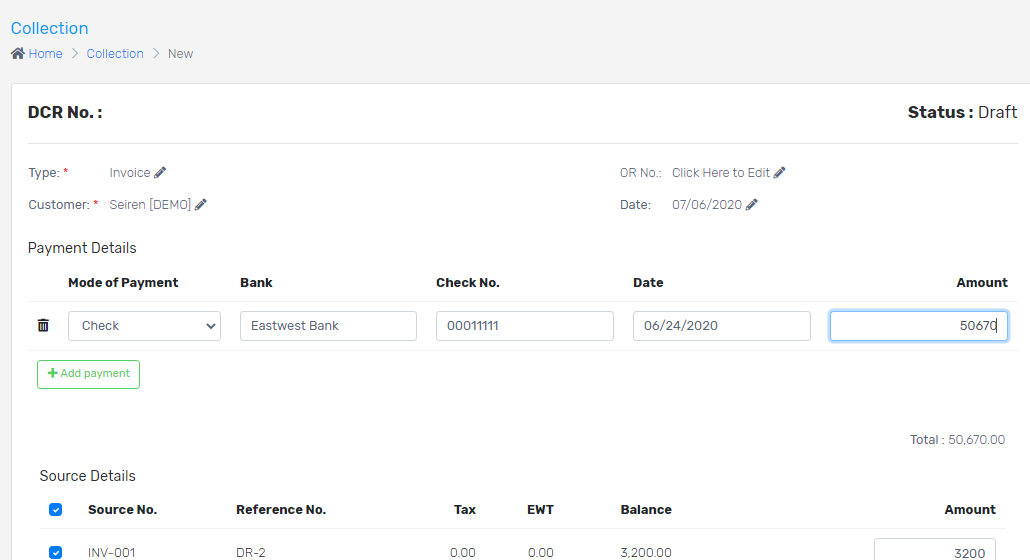
7. Select the Mode of Payment for the customer’s payment. Fill out all the important details of the payment. Add Remarks if necessary. Click Add payment button if there is more than one payment transaction.

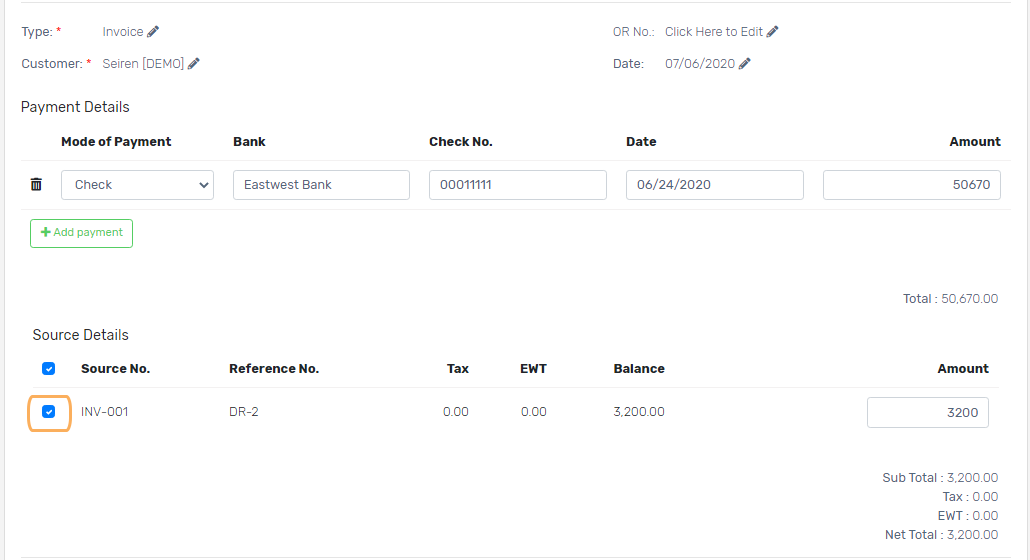
8. If Invoice is chosen from the Type field, select the Invoices made under Source Details. Input the Amount of invoice. You can check the Invoice Details below for your reference.

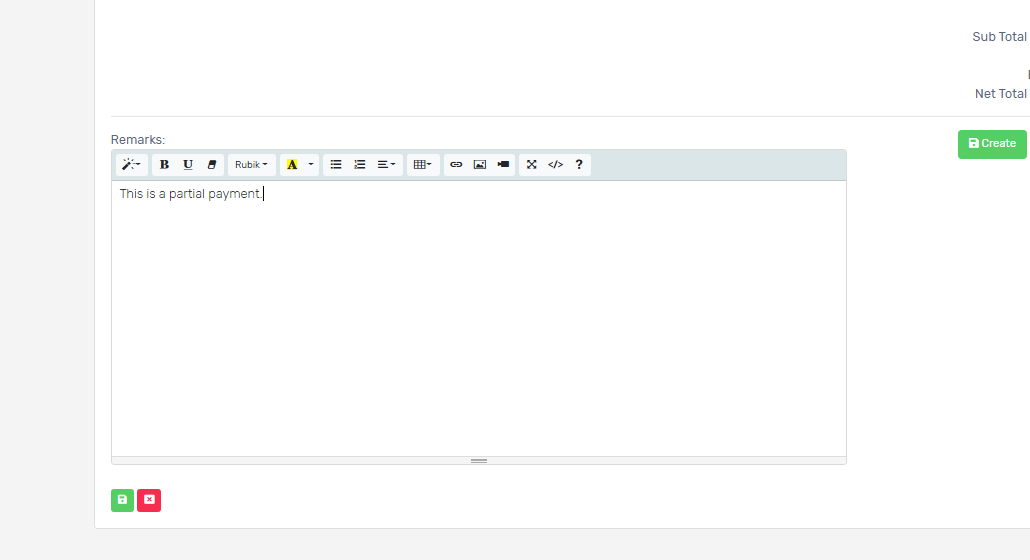
9. You can save Remarks by clicking the pencil at the bottom left corner of the page. Click the green button to save.

10. Double check and once done, click Create then Post and Proceed. The status will now change to COLLECTED.

You may now proceed with generating of Statement of Account to see all the transactions.


Was the article helpful ?

[yasr_visitor_votes null size=”–“]

Have more questions ? Submit a request