For better tracking, customer record(s) should be saved in the system with their complete details.
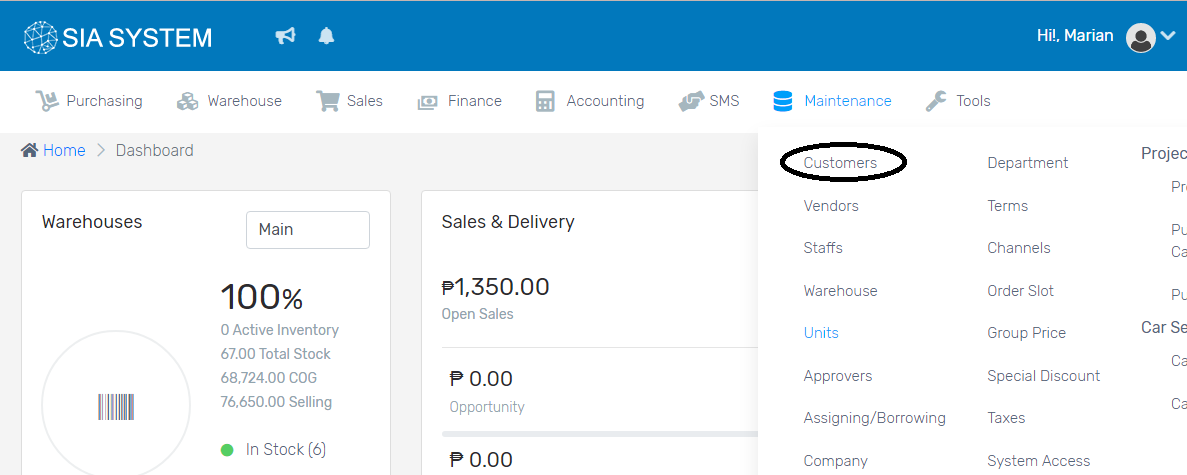
- On the menu, click Maintenance and select Customers.
A. Creating a customer record(s) one at a time
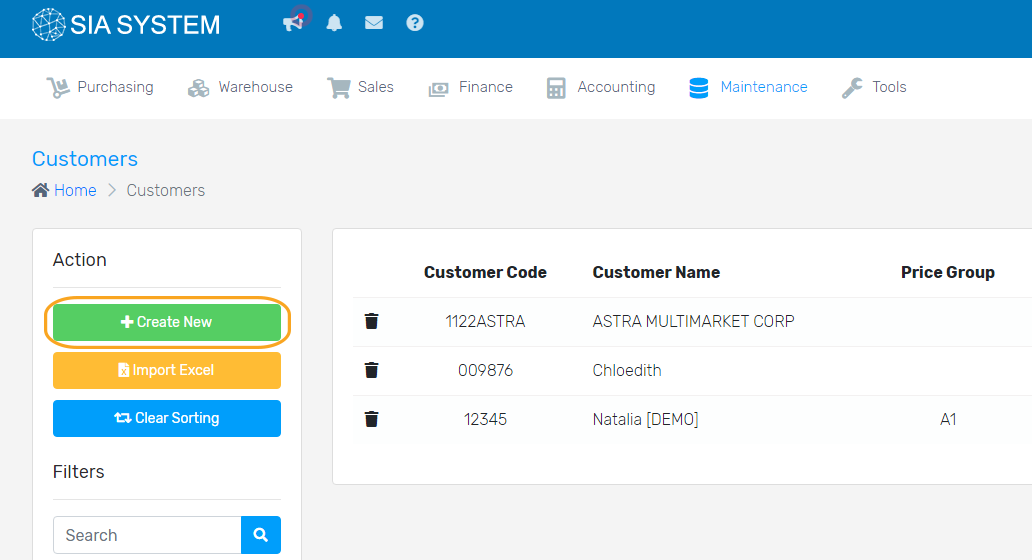
1. On the Action section (left side), click the Create New button.
2. Input each customer record with their information, especially those field marked with *.
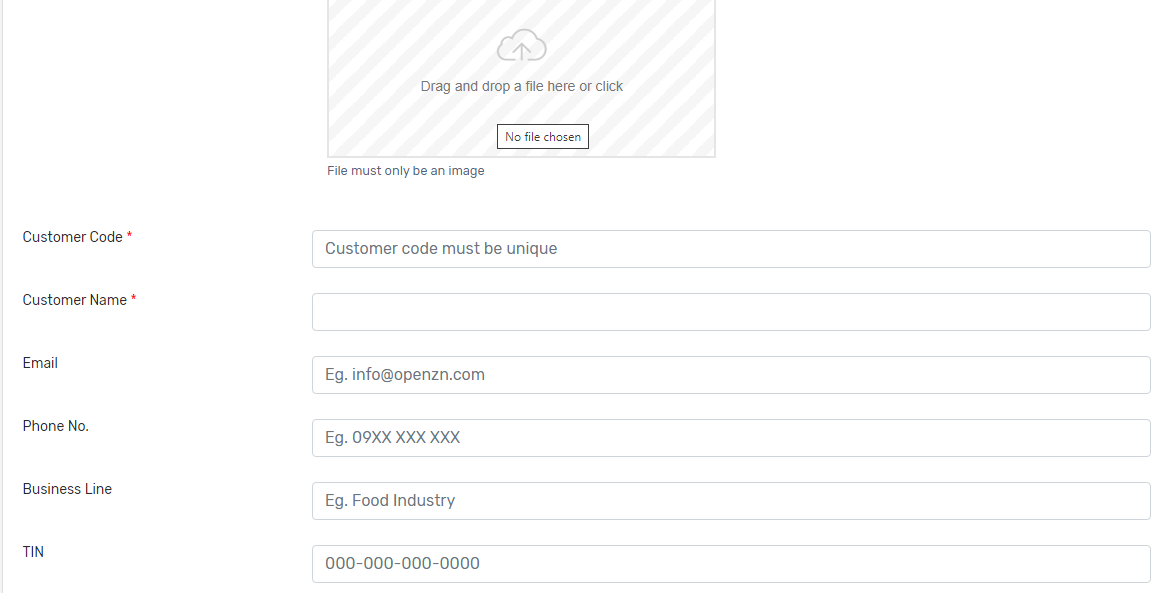
3. Input the Address Information.

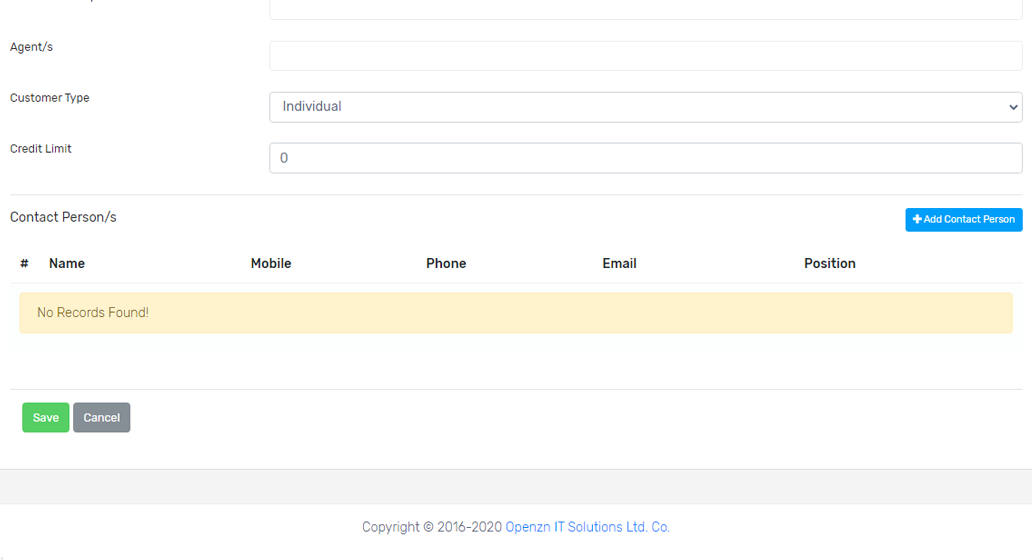
4. Input Other Information.

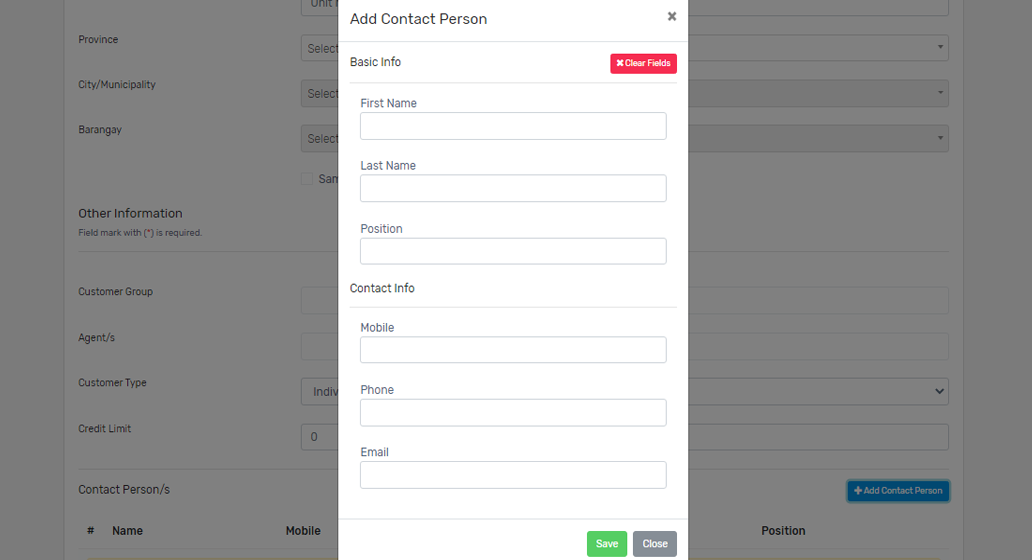
5. After filling out all the fields, don’t forget to add a contact person. Click Add Contact Person and input all the necessary details of that contact person.
6. Once done, click the Save button. Repeat the process for the other customers.
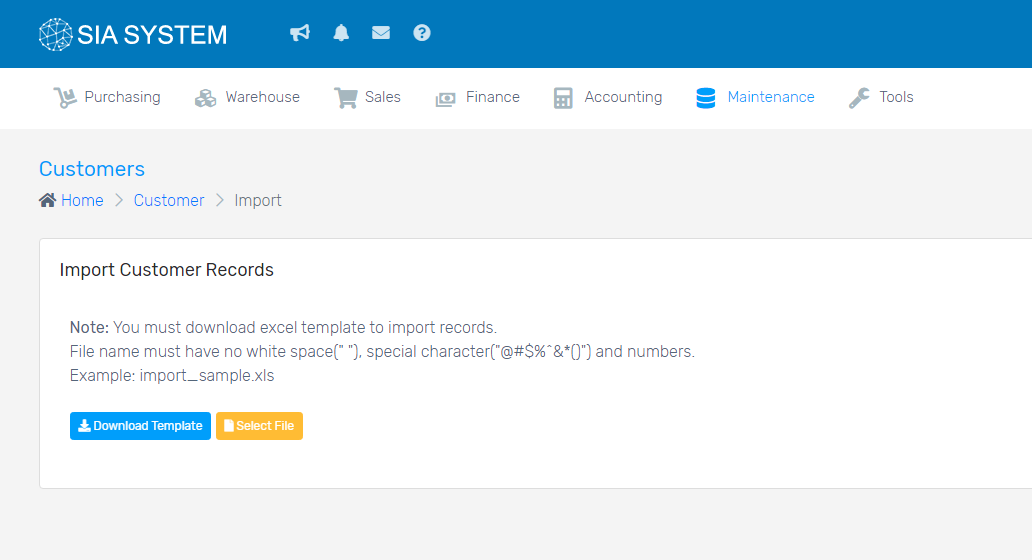
B. Creating customer record(s) by batch upload
If you have a number of customer records that needs to be set up, it’s better to use this way of importing.
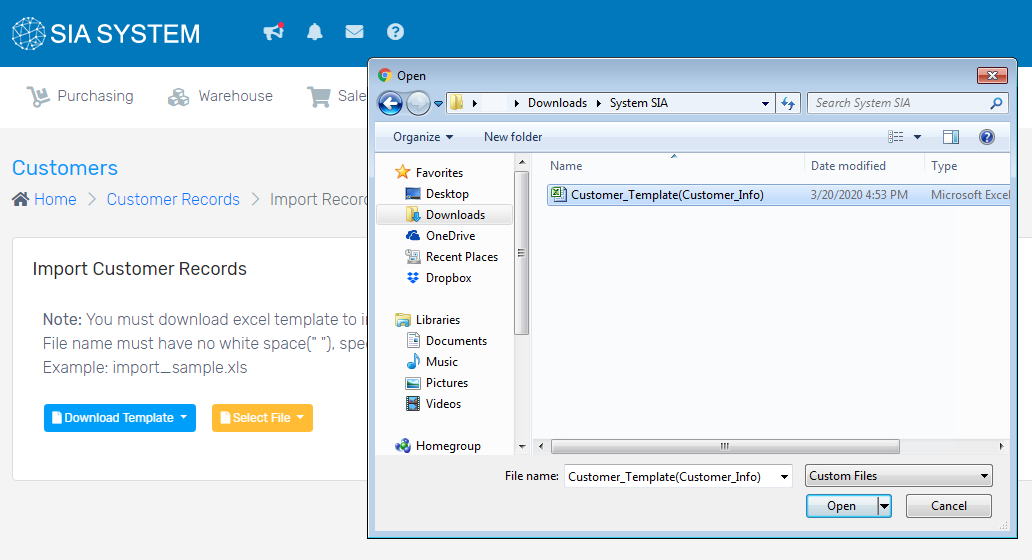
1. On the Action section (left side), click the Import Excel button.

2. Click the Download Template button. Make sure to follow the template to match with the system.
3. Open the Excel templates, fill up the fields, and save on your computer.
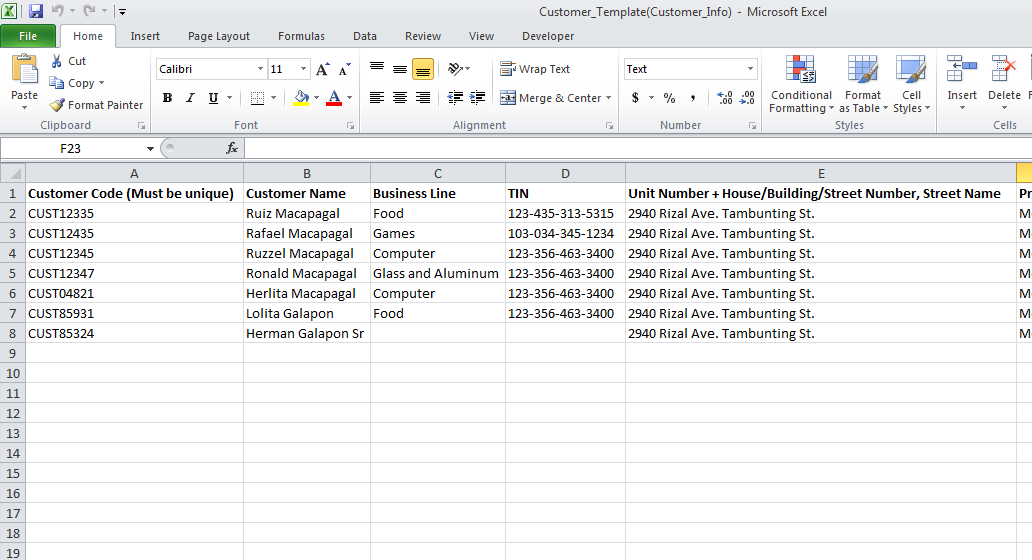
Note: Make sure that the Customer Codes match in the three templates for a specific Customer.
4. Go back to the system, click Select File and select the Excel file you saved.
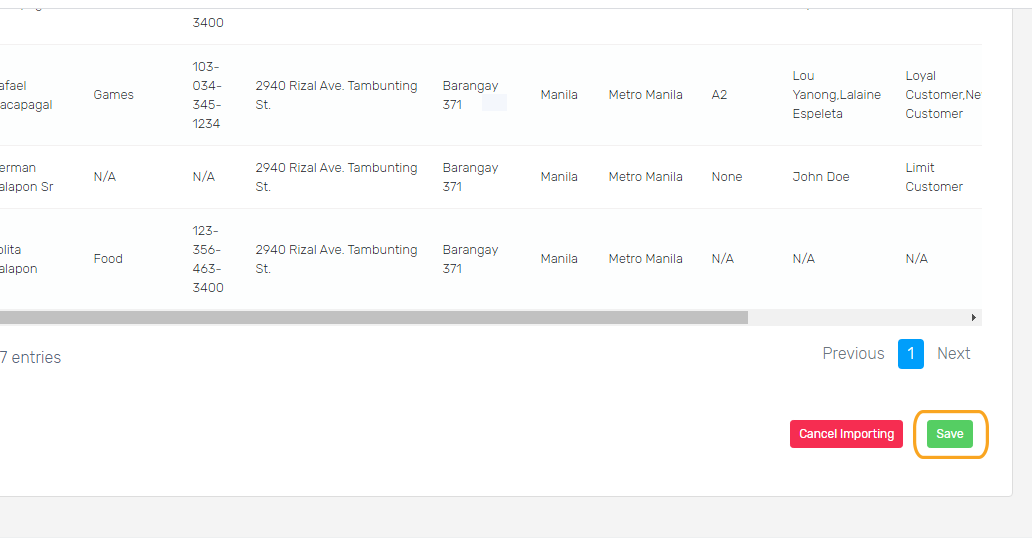
5. Wait for the file to upload.

6. Click Save once done.